Vue框架 03

Vue项目开发:
前后端完全分离
后端:提供接口数据
前端:页面转跳、页面布局、页面数据渲染全部由前端做
中间交互:请求
Vue项目需要自建服务器:node
node介绍:
1.用C++语言编写,用来运行JavaScript语言
2.node可以为前端项目提供server (包含了socket)
node下载安装:https://nodejs.org/zh-cn/
一路点击下一步就可以。
npm:包管理器 - 为node拓展功能的
# 换国内源,加速下载,通过命令行换源:
# 管理员命令行:npm install -g cnpm --registry=https://registry.npm.taobao.org
# MacOS: sudo npm install -g cnpm --registry=https://registry.npm.taobao.org
# 索引npm的指令都可以换成cnpm
# npm install vuex => cnpm install vuex
vue cli环境:脚手架 - 命令行快速创建项目
# cnpm install -g @vue/cli
# 如果报错:npm cache clean --force
创建Vue项目
起步
1.cd 到目标目录
2.创建项目:vue create 目录名
创建项目的过程
提示下载原:选择淘宝镜像
具体配置:上下键切换,空格键选择,回车键进入下一步
1.第二个选项进入自定义配置
2.Babel jsES6语法转换ES5,Router路由 Vuex组件数据交互 Formatter格式化代码
3...有提示选择大写,没提示默认第一个即可
选y
开始下载:
启动项目
两种启动方式:
①终端启动
1.进入项目:cd到项目目录
2.启动项目:npm run serve
②pycharm配置启动
1.安装vue.js插件,重启
2.配置项目的npm启动项
3.启动node搭建的socket
如果项目环境搭建失败,可以将搭建成功的项目中的相关文件及文件夹:
然后打开管理员打开cmd命令
cd e:\vue-proj进入项目文件目录下
cnpm install 对自己电脑的当前环境进行重新安装依赖,重构项目环境,这样就可以用了,使用pycharm打开该文件夹就行了
该方法可以用于快速创建和搭建项目环境使用,这样就不用每次vue create进行下一步下一步了
项目目录
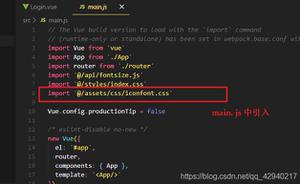
打开main.js
修改后按ctrl+s保存后页面会实时刷新,且文件后缀都可以省略不写
页面组件开发
组件创建:
创建新组件之后的基本页面情况:
<template><!-- 只能有一个根标签 -->
</template>
<script>
export default {
name: "Main",
data: function() {
return {
}
},
...
}
</script>
<style scoped>
/* scoped 可以让样式实现局部化*/
/* 如果让样式实现全局化,则应该写在根组件样式中*/
</style>
组件渲染
<!-- Main.vue 主页组件 --><template>
<div class="main">
<h1>{{ title }}</h1>
</div>
</template>
<script>
export default {
name: "Main",
data:function () {
return {
title:'主页'
}
}
}
</script>
<style scoped>
.main {
height: 100vh;
background-color: beige;
}
h1 {
margin: 0;
color: darkred;
}
</style>
<!-- App.vue根组件 --><template>
<div id="app">
<Main></Main>
</div>
</template>
<script>
import Main from '@/views/Main'
export default {
components:{
Main:Main
}
}
</script>
<style>
html, body {
margin: 0;
}
</style>
说明:
路由:router.js
在根组件中设计转跳页面的导航栏
<template><div id="app">
<ul class="nav">
<li>主页</li>
<li>商品页</li>
<li>个人页</li>
</ul>
</div>
</template>
<script>
import Main from '@/views/Main'
export default {
components:{
Main:Main
}
}
</script>
<style>
.nav {
height: 60px;
background-color: silver;
}
.nav li {
float: left;
height: 60px;
width: 123px;
text-align: center;
line-height: 60px;
}
.nav li:hover {
background-color: aquamarine;
}
html, body, ul {
margin: 0;
}
ul {
list-style: none;
}
</style>
创建三个页面组件
<!--Main.vue--><template>
<div class="main">
<h1>{{ title }}</h1>
</div>
</template>
<script>
export default {
name: "Main",
data:function () {
return {
title:'主页'
}
}
}
</script>
<style scoped>
.main {
height: 100vh;
background-color: beige;
}
h1 {
margin: 0;
color: darkred;
}
</style>
<!--Goods.vue--><template>
<div class="goods">
<h1>商品页</h1>
</div>
</template>
<script>
export default {
name: "Goods"
}
</script>
<style scoped>
</style>
<!--User.vue--><template>
<div class="user">
<h1>个人页</h1>
</div>
</template>
<script>
export default {
name: "User"
}
</script>
<style scoped>
</style>
配置路由(router.js中)
import Vue from 'vue'import Router from 'vue-router'
import Main from '@/views/Main.vue'
import Goods from '@/views/Goods.vue'
import User from '@/views/User.vue'
Vue.use(Router)
export default new Router({
mode: 'history',
base: process.env.BASE_URL,
routes: [
{
path: '/',
name: 'main',
component: Main
},
{
path: '/goods',
name: 'goods',
component: Goods
},
{
path: '/user',
name: 'user',
component: User
},
//第二种方式
// {
// path: '/about',
// name: 'about',
// // route level code-splitting
// // this generates a separate chunk (about.[hash].js) for this route
// // which is lazy-loaded when the route is visited.
// component: () => import(/* webpackChunkName: "about" */ './views/About.vue')
// }
]
})
根组件中:
<template><div id="app">
<ul class="nav">
<li>
<router-link to="/">主页</router-link>
</li>
<li>
<router-link to="/goods">商品页</router-link>
</li>
<li>
<router-link to="/user">个人页</router-link>
</li>
</ul>
<!--<router-view></router-view>-->
<router-view/>
</div>
</template>
<script>
import Main from '@/views/Main'
export default {
components:{
Main:Main
}
}
</script>
<style>
.nav {
height: 60px;
background-color: silver;
}
.nav li {
float: left;
height: 60px;
width: 123px;
text-align: center;
line-height: 60px;
}
.nav li:hover {
background-color: aquamarine;
}
html, body, ul, h1 {
margin: 0;
}
ul {
list-style: none;
}
a {
text-decoration: none;
font: bold 20px/60px 'STSong';
}
</style>
前后台交互
axios
// 安装 axios(ajax)的命令// npm install axios --save
// 为项目配置全局axios(main.js中)
import Axios from 'axios'
Vue.prototype.$ajax = Axios
goods组件中设置ajax给后台发送数据(在组件渲染完毕时候发送)
<!--Goods.vue--><template>
<div class="goods">
<h1>商品页</h1>
</div>
</template>
<script>
export default {
name: "Goods",
beforeCreate() {
window.console.log("开始创建Goods组件");
},
created() {
window.console.log("创建Goods组件完毕");
},
mounted() {
window.console.log("Goods组件渲染完毕");
// 请求后台
this.$ajax({
method:'post',
url:'http://127.0.0.1:8000/goods/',
params:{
info:'前台数据'
}
}).then(function (res) {
window.console.log(res)
})
}
}
</script>
<style scoped>
</style>
新建一个Django项目,作为后台接收、返回数据
settings.py中手动将csrf中间件注释掉(这里需要注意真正项目中前后端分离时,Django的csrf中间件时通过代码层面禁用并手写安全认证,这里注释掉主要方便我们测试)
路由配置:
from django.conf.urls import urlfrom django.contrib import admin
from app01 import views
urlpatterns = [
url(r'^admin/', admin.site.urls),
url(r'^goods/', views.goods),
]
视图函数
def goods(request):print(request.method)
print(request.POST)
print(request.GET)
return HttpResponse('后台数据')
发现跨域问题:后台能收到前台发送的请求数据,但是由于跨域问题,只要前台端给后端发送数据,后端都会接收,来者不拒,但是由于跨域问题,导致Django不认识它,所以
不给它返回数据。
## Django跨域问题#### 什么是跨域
```python
'''
通常情况下,A网页访问B服务器资源时,不满足以下三个条件其一就是跨域访问
1. 协议不同
2. 端口不同
3. 主机不同
'''
```
#### Django解决跨域
```python
'''
安装django-cors-headers模块
在settings.py中配置
# 注册app
INSTALLED_APPS = [
...
'corsheaders'
]
# 添加中间件
MIDDLEWARE = [
...
'corsheaders.middleware.CorsMiddleware'
]
# 允许跨域源
CORS_ORIGIN_ALLOW_ALL = True
'''
```
解决跨域:
①在pycharm中安装django-cors-headers
②在Django配置文件中:
然后前端进行处理数据:
这样渲染msg后发现报错:
发现msg没有被定义,但是在data中明明已经定义了msg,所以错误不在data中,最后发现在then的回调函数中的this
问题解析:
① 在this.ajax上先声明个变量_this=this将vue实例存起来,然后在then的回调函数中打印this和_this
从以上结果来看,在生命周期钩子函数下的this指向的是当前创建的vue实例,而在这些函数内部使用例如axios与后台交互后回调函数的内部的this并非指向当前的vue实例;
若想拿到后台回传的数据更新data里的数据,不能在回调函数中直接使用this,而要用在外部函数定义的变量存储的this,也就是当前vue的实例。
以上是一种解决方式,这里再补充另一种解决方法:使用es6语法箭头函数自动解决此类问题:
箭头函数相当于匿名函数,并且简化了函数定义。看上去是匿名函数的一种简写,但实际上,箭头函数和匿名函数有个明显的区别:箭头函数内部的this是词法作用域,由上下文确定。此时this在箭头函数中已经按照词法作用域绑定了。很明显,使用箭头函数之后,箭头函数指向的函数内部的this已经绑定了外部的vue实例了.
vue-cookie
// 安装cookie的命令// npm install vue-cookie --save
// 为项目配置全局vue-cookie(在main.js中)
import VueCookie from 'vue-cookie'
// 将插件设置给Vue原型,作为全局的属性,在任何地方都可以通过this.$cookie进行访问
Vue.prototype.$cookie = VueCookie
// 持久化存储val的值到cookie中this.$cookie.set('val', this.val)
// 获取cookie中val字段值
this.$cookie.get('val')
以上是 Vue框架 03 的全部内容, 来源链接: utcz.com/z/376556.html

