C++实现神经网络框架SimpleNN的详细过程
SimpleNN is a simple neural network framework written in C++.It can help to learn how neural networks work.
源码地址:https://github.com/Kindn/SimpleNN
Features
- Construct neural networks.
- Configure optimizer and loss layer for the network to train models and use models to do prediction.Save models.
- Network architecture will be saved as a
.netjson file,while weights will be saved as a.weightsbinary file. - Load models.Load network from an existing
.netfile and load weights from an existing.weights.Load dataset (including data and labels) from a.csvfile.It is neccesary to preprocess the dataset(mnist etc.) into SimpleNN stype 2D matrix and save it into a.csvfile.All data in SimpleNN will be organized into columns and conbined into a 2D matrix. - For example,mostly a batch of C C C channels H H Hx W W W images with batch size N N N will be flatten into columns by channel and organized into an ( H ∗ W ) (H*W) (H∗W)x ( C ∗ N ) (C*N) (C∗N) matrix.构建自定义网络。
- 为网络对象配置优化器和损失函数层来训练模型,并用模型作预测。
- 保存模型。网络结构用json格式描述,扩展名为
.net;权重存为二进制文件,扩展名为.weights。 - 加载模型。从已有的
.net文件中加载网络,从已有的.weights文件中加载权重。 - 从
.csv文件中加载数据集。在此之前需要对原始数据集(如mnist等)进行预处理组织为一个二维矩阵。 - 在SimpleNN中流动的所有数据都是组织成一列列的并组合成一个二维矩阵。
例如,大多数情况下一批batch size为 N N N 的 C C C 通道 H H Hx W W W 图像会按通道展开成列并组织为一个 ( H ∗ W ) (H*W) (H∗W)x ( C ∗ N ) (C*N) (C∗N)的矩阵。
Dependencies
The core of SimpleNN is completely written with C++11 STL.So to build SimpleNN it just need a C++ compiler surppoting C++11 stantard.
P.S.:Some examples in examplesfolder needs 3rd-party libraries like OpenCV3.So if you want to build them as well you may install the needed libraries first.
Platform
Any os with C++11 compiler.
To Do
- 丰富layers和nets。
- 实现AutoGradient,使之可基于计算图构造网络。
- 利用并行计算实现矩阵运算等过程的加速优化(多线程、GPU),目前所有矩阵运算都是用for循环硬堆的,毫无性能可言。。。
- 利用自己造的这个轮子复现更多的神经网络模型。
- 为什么用二维矩阵来存储数据呢主要是因为一开始只是写了一个二维矩阵运算模板类,然后就想直接用这个类实现神经网络。一般情况下这种数据处理方法应该是够用的,后面看如果有必要的话再实现一个四维的Tensor类。
本来自己想到用C++实现神经网络主要是想强化一下编码能力并入门深度学习,所以我会尽力亲自从头实现以上功能,欢迎各位大佬们批评指点!
Usage
1.Build
git clone
cd SimpleNN
mkdir build
cd build
cmake ..
make
2.Run examples(Linux)
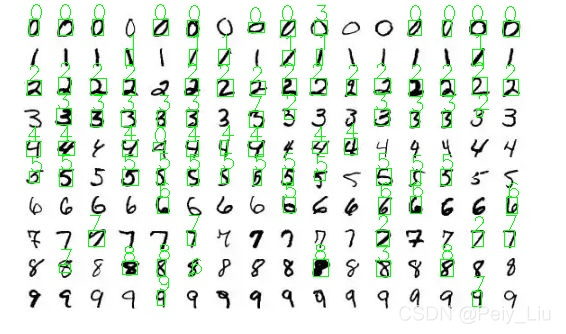
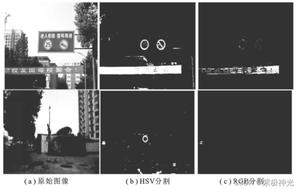
examples都在examples目录下,以例子recognition为例。本例是利用图像分割和LeNet进行数字识别。
若目标数字是黑底白字,则在终端输入(假设终端在SimpleNN根目录下打开)
examples/mnist/recognition <image_path>
效果:


若目标数字是黑底白字,则输入
examples/mnist/recognition <image_path> --reverse
在mnist目录下已有训练好的LeNet权重参数。若要运行examples/mnist/train,需要先在examples/mnist/dataset目录下运行generate_csv.py来生成数据集的csv文件(这个文件有400多M属于大文件试了好多种都push不上来QAQ)。
注:本例依赖OpenCV3,如果要运行须事先安装,不然不会编译本例。
3.Coding
Construct network
int input_img_rows1 = 28;
int input_img_cols1 = 28;
int input_img_channels1 = 1;
int conv_output_img_channels1 = 6;
int conv_filter_rows1 = 5;
int conv_filter_cols1 = 5;
int conv_row_pads1 = 0;
int conv_col_pads1 = 0;
int conv_row_strides1 = 1;
int conv_col_strides1 = 1;
std::shared_ptr<snn::Convolution> conv_layer1(new snn::Convolution(input_img_rows1, input_img_cols1,
input_img_channels1,
conv_output_img_channels1,
conv_filter_rows1, conv_filter_cols1,
conv_row_pads1, conv_col_pads1,
conv_row_strides1, conv_col_strides1,
0, 0.283,
0, 0.01));
int pool_input_img_rows1 = conv_layer1->output_img_rows;
int pool_input_img_cols1 = conv_layer1->output_img_cols;
int pool_filter_rows1 = 2;
int pool_filter_cols1 = 2;
int pool_pads1 = 0;
int pool_strides1 = 2;
std::shared_ptr<snn::MaxPooling> pool_layer1(new snn::MaxPooling(pool_input_img_rows1, pool_input_img_cols1,
pool_filter_rows1, pool_filter_cols1,
pool_pads1, pool_pads1,
pool_strides1, pool_strides1,
conv_output_img_channels1, false));
int input_img_rows2 = pool_layer1->output_img_rows;
int input_img_cols2 = pool_layer1->output_img_rows;
int input_img_channels2 = pool_layer1->image_channels;
int conv_output_img_channels2 = 16;
int conv_filter_rows2 = 5;
int conv_filter_cols2 = 5;
int conv_row_pads2 = 0;
int conv_col_pads2 = 0;
int conv_row_strides2 = 1;
int conv_col_strides2 = 1;
std::shared_ptr<snn::Convolution> conv_layer2(new snn::Convolution(input_img_rows2, input_img_cols2,
input_img_channels2,
conv_output_img_channels2,
conv_filter_rows2, conv_filter_cols2,
conv_row_pads2, conv_col_pads2,
conv_row_strides2, conv_col_strides2,
0, 0.115,
0, 0.01));
int pool_input_img_rows2 = conv_layer2->output_img_rows;
int pool_input_img_cols2 = conv_layer2->output_img_cols;
int pool_filter_rows2 = 2;
int pool_filter_cols2 = 2;
int pool_pads2 = 0;
int pool_strides2 = 2;
std::shared_ptr<snn::MaxPooling> pool_layer2(new snn::MaxPooling(pool_input_img_rows2, pool_input_img_cols2,
pool_filter_rows2, pool_filter_cols2,
pool_pads2, pool_pads2,
pool_strides2, pool_strides2,
conv_output_img_channels2, true));
int aff1_input_rows = pool_layer2->output_rows * conv_output_img_channels2; // because flatten-flag is true
int aff1_input_cols = 1;
int aff1_output_rows = 120;
int aff1_output_cols = 1;
std::shared_ptr<snn::Affine> aff1_layer(new snn::Affine(aff1_input_rows, aff1_input_cols,
aff1_output_rows, aff1_output_cols, 0, 2.0 / double(aff1_input_rows),
0, 0.01));
int aff2_input_rows = 120;
int aff2_input_cols = 1;
int aff2_output_rows = 84;
int aff2_output_cols = 1;
std::shared_ptr<snn::Affine> aff2_layer(new snn::Affine(aff2_input_rows, aff2_input_cols,
aff2_output_rows, aff2_output_cols, 0, 2.0 / 120.0, 0, 0.01));
int aff3_input_rows = 84;
int aff3_input_cols = 1;
int aff3_output_rows = 10;
int aff3_output_cols = 1;
std::shared_ptr<snn::Affine> aff3_layer(new snn::Affine(aff3_input_rows, aff3_input_cols,
aff3_output_rows, aff3_output_cols, 0, 2.0 / 84.0, 0, 0.01));
std::shared_ptr<snn::Relu> relu_layer1(new snn::Relu);
std::shared_ptr<snn::Relu> relu_layer2(new snn::Relu);
std::shared_ptr<snn::Relu> relu_layer3(new snn::Relu);
std::shared_ptr<snn::Relu> relu_layer4(new snn::Relu);
//std::shared_ptr<Softmax> softmax_layer(new Softmax);
snn::Sequential net;
net << conv_layer1 << relu_layer1 << pool_layer1
<< conv_layer2 << relu_layer2 << pool_layer2
<< aff1_layer << relu_layer3
<< aff2_layer << relu_layer4
<<aff3_layer;
也可以直接封装成一个类,参考models目录下各hpp文件:
#include <../include/SimpleNN.hpp>
namespace snn
{
// Simplified LeNet-5 model
class LeNet : public Sequential
{
public:
LeNet():Sequential()
{
/* ... */
*this << conv_layer1 << relu_layer1 << pool_layer1
<< conv_layer2 << relu_layer2 << pool_layer2
<< aff1_layer << relu_layer3
<< aff2_layer << relu_layer4
<<aff3_layer;
}
};
}
Train model
配置优化器和loss层:
std::shared_ptr<SoftmaxWithLoss> loss_layer(new SoftmaxWithLoss(true));
net.set_loss_layer(loss_layer);
std::cout << "Loss layer ready!" << std::endl;
std::vector<Matrix_d> init_params = net.get_params();
std::vector<Matrix_d> init_grads = net.get_grads();
std::shared_ptr<AdaGrad> opt(new AdaGrad(init_params, init_grads, 0.012));
net.set_optimizer(opt);
加载数据
Dataset train_set(true);
Dataset test_set(true);
if (train_set.load_data(train_data_file_path, train_label_file_path))
std::cout << "Train set loading finished!" << std::endl;
else
std::cout << "Failed to load train set data!" << std::endl;
if (test_set.load_data(test_data_file_path, test_label_file_path))
std::cout << "Test set loading finished!" << std::endl;
else
std::cout << "Failed to load test set data!" << std::endl;
训练并保存模型
net.fit(train_set, test_set, 256, 2);
if (!net.save_net("../../../examples/mnist/LeNet.net"))
{
std::cout << "Failed to save net!" << std::endl;
return 0;
}
if (!net.save_weights("../../../examples/mnist/LeNet.weights"))
{
std::cout << "Failed to save weights!" << std::endl;
return 0;
}
Load model
if (!net.load_net(net_path))
{
std::cerr << "Failed to load net!" << std::endl;
return -1;
}
if (!net.load_weights(weight_path))
{
std::cerr << "Failed to load weights!" << std::endl;
return -1;
}
或者直接
if (!net.load_model(net_path, weight_path))
{
std::cerr << "Failed to load model!" << std::endl;
return -1;
}
如果网络结构和权重分开加载,则先加载结构再加载权重。
Predict
y = net.predict(x);
到此这篇关于用C++实现的简易神经网络框架:SimpleNN的文章就介绍到这了,更多相关C++实现神经网络框架SimpleNN内容请搜索以前的文章或继续浏览下面的相关文章希望大家以后多多支持!
以上是 C++实现神经网络框架SimpleNN的详细过程 的全部内容, 来源链接: utcz.com/p/246915.html


