微信小程序实现天气预报功能(附源码)
前言
最近在学小程序开发,刚好学到天气预报功能的制作,于是给大家分享下。
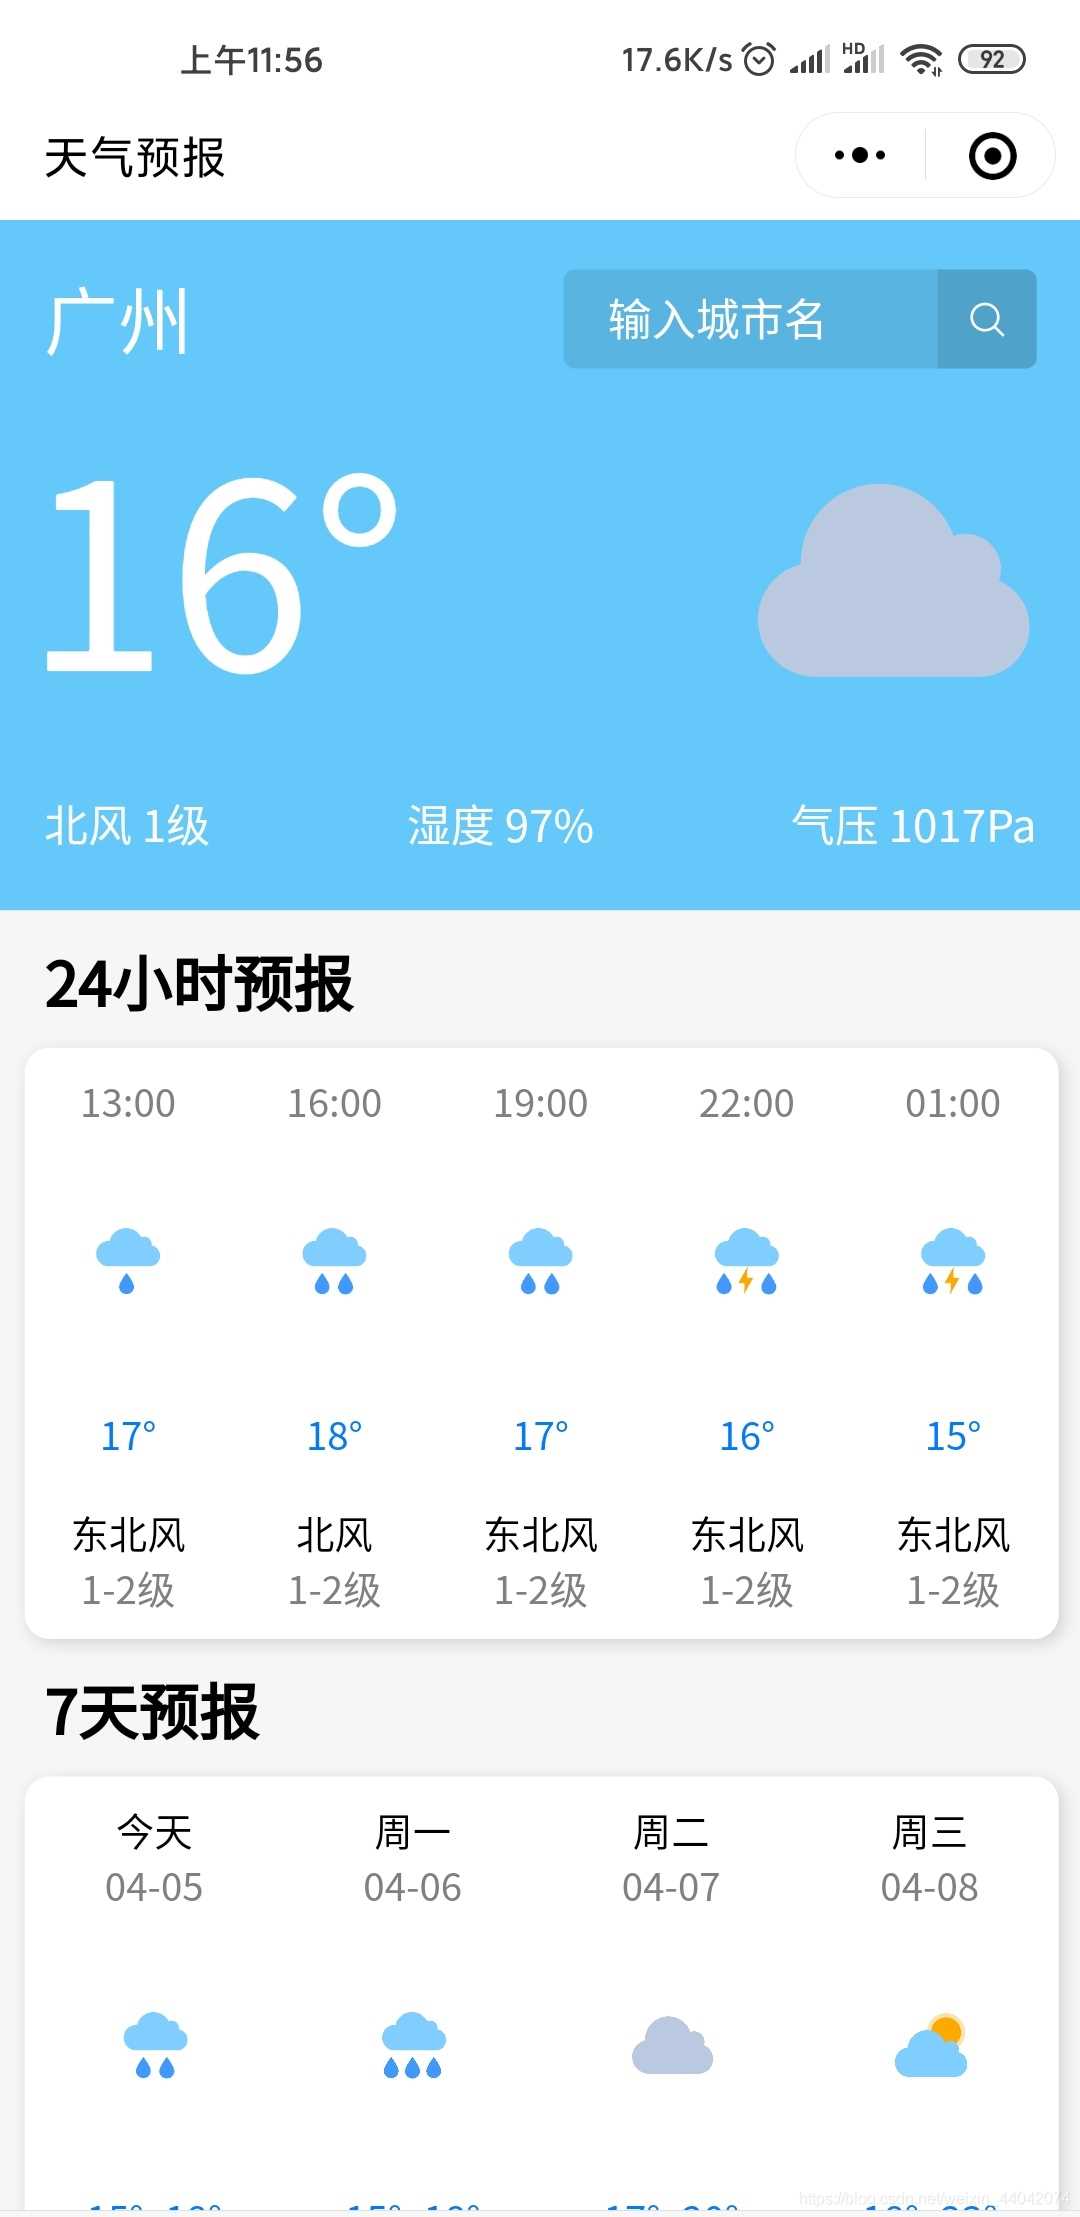
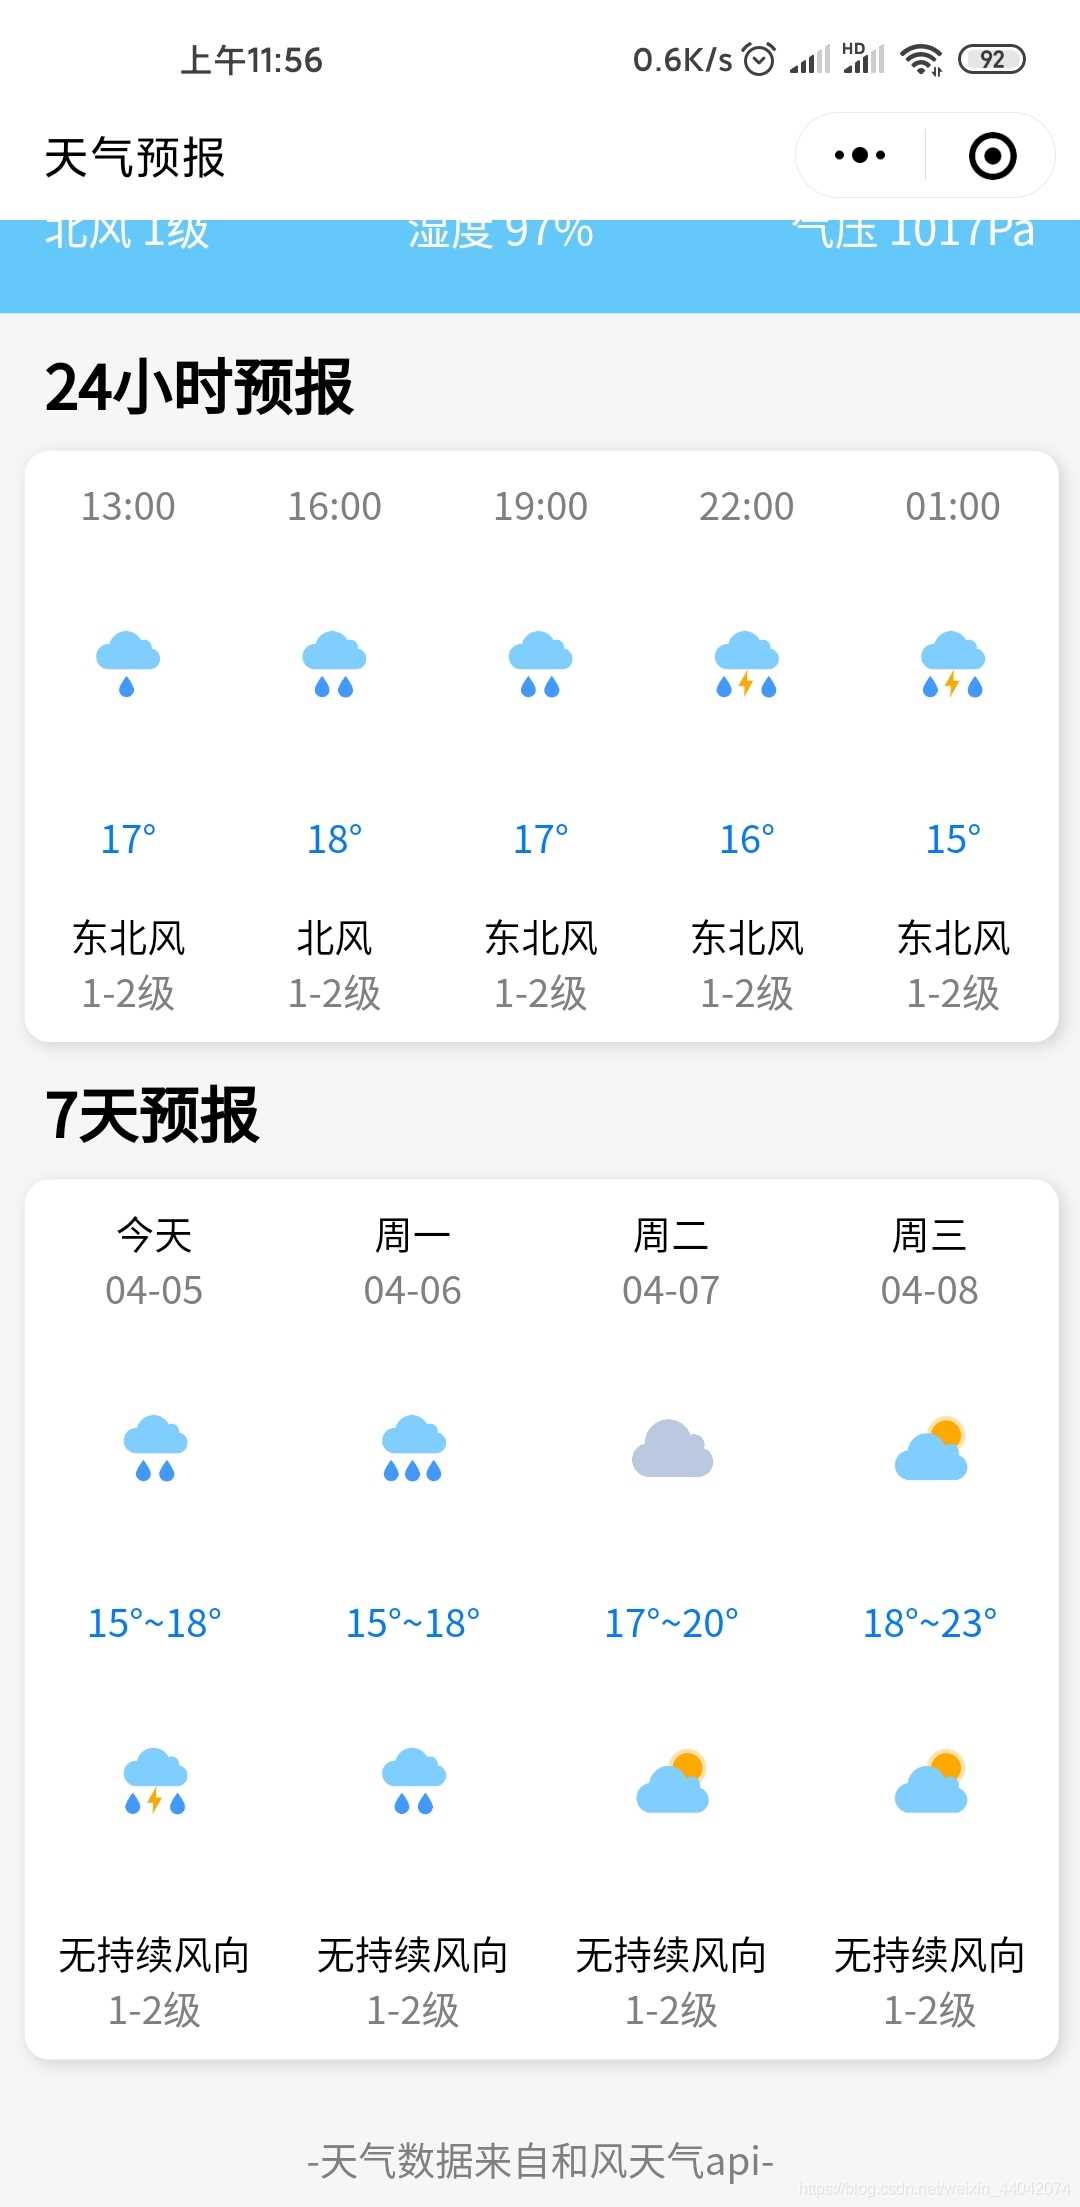
效果图
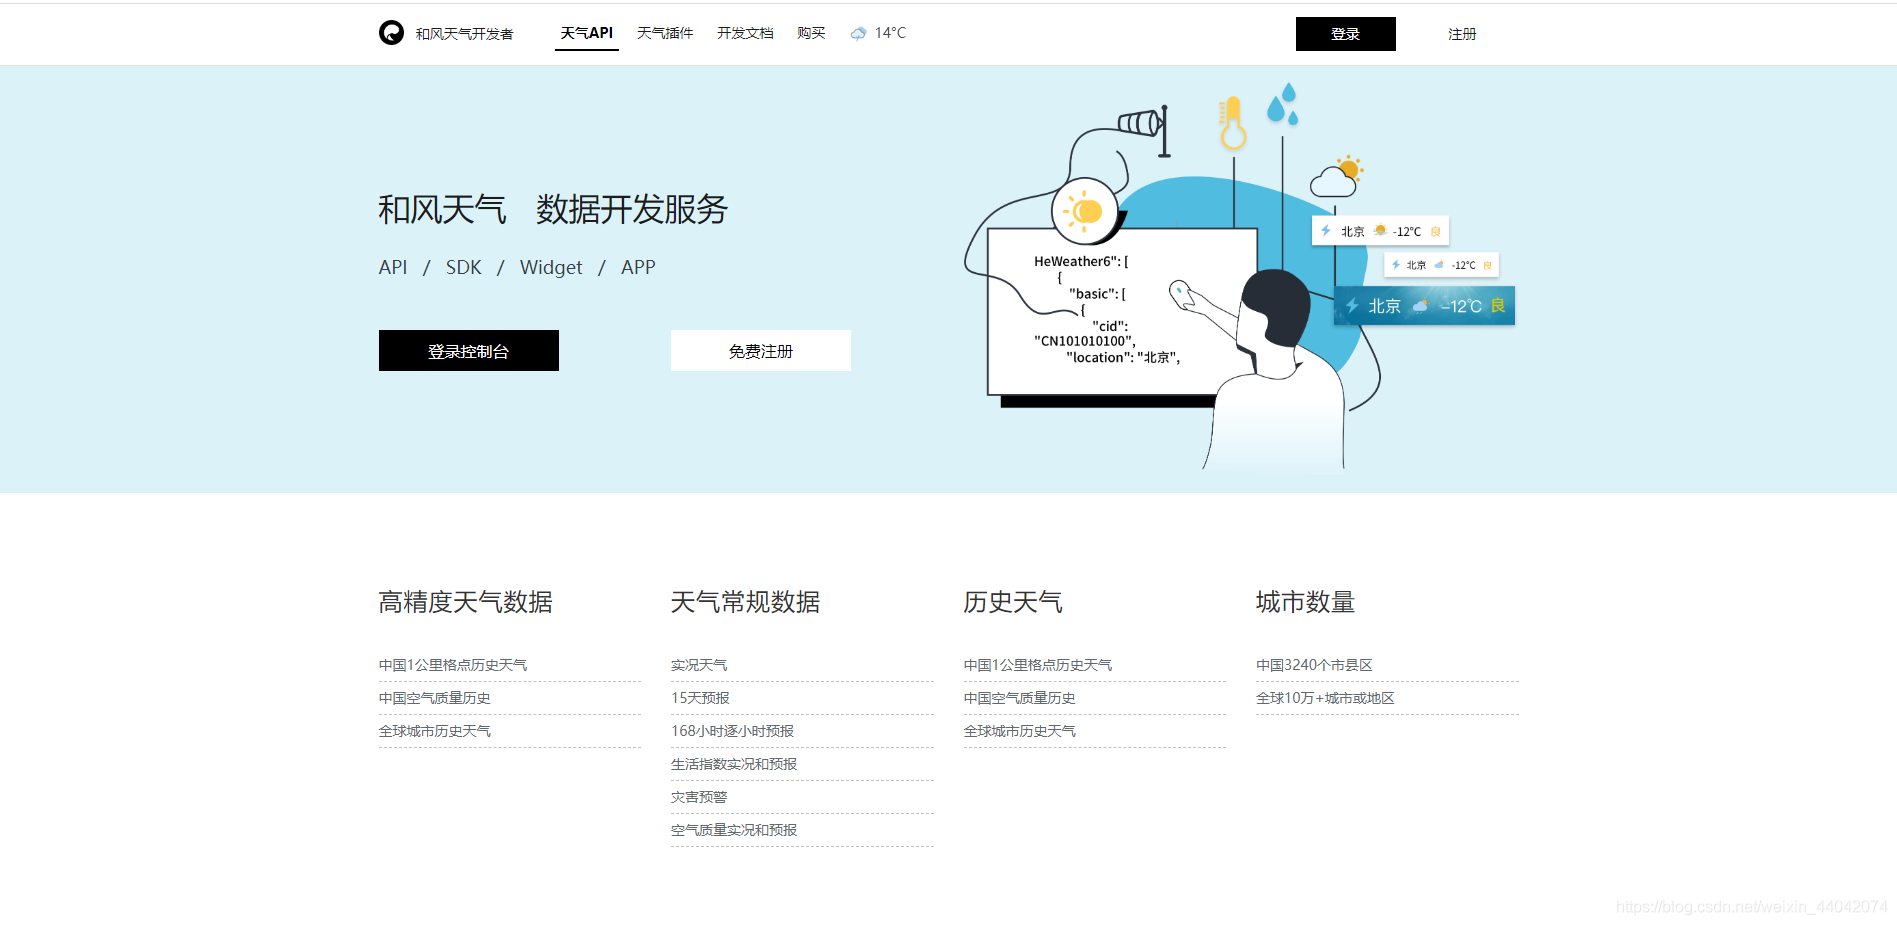
天气API获取
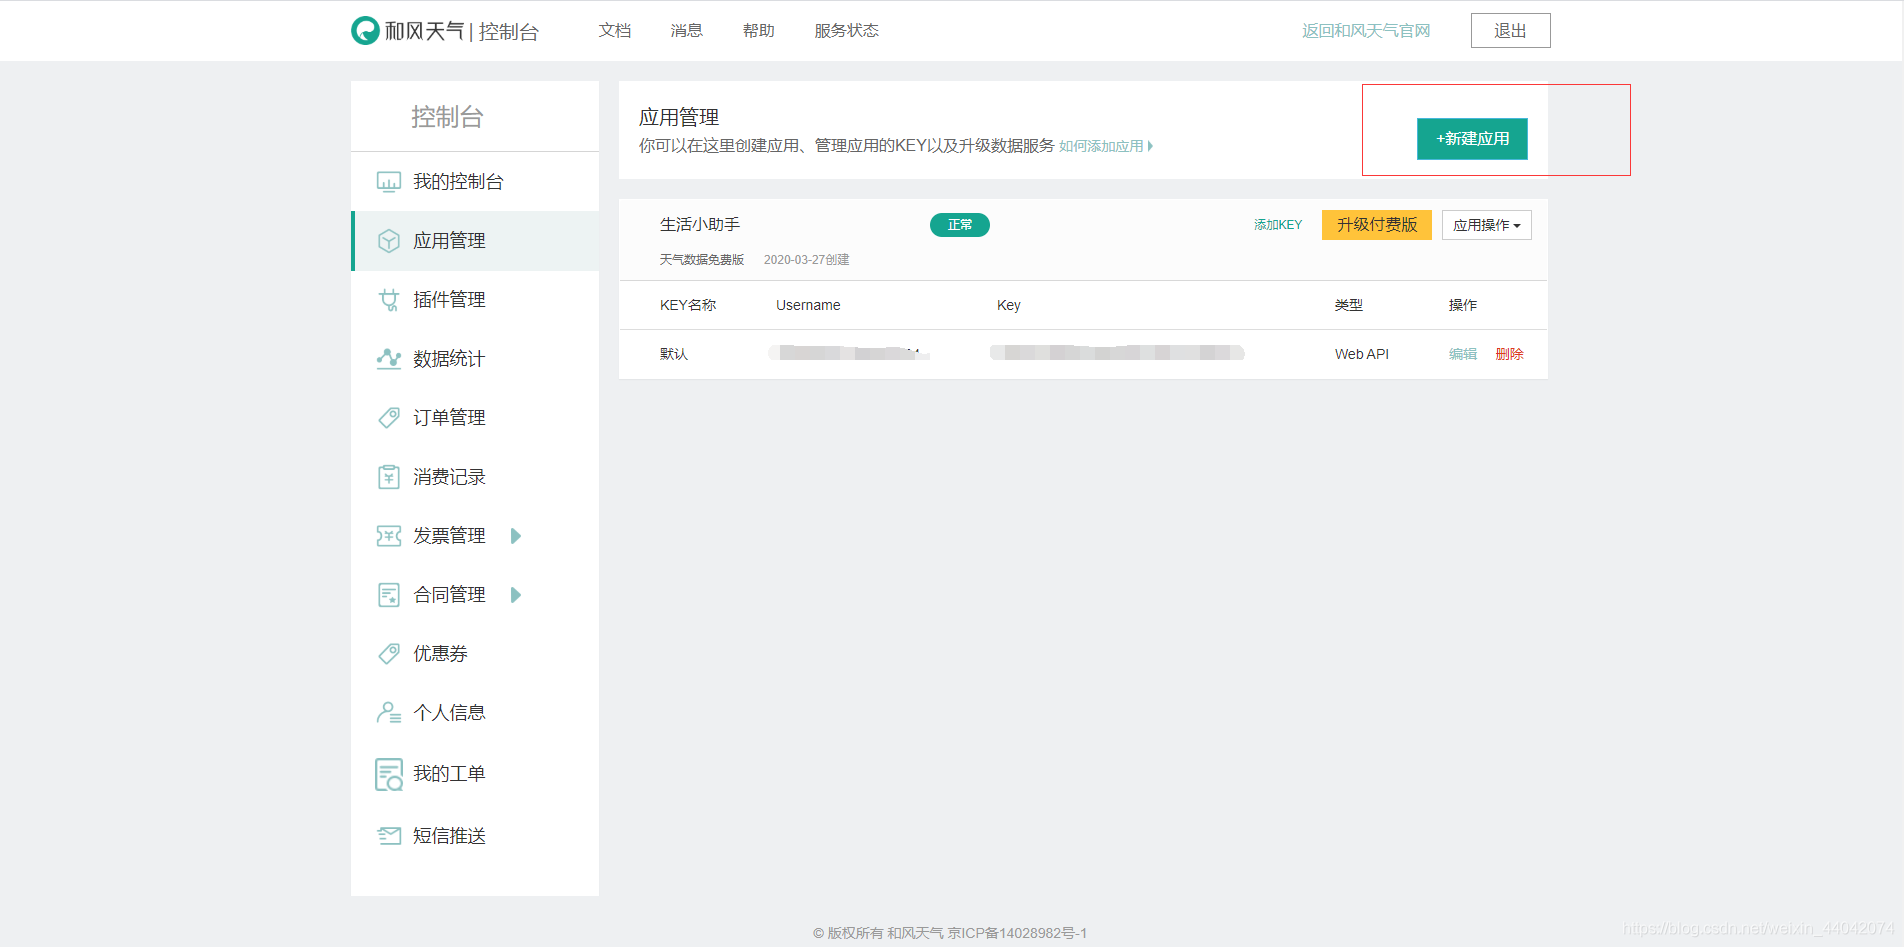
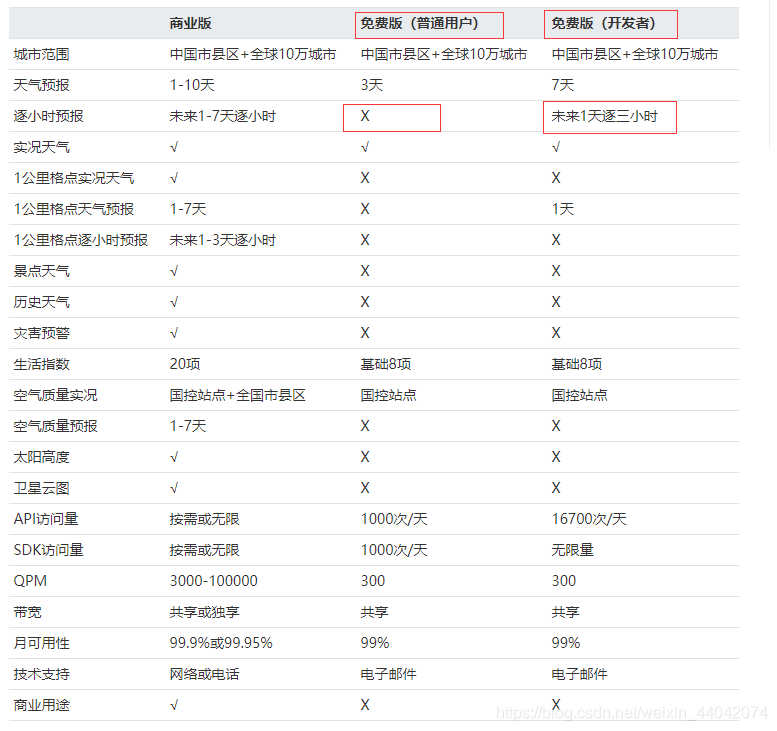
这里我用的是和风天气的API,打开官网注册或者登陆你的账号
进入控制台,新建应用
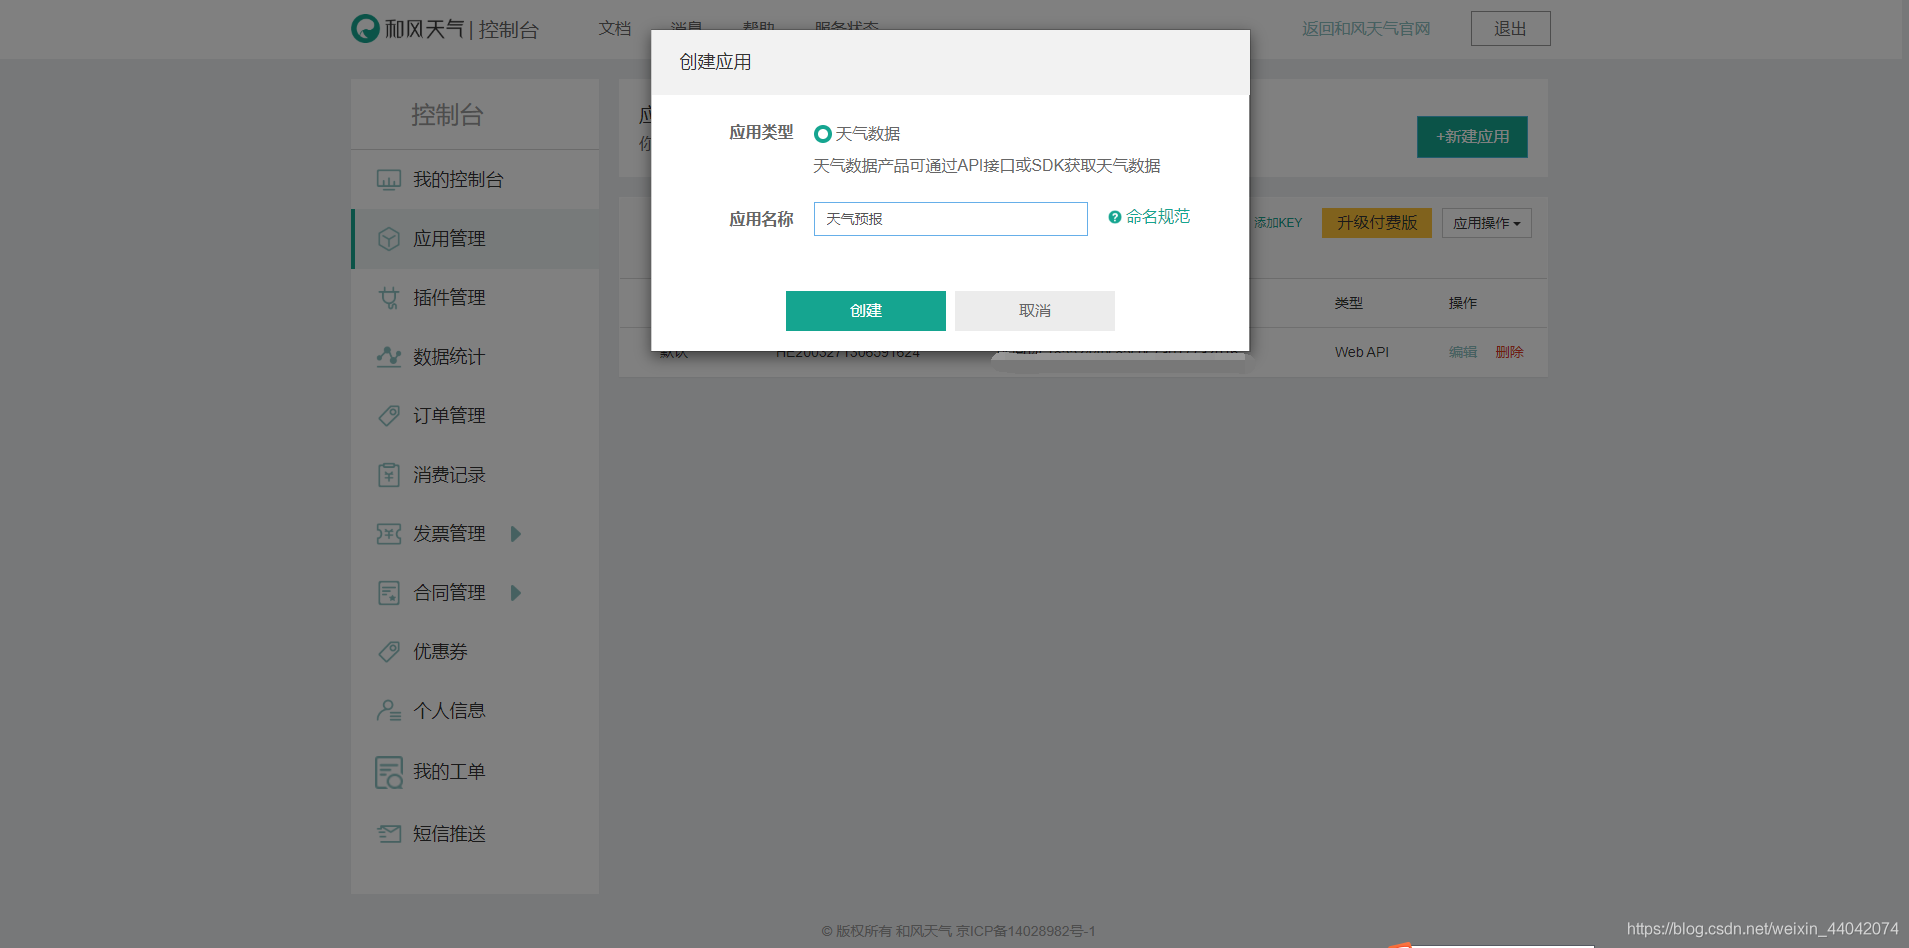
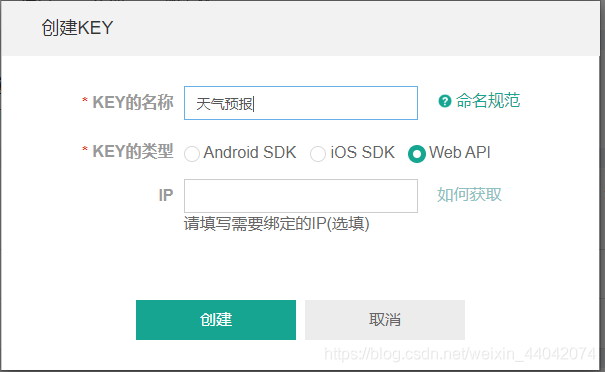
这是刚刚我们创建好的应用,点击添加KEY

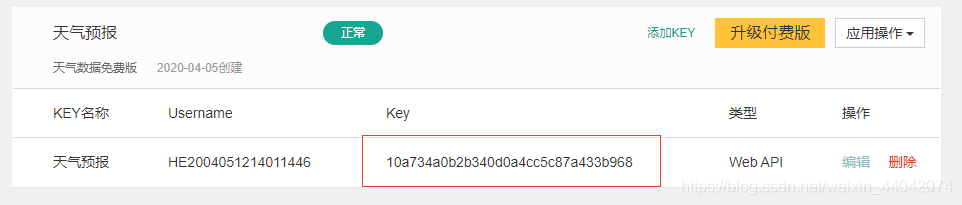
选择WebAPI
这注册好我们的API了
微信小程序后台域名配置
登陆小程序后台,分别点击开发和开发设置
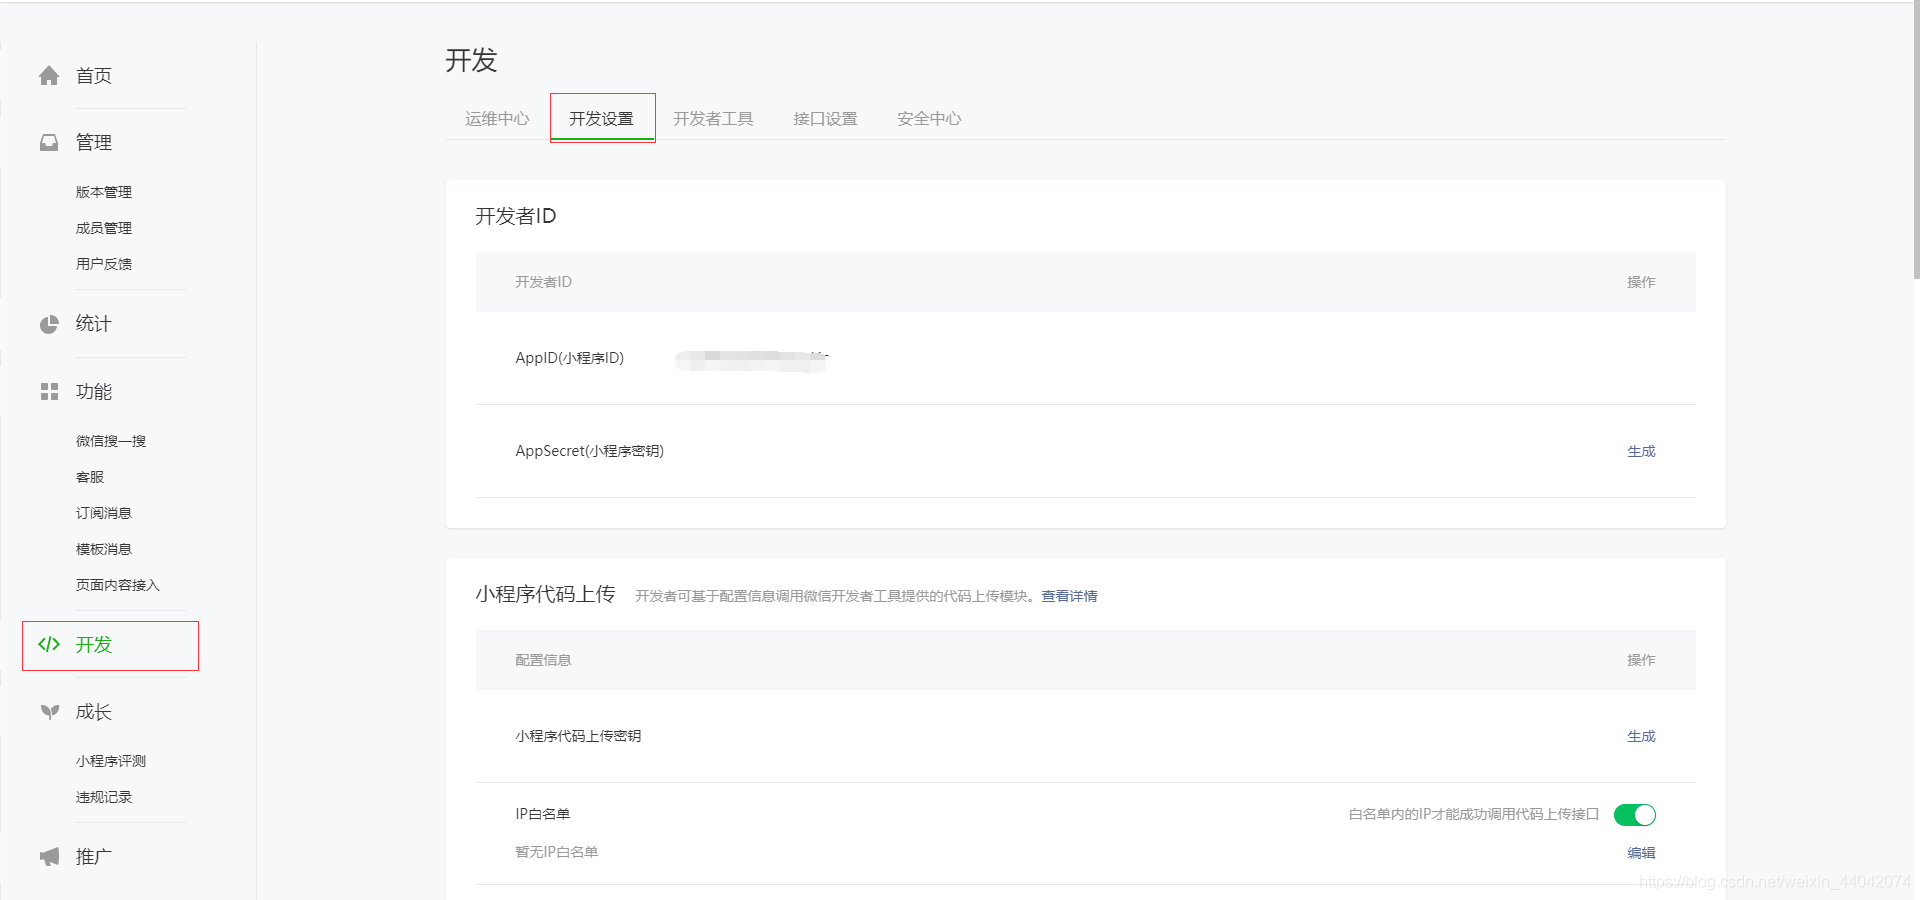
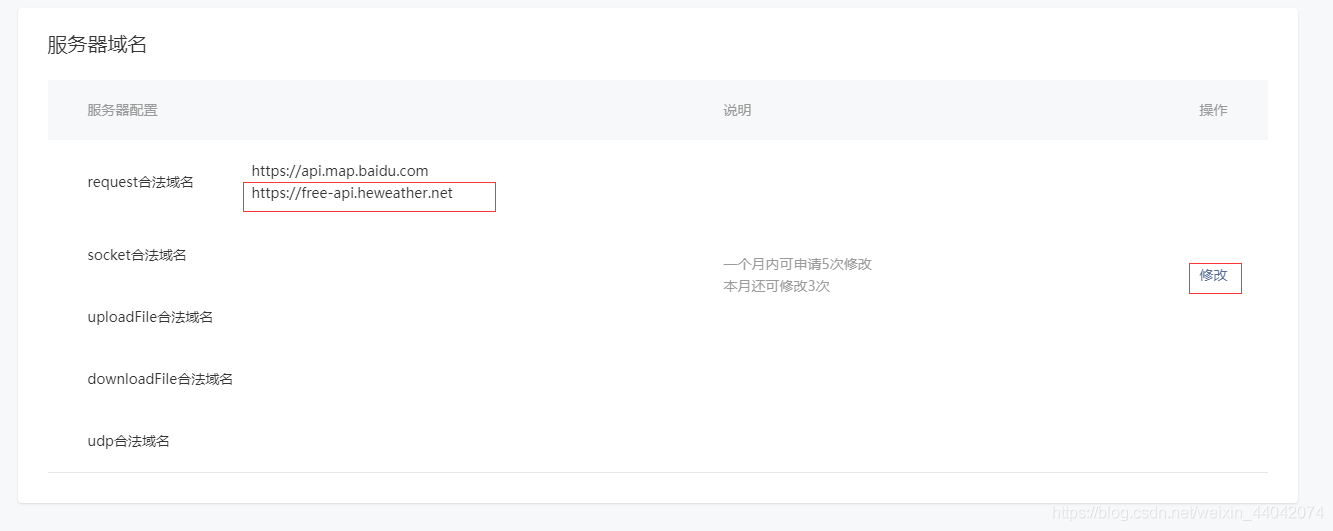
点击修改,将我们API的域名添加到request合法域名里面https://free-api.heweather.net
页面代码
.wxml
<view class="header">
<view class="top">
<view class="city">
{{city}}
</view>
<view class="search">
<input placeholder="输入城市名" bindinput="bindKeyInput" placeholder-style="color:white"></input>
<view class="bt_search" bindtap="search">
<icon type="search" size="18" color="white"></icon>
</view>
</view>
</view>
<view class="center">
<view class="tmp">
{{tmp}}°
</view>
<image mode="widthFix" class="cond-image" src="https://moyv.top/wechat/images/weather/{{imgsrc}}.png">
</image>
</view>
<view class="bottom">
<view>{{wind_dir}} {{wind_sc}}级</view>
<view>湿度 {{hum}}%</view>
<view>气压 {{pres}}Pa</view>
</view>
</view>
<view class="container">
<view class="hourly_title">24小时预报</view>
<scroll-view scroll-x="true" class="hourly">
<view class="h_item" wx:for="{{hourly}}" wx:key="index">
<text class="h_time">{{item.time}}</text>
<view class="h_img">
<image mode="widthFix" src="https://moyv.top/wechat/images/weather/{{item.imgsrc}}.png"></image>
</view>
<text class="h_tmp">{{item.tmp}}°</text>
<text class="h_wind_dir">{{item.wind_dir}}</text>
<text class="h_wind_sc">{{item.wind_sc}}级</text>
</view>
</scroll-view>
<view class="hourly_title">7天预报</view>
<scroll-view scroll-x="true" class="daily">
<view class="d_item" wx:for="{{daily_forecast}}" wx:key="index">
<text class="d_txt">{{item.d_txt}}</text>
<text class="d_date">{{item.d_date}}</text>
<view class="h_img">
<image mode="widthFix" src="https://moyv.top/wechat/images/weather/{{item.imgsrc_d}}.png"></image>
</view>
<text class="h_tmp">{{item.tmp_min}}°~{{item.tmp_max}}°</text>
<view class="h_img">
<image mode="widthFix" src="https://moyv.top/wechat/images/weather/{{item.imgsrc_n}}.png"></image>
</view>
<text class="d_wind_dir">{{item.wind_dir}}</text>
<text class="d_wind_sc">{{item.wind_sc}}级</text>
</view>
</scroll-view>
</view>
<view class="footer">
-天气数据来自和风天气api-
</view>
.wxss
page {
background-color: #f6f6f6;
}
.header {
background-color:#64c8fa;
/* background-image: linear-gradient(to right, #64a0f8, #64c8fa); */
height: 450rpx;
padding-top: 32rpx;
text-align: center;
}
.top {
display: flex;
justify-content: space-between;
align-content: center;
align-items: center;
}
.city {
text-align: center;
color: white;
display: inline-block;
font-size: 52rpx;
margin-left: 32rpx;
}
.search {
margin-right: 32rpx;
border-radius: 8rpx;
display: inline-flex;
justify-content: center;
align-content: center;
align-items: center;
background-color: rgba(0, 0, 0, 0.1);
height: 70rpx;
}
.search input {
width: 200rpx;
padding: 18rpx 32rpx;
text-align: left;
color: white;
display: inline-block;
}
.bt_search {
border-radius: 0 8rpx 8rpx 0;
height: 100%;
background-color: rgba(0, 0, 0, 0.1);
display: inline-flex;
justify-content: center;
align-content: center;
align-items: center;
}
.bt_search icon {
margin: 8rpx 18rpx;
}
.center {
display: flex;
justify-content: space-between;
align-content: center;
align-items: center;
}
.tmp {
margin-left: 18rpx;
display: inline-block;
font-size: 180rpx;
color: white;
}
.cond-image{
width: 200rpx;
margin-right: 32rpx;
margin-top: 32rpx;
}
.bottom{
display: flex;
justify-content: space-between;
align-content: center;
align-items: center;
}
.bottom view{
color: white;
margin: 32rpx;
}
.hourly_title{
font-weight: bold;
font-size: 42rpx;
padding: 18rpx 32rpx;
}
.hourly {
width: 718rpx;
margin: 0 18rpx;
border-radius: 18rpx;
box-shadow: 0.1rem 0.1rem 0.5rem rgba(0, 0, 0, 0.15);
white-space: nowrap;
background-color: white;
}
.h_item {
margin: 18rpx 0;
display: inline-block;
width: 143.5rpx;
text-align: center;
font-size: 28rpx;
}
.h_img {
margin: 64rpx 0;
}
.h_img image {
width: 60rpx;
}
.h_item text {
display: block;
}
.h_time {
color: gray;
}
.h_wind_dir {
margin-top: 32rpx;
}
.h_wind_sc {
color: gray;
}
.h_tmp {
color: #027aff;
}
.daily {
width: 718rpx;
white-space: nowrap;
margin: 0 18rpx;
background-color: white;
border-radius: 18rpx;
box-shadow: 0.1rem 0.1rem 0.5rem rgba(0, 0, 0, 0.15);
}
.d_item {
margin: 18rpx 0;
display: inline-block;
width: 179.5rpx;
text-align: center;
font-size: 28rpx;
}
.d_item text {
display: block;
}
.d_date {
color: gray;
}
.d_wind_dir {
margin-top: 32rpx;
}
.d_wind_sc {
color: gray;
}
.footer{
font-size: 28rpx;
color: gray;
text-align: center;
margin-top: 50rpx;
margin-bottom: 18rpx;
}
.js
Page({
/**
* 页面的初始数据
*/
data: {
search_city: '',
imgsrc:100
},
/**
* 根据城市获取天气预报
*/
getWeather(city) {
let that = this
//获取实况天气
wx.request({
url: 'https://free-api.heweather.net/s6/weather/now?key=你后台的key&location=' + city,
success: function(res) {
if (res.data.HeWeather6[0].status == 'unknown location') {
wx.showToast({
title: '抱歉!没有该城市的天气预报',
icon: 'none',
duration: 2000
})
return;
}
console.log(res)
that.setData({
city: city,
tmp: res.data.HeWeather6[0].now.tmp,
imgsrc: res.data.HeWeather6[0].now.cond_code,
wind_dir: res.data.HeWeather6[0].now.wind_dir,
wind_sc: res.data.HeWeather6[0].now.wind_sc,
hum: res.data.HeWeather6[0].now.hum,
pres: res.data.HeWeather6[0].now.pres
})
//获取24小时天气预报
wx.request({
url: 'https://free-api.heweather.net/s6/weather/hourly?key=你后台的key&location=' + city,
success: function(res) {
var arr = res.data.HeWeather6[0].hourly
var hourly = []
for (var i = 0; i < arr.length; i++) {
hourly[i] = {
"imgsrc": arr[i].cond_code,
"tmp": arr[i].tmp,
"time": arr[i].time.substring(11),
"wind_dir": arr[i].wind_dir,
"wind_sc": arr[i].wind_sc
}
}
that.setData({
hourly: hourly
})
var weekArray = new Array("周日", "周一", "周二", "周三", "周四", "周五", "周六");
//获取未来7天天气预报
wx.request({
url: 'https://free-api.heweather.net/s6/weather/forecast?key=你后台的key&location=' + city,
success: function(result) {
//console.log(result)
var arr = result.data.HeWeather6[0].daily_forecast
var daily_forecast = []
for (var i = 0; i < arr.length; i++) {
daily_forecast[i] = {
d_txt: i == 0 ? "今天" : weekArray[new Date(arr[i].date).getDay()],
d_date: arr[i].date.substring(5),
imgsrc_d: arr[i].cond_code_d,
imgsrc_n: arr[i].cond_code_n,
wind_dir: arr[i].wind_dir,
wind_sc: arr[i].wind_sc,
tmp_max: arr[i].tmp_max,
tmp_min: arr[i].tmp_min,
cond_txt_d: arr[i].cond_txt_d
}
}
that.setData({
daily_forecast: daily_forecast
})
}
})
}
})
}
})
},
bindKeyInput(e) {
this.setData({
search_city: e.detail.value
})
},
search() {
this.getWeather(this.data.search_city)
},
/**
* 生命周期函数--监听页面加载
*/
onLoad: function(options) {
this.getWeather("广州")
},
})
.json
{
"usingComponents": {},
"navigationBarTitleText": "天气预报"
}
注意问题(必看)
由于我的项目有用到天气预报的逐小时预报和7天预报,和风天气又必须实名才能获取到此数据,所以请登录和风天气后台进行实名认证
到此这篇关于微信小程序实现天气预报功能(附源码)的文章就介绍到这了,更多相关小程序实现天气预报内容请搜索以前的文章或继续浏览下面的相关文章希望大家以后多多支持!
以上是 微信小程序实现天气预报功能(附源码) 的全部内容, 来源链接: utcz.com/p/219069.html