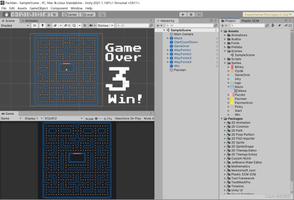
Unity实现场景漫游相机
本文实例为大家分享了Unity实现场景漫游相机的具体代码,供大家参考,具体内容如下
前言
拿到场景后总喜欢在场景里面玩一段时间,那这个脚本就是你的不二选择
代码里加了注释,改起来也很方便。
使用方法
把脚本拖拽到场景相机上,开箱即用。
- WASD前后左右移动
- QE为上下
- Shift加速
- 鼠标右键按住旋转视角
- ESC退出游戏
源码
#if ENABLE_INPUT_SYSTEM && ENABLE_INPUT_SYSTEM_PACKAGE
#define USE_INPUT_SYSTEM
using UnityEngine.InputSystem;
using UnityEngine.InputSystem.Controls;
#endif
using UnityEngine;
public class SimpleCameraController : MonoBehaviour
{
#region 相机状态
/// <summary>
/// 相机状态
/// </summary>
class CameraState
{
public float yaw;
public float pitch;
public float roll;
public float x;
public float y;
public float z;
public void SetFromTransform(Transform t)
{
pitch = t.eulerAngles.x;
yaw = t.eulerAngles.y;
roll = t.eulerAngles.z;
x = t.position.x;
y = t.position.y;
z = t.position.z;
}
public void Translate(Vector3 translation)
{
Vector3 rotatedTranslation = Quaternion.Euler(pitch, yaw, roll) * translation;
x += rotatedTranslation.x;
y += rotatedTranslation.y;
z += rotatedTranslation.z;
}
public void LerpTowards(CameraState target, float positionLerpPct, float rotationLerpPct)
{
yaw = Mathf.Lerp(yaw, target.yaw, rotationLerpPct);
pitch = Mathf.Lerp(pitch, target.pitch, rotationLerpPct);
roll = Mathf.Lerp(roll, target.roll, rotationLerpPct);
x = Mathf.Lerp(x, target.x, positionLerpPct);
y = Mathf.Lerp(y, target.y, positionLerpPct);
z = Mathf.Lerp(z, target.z, positionLerpPct);
}
public void UpdateTransform(Transform t)
{
t.eulerAngles = new Vector3(pitch, yaw, roll);
t.position = new Vector3(x, y, z);
}
}
#endregion
CameraState m_TargetCameraState = new CameraState();
CameraState m_InterpolatingCameraState = new CameraState();
[Header("Movement Settings 移动设置")]
[Tooltip("Exponential boost factor on translation, controllable by mouse wheel. 平移的指数增强因子,可通过鼠标滚轮控制。")]
public float boost = 3.5f;
[Tooltip("Time it takes to interpolate camera position 99% of the way to the target. 将相机位置插值到目标位置99%所需的时间。"), Range(0.001f, 1f)]
public float positionLerpTime = 0.2f;
[Header("Rotation Settings 旋转设定")]
[Tooltip("X = Change in mouse position. 改变鼠标位置。\nY = Multiplicative factor for camera rotation. 相机旋转的乘性因子。")]
public AnimationCurve mouseSensitivityCurve = new AnimationCurve(new Keyframe(0f, 0.5f, 0f, 5f), new Keyframe(1f, 2.5f, 0f, 0f));
[Tooltip("Time it takes to interpolate camera rotation 99% of the way to the target. 插值相机旋转99%到目标所需的时间。"), Range(0.001f, 1f)]
public float rotationLerpTime = 0.01f;
[Tooltip("Whether or not to invert our Y axis for mouse input to rotation. 是否将鼠标输入的Y轴反转为旋转。")]
public bool invertY = false;
void OnEnable()
{
m_TargetCameraState.SetFromTransform(transform);
m_InterpolatingCameraState.SetFromTransform(transform);
}
Vector3 GetInputTranslationDirection()
{
Vector3 direction = new Vector3();
if (Input.GetKey(KeyCode.W))
{
direction += Vector3.forward;
}
if (Input.GetKey(KeyCode.S))
{
direction += Vector3.back;
}
if (Input.GetKey(KeyCode.A))
{
direction += Vector3.left;
}
if (Input.GetKey(KeyCode.D))
{
direction += Vector3.right;
}
if (Input.GetKey(KeyCode.Q))
{
direction += Vector3.down;
}
if (Input.GetKey(KeyCode.E))
{
direction += Vector3.up;
}
return direction;
}
void Update()
{
Vector3 translation = Vector3.zero;
#if ENABLE_LEGACY_INPUT_MANAGER
// Exit Sample 按下Esc键退出游戏
if (Input.GetKey(KeyCode.Escape))
{
Application.Quit();
#if UNITY_EDITOR
UnityEditor.EditorApplication.isPlaying = false;
#endif
}
// Hide and lock cursor when right mouse button pressed 按下鼠标右键时隐藏并锁定光标
if (Input.GetMouseButtonDown(1))
{
Cursor.lockState = CursorLockMode.Locked;
}
// Unlock and show cursor when right mouse button released 松开鼠标右键时解锁并显示光标
if (Input.GetMouseButtonUp(1))
{
Cursor.visible = true;
Cursor.lockState = CursorLockMode.None;
}
// Rotation 旋转
if (Input.GetMouseButton(1))
{
var mouseMovement = new Vector2(Input.GetAxis("Mouse X"), Input.GetAxis("Mouse Y") * (invertY ? 1 : -1));
var mouseSensitivityFactor = mouseSensitivityCurve.Evaluate(mouseMovement.magnitude);
m_TargetCameraState.yaw += mouseMovement.x * mouseSensitivityFactor;
m_TargetCameraState.pitch += mouseMovement.y * mouseSensitivityFactor;
}
// Translation 移动
translation = GetInputTranslationDirection() * Time.deltaTime;
// Speed up movement when shift key held 按住shift键时加速移动
if (Input.GetKey(KeyCode.LeftShift))
{
//原速度*10为按下Shift后的速度
translation *= 10.0f;
}
// Modify movement by a boost factor (defined in Inspector and modified in play mode through the mouse scroll wheel) 通过增强因子修改移动(在检查器中定义,通过鼠标滚轮在播放模式下修改)
boost += Input.mouseScrollDelta.y * 0.2f;
translation *= Mathf.Pow(2.0f, boost);
#elif USE_INPUT_SYSTEM
// TODO: make the new input system work 使新的输入系统正常工作
#endif
m_TargetCameraState.Translate(translation);
// Framerate-independent interpolation 帧率无关插值
// Calculate the lerp amount, such that we get 99% of the way to our target in the specified time 计算lerp的数量,这样我们就可以在指定的时间内到达目标的99%
var positionLerpPct = 1f - Mathf.Exp((Mathf.Log(1f - 0.99f) / positionLerpTime) * Time.deltaTime);
var rotationLerpPct = 1f - Mathf.Exp((Mathf.Log(1f - 0.99f) / rotationLerpTime) * Time.deltaTime);
m_InterpolatingCameraState.LerpTowards(m_TargetCameraState, positionLerpPct, rotationLerpPct);
m_InterpolatingCameraState.UpdateTransform(transform);
}
}
以上是 Unity实现场景漫游相机 的全部内容, 来源链接: utcz.com/z/359468.html