vue+element UI实现树形表格
本文实例为大家分享了vue+element UI实现树形表格的具体代码,供大家参考,具体内容如下
一、在component文件夹下新建如下treeTable文件夹,里面有2个文件:
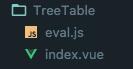
eval.js:将数据转换成树形数据
/**
* @Author: jianglei
* @Date: 2017-10-12 12:06:49
*/
'use strict'
import Vue from 'vue'
export default function treeToArray(data, expandAll, parent = null, level = null) {
let tmp = []
Array.from(data).forEach(function(record) {
if (record._expanded === undefined) {
Vue.set(record, '_expanded', expandAll)
}
let _level = 1
if (level !== undefined && level !== null) {
_level = level + 1
}
Vue.set(record, '_level', _level)
// 如果有父元素
if (parent) {
Vue.set(record, 'parent', parent)
}
tmp.push(record)
if (record.children && record.children.length > 0) {
const children = treeToArray(record.children, expandAll, record, _level)
tmp = tmp.concat(children)
}
})
return tmp
}
index.vue:树形表格组件
<template>
<el-table :data="formatData" :row-style="showRow" v-bind="$attrs">
<el-table-column v-if="columns.length===0" width="150">
<template slot-scope="scope">
<span v-for="space in scope.row._level" :key="space" class="ms-tree-space"/>
<span v-if="iconShow(0,scope.row)" class="tree-ctrl" @click="toggleExpanded(scope.$index)">
<i v-if="!scope.row._expanded" class="el-icon-plus"/>
<i v-else class="el-icon-minus"/>
</span>
{{ scope.$index }}
</template>
</el-table-column>
<el-table-column v-for="(column, index) in columns" v-else :key="column.value" :label="column.text" :width="column.width">
<template slot-scope="scope">
<!-- Todo -->
<!-- eslint-disable-next-line vue/no-confusing-v-for-v-if -->
<span v-for="space in scope.row._level" v-if="index === 0" :key="space" class="ms-tree-space"/>
<span v-if="iconShow(index,scope.row)" class="tree-ctrl" @click="toggleExpanded(scope.$index)">
<i v-if="!scope.row._expanded" class="el-icon-plus"/>
<i v-else class="el-icon-minus"/>
</span>
{{ scope.row[column.value] }}
</template>
</el-table-column>
<slot/>
</el-table>
</template>
<script>
/**
Auth: Lei.j1ang
Created: 2018/1/19-13:59
*/
import treeToArray from "./eval";
export default {
name: "TreeTable",
props: {
/* eslint-disable */
data: {
type: [Array, Object],
required: true
},
columns: {
type: Array,
default: () => []
},
evalFunc: Function,
evalArgs: Array,
expandAll: {
type: Boolean,
default: false
}
},
computed: {
// 格式化数据源
formatData: function() {
let tmp;
if (!Array.isArray(this.data)) {
tmp = [this.data];
} else {
tmp = this.data;
}
const func = this.evalFunc || treeToArray;
const args = this.evalArgs
? Array.concat([tmp, this.expandAll], this.evalArgs)
: [tmp, this.expandAll];
return func.apply(null, args);
}
},
methods: {
showRow: function(row) {
const show = row.row.parent
? row.row.parent._expanded && row.row.parent._show
: true;
row.row._show = show;
return show
? "animation:treeTableShow 1s;-webkit-animation:treeTableShow 1s;"
: "display:none;";
},
// 切换下级是否展开
toggleExpanded: function(trIndex) {
const record = this.formatData[trIndex];
record._expanded = !record._expanded;
},
// 图标显示
iconShow(index, record) {
return index === 0 && record.children && record.children.length > 0;
}
}
};
</script>
<style rel="stylesheet/css">
@keyframes treeTableShow {
from {
opacity: 0;
}
to {
opacity: 1;
}
}
@-webkit-keyframes treeTableShow {
from {
opacity: 0;
}
to {
opacity: 1;
}
}
</style>
<style scoped>
.ms-tree-space {
position: relative;
top: 1px;
display: inline-block;
font-style: normal;
font-weight: 400;
line-height: 1;
width: 18px;
height: 14px;
}
.ms-tree-space::before {
content: "";
}
.processContainer {
width: 100%;
height: 100%;
}
table td {
line-height: 26px;
}
.tree-ctrl {
position: relative;
cursor: pointer;
color: #2196f3;
margin-left: -18px;
}
</style>
二、在需要的地方引入该组件
例如:在component文件夹下新建a.vue:
<tree-table :data="data" :columns="columns" border/>
import treeTable from "./TreeTable";
components: { treeTable },
data() {
return {
columns: [
{
text: "事件",
value: "event",
width: 200
},
{
text: "ID",
value: "id"
},
{
text: "时间线",
value: "timeLine"
},
{
text: "备注",
value: "comment"
}
],
data: [
{
id: 0,
event: "事件1",
timeLine: 50,
comment: "无"
},
{
id: 1,
event: "事件1",
timeLine: 100,
comment: "无",
children: [
{
id: 2,
event: "事件2",
timeLine: 10,
comment: "无"
},
{
id: 3,
event: "事件3",
timeLine: 90,
comment: "无",
children: [
{
id: 4,
event: "事件4",
timeLine: 5,
comment: "无"
},
{
id: 5,
event: "事件5",
timeLine: 10,
comment: "无"
},
{
id: 6,
event: "事件6",
timeLine: 75,
comment: "无",
children: [
{
id: 7,
event: "事件7",
timeLine: 50,
comment: "无",
children: [
{
id: 71,
event: "事件71",
timeLine: 25,
comment: "xx"
},
{
id: 72,
event: "事件72",
timeLine: 5,
comment: "xx"
},
{
id: 73,
event: "事件73",
timeLine: 20,
comment: "xx"
}
]
},
{
id: 8,
event: "事件8",
timeLine: 25,
comment: "无"
}
]
}
]
}
]
}
]
};
},
以上就是本文的全部内容,希望对大家的学习有所帮助,也希望大家多多支持。
以上是 vue+element UI实现树形表格 的全部内容, 来源链接: utcz.com/p/238774.html