vue+element-ui实现头部导航栏组件
本文实例为大家分享了vue+element-ui实现头部导航栏组件具体代码,供大家参考,具体内容如下
话不多说,先上一张效果图:

这是一个头部导航栏,网站最常见的一个功能,鼠标点击切换不同界面,样式跟随。
首先就是下载element-ui框架
npm install element-ui
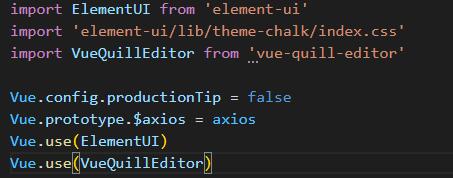
在main.js文件里面全局引入这个ui框架
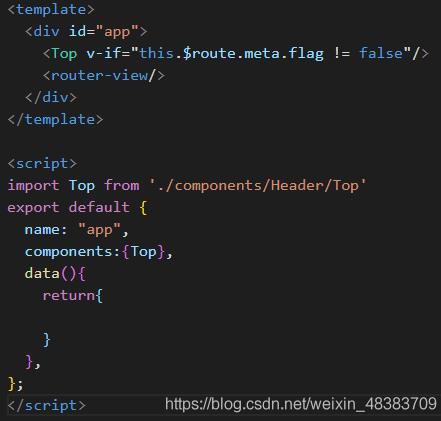
然后就是在app.vue文件里面注册这个top组件
这是用vue和“饿了么”来实现的头部导航栏,看一下代码:
<template>
<div class="header">
<div class="img">
<img src="@/assets/image/index/logo.png" alt="">
</div>
<el-menu
:default-active="this.$route.path"
class="el-menu-demo"
mode="horizontal"
@select="handleSelect"
router
background-color="#fff"
text-color="#333"
active-text-color="#0084ff"
style="flex:1"
>
<el-menu-item v-for="(item, i) in navList" :key="i" :index="item.name">
<template slot="title">
<span> {{ item.navItem }}</span>
</template>
</el-menu-item>
</el-menu>
</div>
</template>
<script>
export default {
data() {
return {
navList:[
{name:'/home', navItem:'首页'},
{name:'/home/classRoom',navItem:'我的班级'},
{name:'/home/course',navItem:'我的课程'},
{name:'/home/exam',navItem:'创建考试'},
{name:'/home/practice',navItem:'创建练习'},
]
}
},
methods: {
handleSelect(key, keyPath) {
}
}
}
</script>
<style>
.el-menu-item{
font-size: 18px !important;
}
.el-menu-item.is-active {
color: #ea5b2c !important;
font-size: 18px !important;
}
.el-menu--horizontal>.el-menu-item.is-active {
border-bottom: 2px solid #ea5b2c !important;
}
</style>
<style lang="scss" scoped>
.header {
display: flex;
width: 100%;
.img {
background: #ffffff;
border-bottom: solid 1px #e6e6e6;
img {
height:50px;
padding:10px;
}
}
}
</style>
能力有限,写的不好的地方还望路过的大佬指点一二。
以上就是本文的全部内容,希望对大家的学习有所帮助,也希望大家多多支持。
以上是 vue+element-ui实现头部导航栏组件 的全部内容, 来源链接: utcz.com/p/239828.html


