js实现轮播图制作方法
本文实例为大家分享了js实现轮播图展示的具体代码,供大家参考,具体内容如下
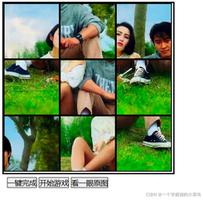
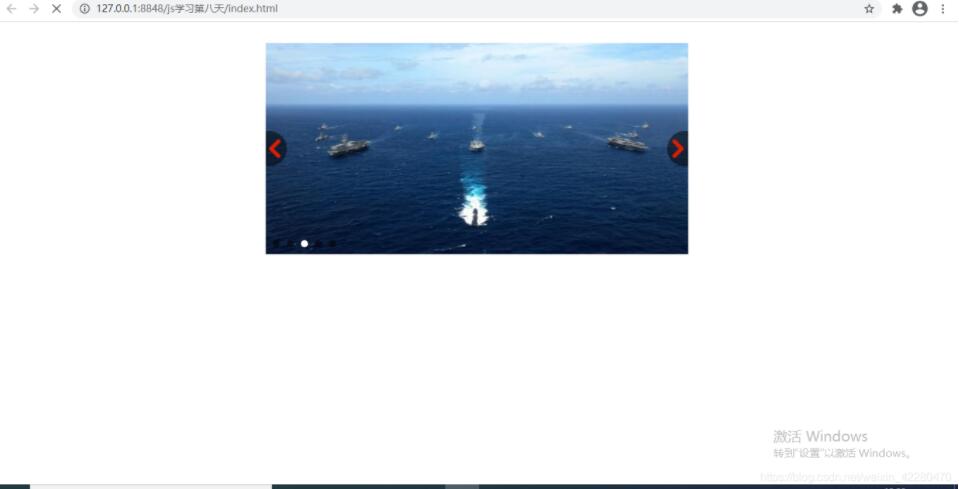
效果如图所示
代码如下:
<!DOCTYPE html>
<html>
<head>
<meta charset="utf-8" />
<title></title>
<style type="text/css">
* {
padding: 0;
margin: 0;
}
.container {
position: relative;
width: 600px;
height: 300px;
margin: 30px auto;
overflow: hidden;
}
.left {
display: none;
position: absolute;
top: 50%;
left: -20px;
transform: translateY(-50%);
width:50px;
height: 50px;
border-top-right-radius: 50%;
border-bottom-right-radius: 50%;
background-color: rgba(0,0,0,0.5);
z-index: 999;
}
.left i {
display: block;
margin-top: 10px;
margin-left: 20px;
width: 30px;
height: 30px;
background: url(img/left.png) no-repeat;
background-size: 30px 30px;
}
.right {
display: none;
position: absolute;
top: 50%;
right: -20px;
transform: translateY(-50%);
width:50px;
height: 50px;
border-top-left-radius: 50%;
border-bottom-left-radius: 50%;
background-color: rgba(0,0,0,0.5);
z-index: 999;
}
.right i {
display: block;
margin-top: 10px;
margin-right: 20px;
width: 30px;
height: 30px;
background: url(img/right.png) no-repeat;
background-size: 30px 30px;
}
ul li,ol li {
list-style: none;
}
.picture {
position: absolute;
}
.list {
position: absolute;
bottom: 10px;
left: 10px;
}
.list li {
float: left;
margin-right: 10px;
width: 10px;
height: 10px;
border-radius: 10px;
background-color: rgba(0,0,0,0.5);
cursor: pointer;
}
.list .current {
background-color: #fff;
}
.picture li {
position: absolute;
width: 600px;
height: 300px;
}
img {
width: 100%;
height: 100%;
}
</style>
</head>
<body>
<div class="container">
<span class="left"><i></i></span>
<span class="right"><i></i></span>
<ul class="picture">
<li><img src="img/1.jpg" ></li>
<li><img src="img/2.jpg" ></li>
<li><img src="img/3.jpg" ></li>
<li><img src="img/4.jpg" ></li>
<li><img src="img/5.jpg" ></li>
</ul>
<ol class="list">
</ol>
</div>
<script type="text/javascript">
var picture = document.querySelector('.picture');
var list = document.querySelector('.list');
var num=0;
var circle=0;
for (i=0;i<picture.children.length;i++)
{
// 设置图片的位置
picture.children[i].style.left = i*600 + 'px';
// 自动生成有序列表
var li = document.createElement('li');
li.setAttribute('index',i);
list.appendChild(li);
// 给li添加点击事件
li.addEventListener('click',function () {
for (var i=0;i<list.children.length;i++) {
list.children[i].className = '';
}
this.className = 'current';
var index = this.getAttribute('index');
num = index;
circle = index;
animate(picture,-index*600);
})
}
// 设置第一个ol孩子的类名
list.children[0].className = 'current';
var left = document.querySelector('.left');
var right = document.querySelector('.right');
var container = document.querySelector('.container');
// 设置鼠标经过离开事件
container.addEventListener('mouseover',function () {
left.style.display = 'block';
right.style.display = 'block';
clearInterval(timer)
timer = null;
})
container.addEventListener('mouseleave',function () {
left.style.display = 'none';
right.style.display = 'none';
timer = setInterval(function () {
right.click();
},1000);
})
// js动画函数
function animate (obj,target,callback) {
clearInterval(obj.timer)
obj.timer = setInterval(function () {
var step = (target - obj.offsetLeft)/10;
step = step > 0 ? Math.ceil(step) : Math.floor(step);
if(obj.offsetLeft == target) {
clearInterval(obj.timer);
if (callback) {
callback();
}
}
obj.style.left = obj.offsetLeft + step + 'px';
},15)
}
var first = picture.children[0].cloneNode(true);
picture.appendChild(first);
picture.lastChild.style.left = (picture.children.length-1)*600 + 'px';
//右侧点击事件
right.addEventListener('click',function () {
if (num==picture.children.length-1) {
picture.style.left = 0;
num = 0;
}
num++;
animate(picture,-num*600);
circle ++;
if (circle == list.children.length) {
circle = 0;
}
for (var i = 0;i<list.children.length;i++) {
list.children[i].className = '';
}
list.children[circle].className = 'current';
})
// 左侧点击事件
left.addEventListener('click',function () {
if (num==0) {
picture.style.left = -(picture.children.length-1)*600 +'px';
num = picture.children.length-1;
}
num--;
animate(picture,-num*600);
circle --;
if (circle < 0) {
circle = list.children.length-1;
}
for (var i = 0;i<list.children.length;i++) {
list.children[i].className = '';
}
list.children[circle].className = 'current';
})
var timer = setInterval(function () {
// 手动调用
right.click();
},1000);
</script>
</body>
</html>
以上就是本文的全部内容,希望对大家的学习有所帮助,也希望大家多多支持。
以上是 js实现轮播图制作方法 的全部内容, 来源链接: utcz.com/p/220859.html