结合OpenCV与TensorFlow进行人脸识别的实现
作为新手来说,这是一个最简单的人脸识别模型,难度不大,代码量也不算多,下面就逐一来讲解,数据集的准备就不多说了,因人而异。
一. 获取数据集的所有路径
利用os模块来生成一个包含所有数据路径的list
def my_face():
path = os.listdir("./my_faces")
image_path = [os.path.join("./my_faces/",img) for img in path]
return image_path
def other_face():
path = os.listdir("./other_faces")
image_path = [os.path.join("./other_faces/",img) for img in path]
return image_path
image_path = my_face().__add__(other_face()) #将两个list合并成为一个list
二. 构造标签
标签的构造较为简单,1表示本人,0表示其他人。
label_my= [1 for i in my_face()]
label_other = [0 for i in other_face()]
label = label_my.__add__(label_other) #合并两个list
三.构造数据集
利用tf.data.Dataset.from_tensor_slices()构造数据集,
def preprocess(x,y):
x = tf.io.read_file(x) #读取数据
x = tf.image.decode_jpeg(x,channels=3) #解码成jpg格式的数据
x = tf.cast(x,tf.float32) / 255.0 #归一化
y = tf.convert_to_tensor(y) #转成tensor
return x,y
data = tf.data.Dataset.from_tensor_slices((image_path,label))
data_loader = data.repeat().shuffle(5000).map(preprocess).batch(128).prefetch(1)
四.构造模型
class CNN_WORK(Model):
def __init__(self):
super(CNN_WORK,self).__init__()
self.conv1 = layers.Conv2D(32,kernel_size=5,activation=tf.nn.relu)
self.maxpool1 = layers.MaxPool2D(2,strides=2)
self.conv2 = layers.Conv2D(64,kernel_size=3,activation=tf.nn.relu)
self.maxpool2 = layers.MaxPool2D(2,strides=2)
self.flatten = layers.Flatten()
self.fc1 = layers.Dense(1024)
self.dropout = layers.Dropout(rate=0.5)
self.out = layers.Dense(2)
def call(self,x,is_training=False):
x = self.conv1(x)
x = self.maxpool1(x)
x = self.conv2(x)
x = self.maxpool2(x)
x = self.flatten(x)
x = self.fc1(x)
x = self.dropout(x,training=is_training)
x = self.out(x)
if not is_training:
x = tf.nn.softmax(x)
return x
model = CNN_WORK()
五.定义损失函数,精度函数,优化函数
def cross_entropy_loss(x,y):
y = tf.cast(y,tf.int64)
loss = tf.nn.sparse_softmax_cross_entropy_with_logits(labels=y,logits=x)
return tf.reduce_mean(loss)
def accuracy(y_pred,y_true):
correct_pred = tf.equal(tf.argmax(y_pred,1),tf.cast(y_true,tf.int64))
return tf.reduce_mean(tf.cast(correct_pred,tf.float32),axis=-1)
optimizer = tf.optimizers.SGD(0.002)
六.开始跑步我们的模型
def run_optimizer(x,y):
with tf.GradientTape() as g:
pred = model(x,is_training=True)
loss = cross_entropy_loss(pred,y)
training_variabel = model.trainable_variables
gradient = g.gradient(loss,training_variabel)
optimizer.apply_gradients(zip(gradient,training_variabel))
model.save_weights("face_weight") #保存模型
最后跑的准确率还是挺高的。
七.openCV登场
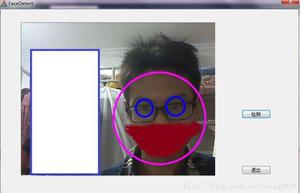
最后利用OpenCV的人脸检测模块,将检测到的人脸送入到我们训练好了的模型中进行预测根据预测的结果进行标识。
cap = cv2.VideoCapture(0)
face_cascade = cv2.CascadeClassifier('C:\\Users\Wuhuipeng\AppData\Local\Programs\Python\Python36\Lib\site-packages\cv2\data/haarcascade_frontalface_alt.xml')
while True:
ret,frame = cap.read()
gray = cv2.cvtColor(frame,cv2.COLOR_BGR2GRAY)
faces = face_cascade.detectMultiScale(gray,scaleFactor=1.2,minNeighbors=5,minSize=(5,5))
for (x,y,z,t) in faces:
img = frame[x:x+z,y:y+t]
try:
img = cv2.resize(img,(64,64))
img = tf.cast(img,tf.float32) / 255.0
img = tf.reshape(img,[-1,64,64,3])
pred = model(img)
pred = tf.argmax(pred,axis=1).numpy()
except:
pass
if(pred[0]==1):
cv2.putText(frame,"wuhuipeng",(x-10,y-10),cv2.FONT_HERSHEY_SIMPLEX,1.2,(255,255,0),2)
cv2.rectangle(frame,(x,y),(x+z,y+t),(0,255,0),2)
cv2.imshow('find faces',frame)
if cv2.waitKey(1)&0xff ==ord('q'):
break
cap.release()
cv2.destroyAllWindows()
完整代码地址github.
以上是 结合OpenCV与TensorFlow进行人脸识别的实现 的全部内容, 来源链接: utcz.com/z/328323.html


