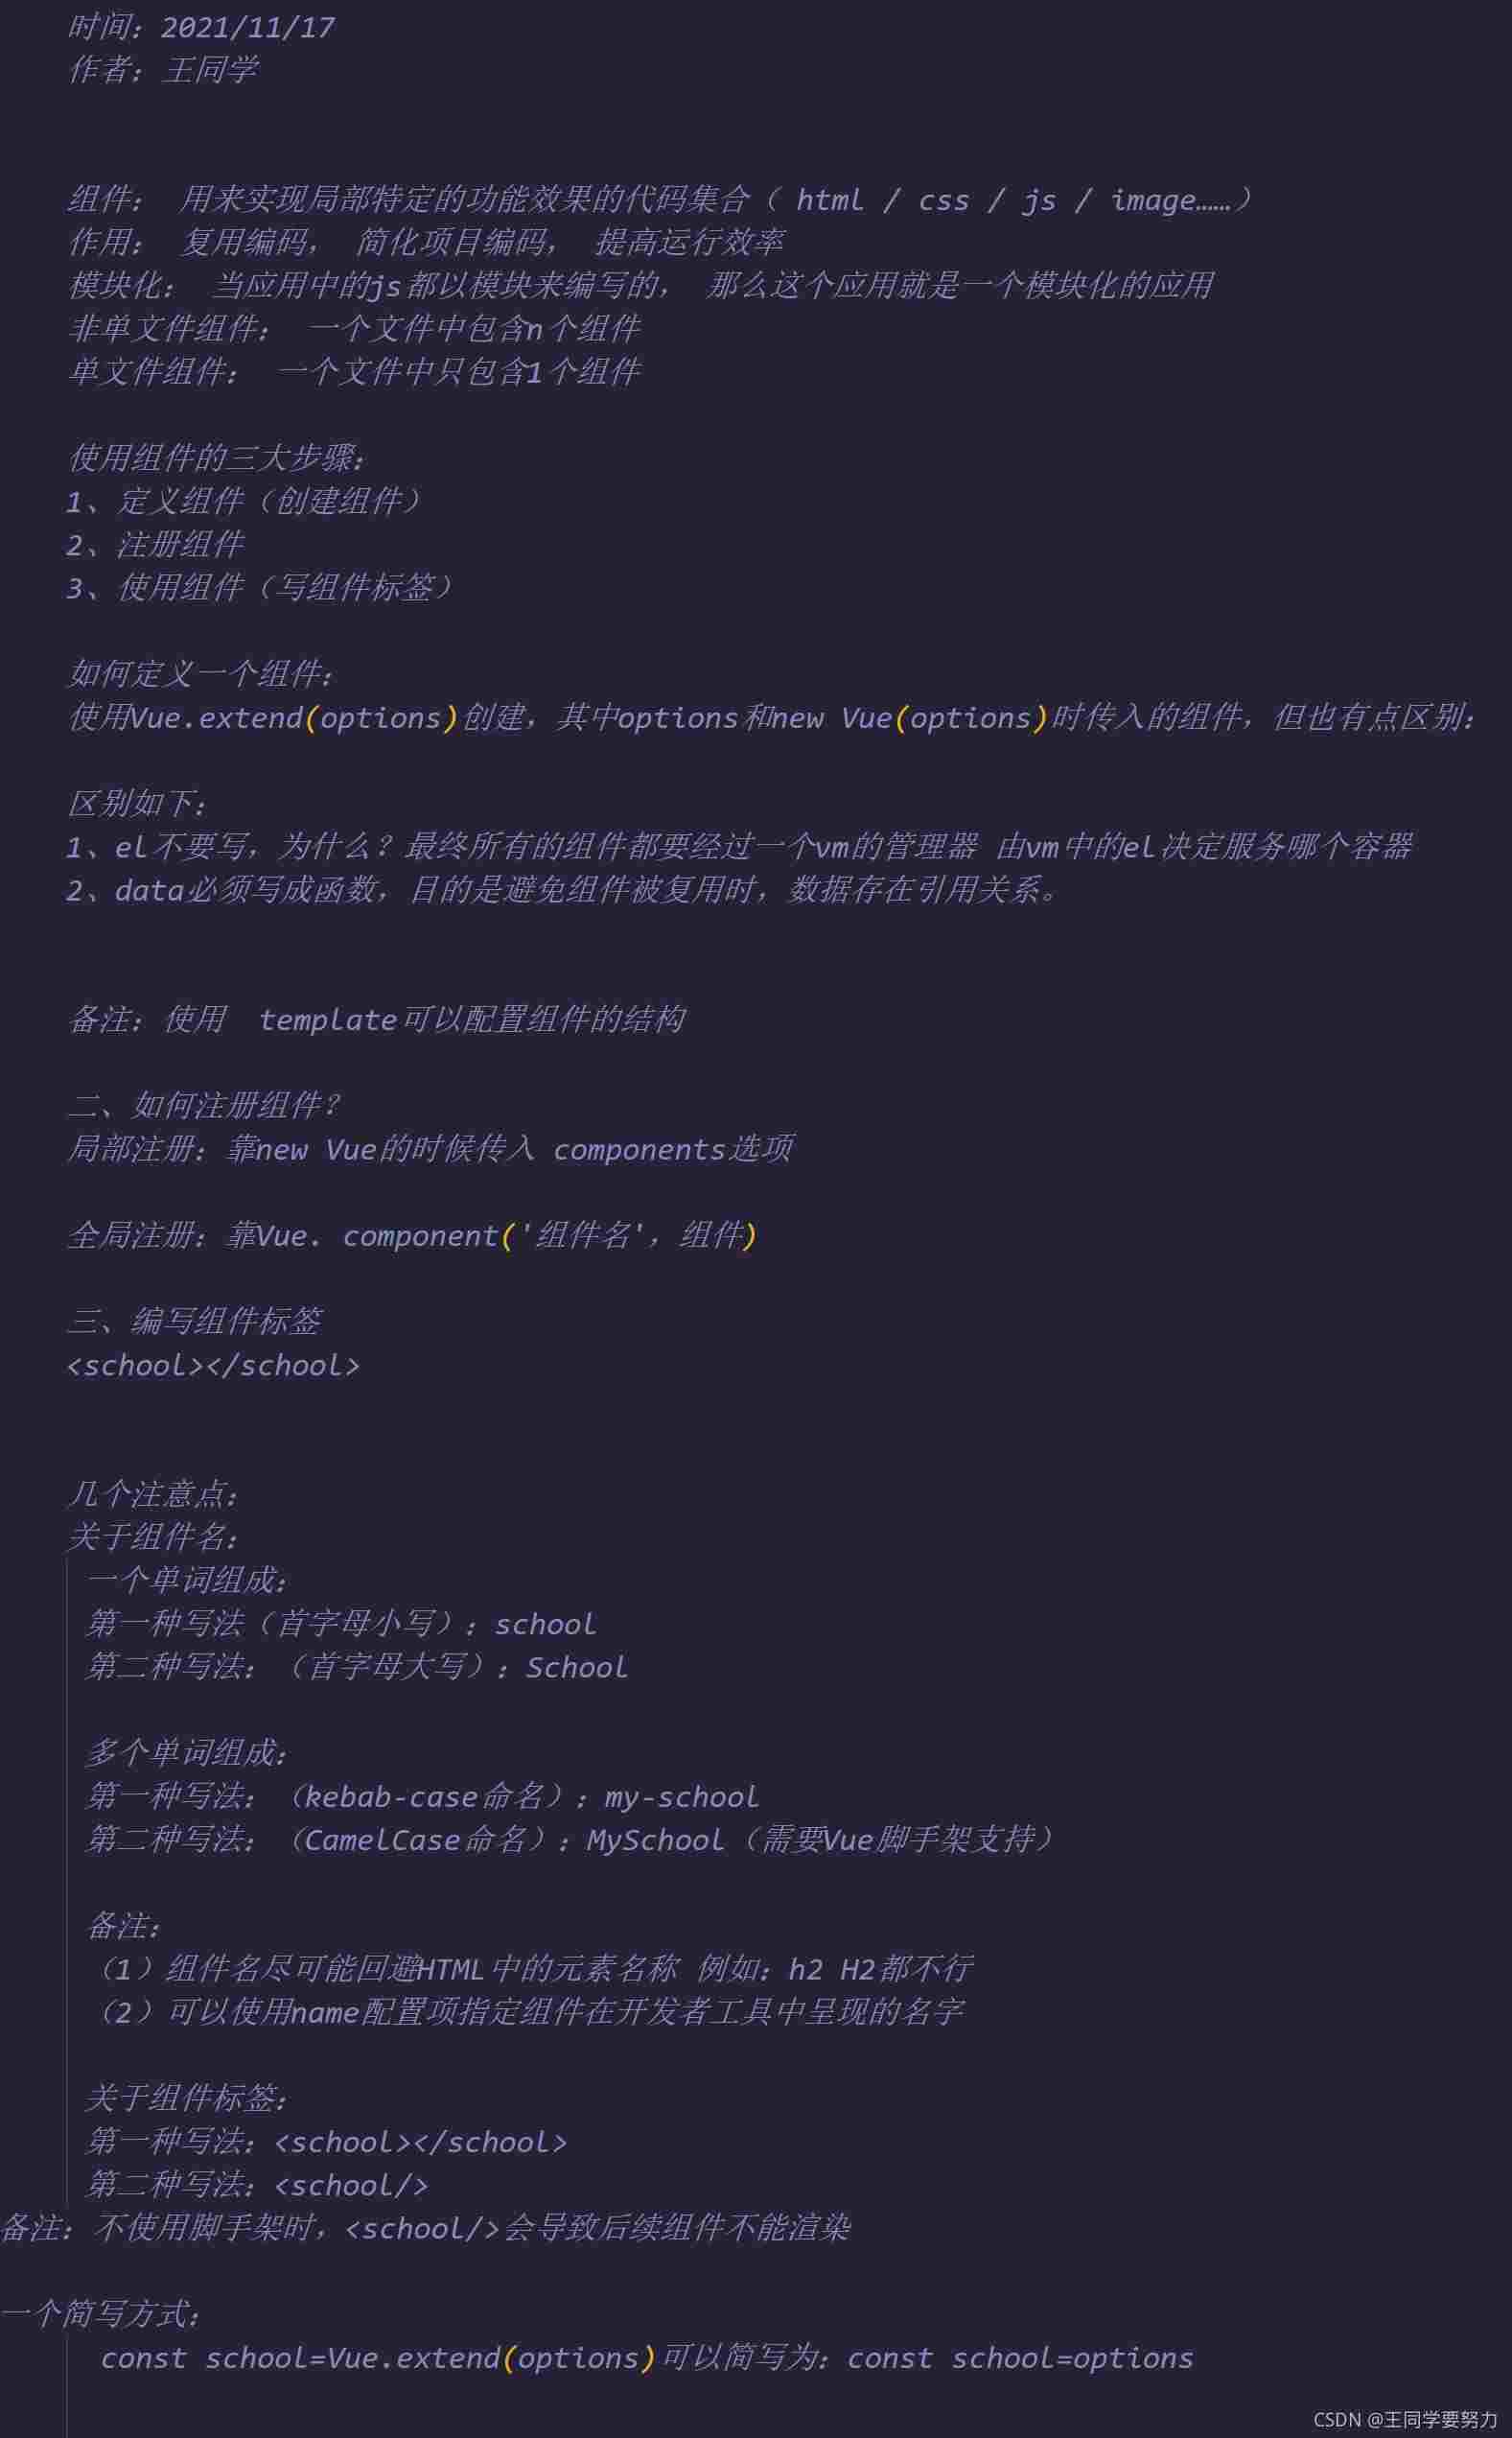
Vue之组件详解
<body>
<div id="root">
<h2>{{name}}</h2>
<hr>
<school></school>
<hr>
<student></student>
<hr>
<!-- <h2>学生姓名:{{name}}</h2>
<h2>学生年龄:{{age}}</h2> -->
</div>
<div id="root2">
<hello></hello>
</div>
<script>
Vue.config.productionTip = false;
//创建school组件
//el:'#root'
//组件定义时 一定不要写el配置项,因为最终所有的组件都要被一个vm管理 由vm决定服务于哪个容器
const school = Vue.extend({
template: `
<div>
<h2>学校名称:{{schoolName}}</h2>
<h2>学校地址:{{address}}</h2>
<button @click="showName">点我提示学校名称</button>
</div>
`,
data() {
return {
schoolName: '二中',
address: '北京',
}
},
methods: {
showName() {
alert(this.schoolName)
}
}
})
//第一步:创建组件
//创建学生组件
const student = Vue.extend({
template: `
<div>
<h2>学生姓名:{{name}}</h2>
<h2>学生年龄:{{age}}</h2>
</div>
`,
data() {
return {
name: '小王',
age: 20,
}
}
})
//创建vm
new Vue({
el: '#root',
data: {
name: '你好,世界!'
},
//第二步:注册组件(局部注册)
components: {
school,
student
}
})
const hello = Vue.extend({
template: `
<div><h2>你好鸭!王同学</h2></div>
`
})
Vue.component('hello', hello)
new Vue({
el: '#root2'
})
</script>
</body>
总结
本篇文章就到这里了,希望能够给你带来帮助,也希望您能够多多关注的更多内容!
以上是 Vue之组件详解 的全部内容, 来源链接: utcz.com/p/240142.html