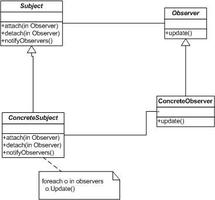
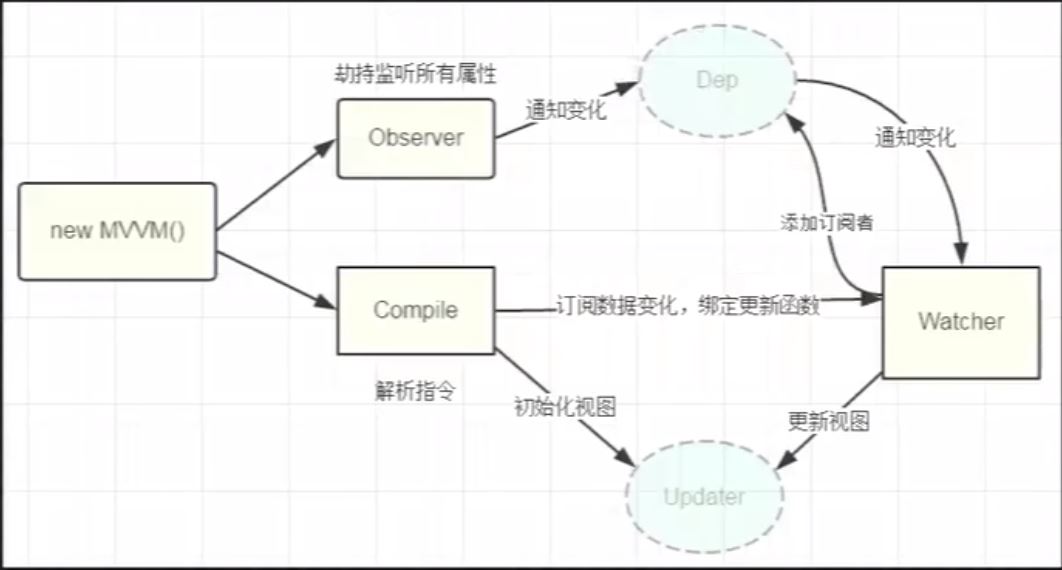
Vue发布订阅模式实现过程图解
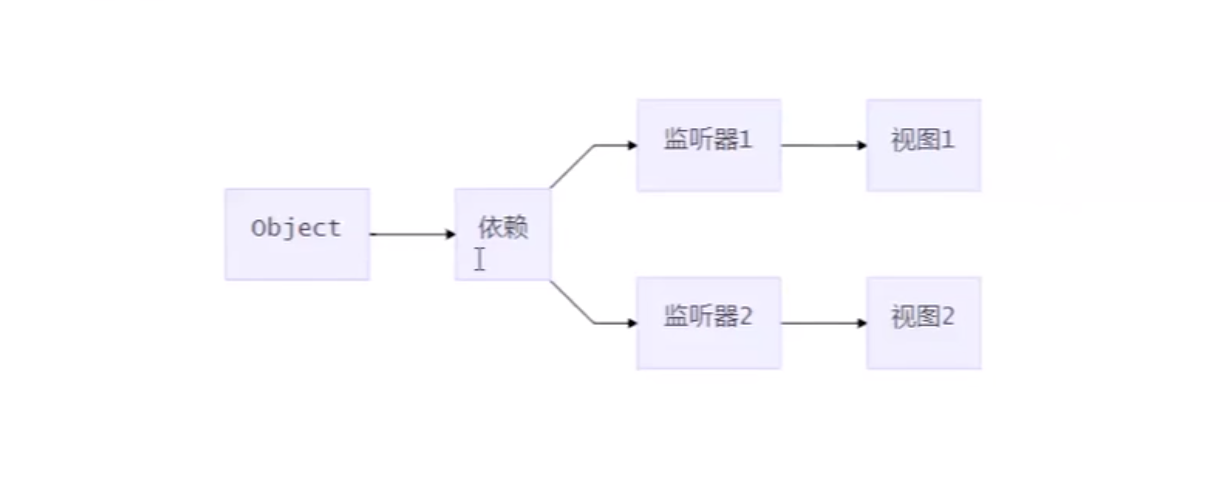
vue项目中不同组件间通信一般使用vuex,通常情况下vuex和EventBus不应该混用,不过某些场景下不同组件间只有消息的交互,这时使用EventBus消息通知的方式就更合适一些。
图解
html
<body>
<script src="./Dvue.js"></script>
<script>
const app = new DVue({
data: {
test: "I am test",
foo: {
bar: "bar"
}
}
})
app.$data.test = "hello world!"
// app.$data.foo.bar = "hello!"
</script>
</body>
Dvue.js
class DVue {
constructor(options) {
this.$options = options
// 数据响应化
this.$data = options.data
this.observe(this.$data)
// 模拟一下watcher创建
// 激活get 并将依赖添加到deps数组上
new Watcher()
this.$data.test
new Watcher()
this.$data.foo.bar
}
observe(value) {
// 判断value是否是对象
if (!value || typeof value !== 'object') {
return
}
// 遍历该对象
Object.keys(value).forEach(key => {
this.defineReactive(value, key, value[key])
})
}
// 数据响应化
defineReactive(obj, key, val) {
// 判断val内是否还可以继续调用(是否还有对象)
this.observe(val) // 递归解决数据嵌套
// 初始化dep
const dep = new Dep()
Object.defineProperty(obj, key, {
get() {
// 读取的时候 判断Dep.target是否有,如果有则调用addDep方法将Dep.target添加到deps数组上
Dep.target && dep.addDep(Dep.target)
return val
},
set(newVal) {
if (newVal === val) {
return;
}
val = newVal
// console.log(`${key}属性更新了:${val}`)
dep.notify() // 更新时候调用该方法
}
})
}
}
// Dep: 用来管理Watcher
class Dep {
constructor() {
// 这里存放若干依赖(watcher) |一个watcher对应一个属性
this.deps = [];
}
// 添加依赖
addDep (dep) {
this.deps.push(dep)
}
// 通知方法
notify() {
this.deps.forEach(dep => dep.update())
}
}
// Watcher
class Watcher {
constructor () {
// 将当前watcher实例指定到Dep静态属性target上
Dep.target = this // 当前this就是Watcher对象
}
update() {
console.log('属性更新了')
}
}
以上就是本文的全部内容,希望对大家的学习有所帮助,也希望大家多多支持。
以上是 Vue发布订阅模式实现过程图解 的全部内容, 来源链接: utcz.com/p/237241.html