vue 授权获取微信openId操作
1、获取url中参数code; 根据code 获取openId;调用后台接口获取openId 。
参考文档:https://mp.weixin.qq.com/wiki?t=resource/res_main&id=mp1421140842
function getUrlKey(name){//获取url 参数
return decodeURIComponent((new RegExp('[?|&]'+name+'='+'([^&;]+?)(&|#|;|$)').exec(location.href)||[,""])[1].replace(/\+/g,'%20'))||null;
}
function getCodeApi(state){//获取code
let urlNow=encodeURIComponent(window.location.href);
let scope='snsapi_base'; //snsapi_userinfo //静默授权 用户无感知
let appid='wx4cc5d5c123123123';
let url=`https://open.weixin.qq.com/connect/oauth2/authorize?appid=${appid}&redirect_uri=${urlNow}&response_type=code&scope=${scope}&state=${state}#wechat_redirect`;
window.location.replace(url);
}
//注意代码放置位置
export default {
created(){
let code=getUrlKey("code");//获取url参数code
if(code){ //拿到code, code传递给后台接口换取opend
getOpenIdApi(code).then(res=>{
console.log(res);
}).catch(res=>{})
}else{
getCodeApi("123");
}
}
}
补充知识:vue 微信公众号支付 jssdk jsapi实现微信支付(完整版)
是自己项目里支付功能测试成功后的代码参考,希望能帮助到曾和我一样想找到有效参考借鉴的朋友们,
废话不多说,直接讲具体的操作规程及完整代码
代码部份:
一、vue的环境配置:
1. 先在当前项目的命令行工具里安装npm install weixin-jsapi
2. 在当前支付页面引用该weixin-jsapi
import wx from 'weixin-jsapi'
二、调用后台接口,正式使用jssdk:
created(){
this.userId = JSON.parse(Cookie.get("user")).id;//这是在我页面需要获取的userid,不需要的可自行删悼,不在支付代码范围
this.getConfig();,
},
methods: {
getConfig(){
console.log(window.location.href);
var url = window.location.href;
this.$http.post('**此处写后台提供获取jsapi相关配置的接口**',{
encodeUrl:Encrypt(url.split("#")[0]) //直接丢弃#及后面的字符串 注意这里Encrypt因为我的项目里使用了ase加密解密,所以这么写的
})
.then(function(response) {
if(response.data.flag == true){
var data = JSON.parse(Decrypt(response.data.data));//将解密后的字符串转为对象 Decrypt这里是解密,不需要的就直接过滤悼
console.log(data);
//下列的data.均为后台接口返回的字段,比如我的项里里返回的是 appid,timestamp,nonceStr,signature
wx.config({
debug: ture,//这里一般在测试阶段先用ture,等打包给后台的时候就改回false,
appId: data.appid,
timestamp: data.timestamp,
nonceStr: data.noncestr,
signature: data.signature,
jsApiList: ['chooseWXPay']
})
wx.ready(function(){
wx.checkJsApi({
jsApiList: ['chooseWXPay'],
success:function(res){
console.log("seccess")
console.log(res)
},
fail:function(res){
console.log("fail");
console.log(res)
}
})
})
}else{
Toast({
message: response.data.detailMsg
});
}
}).catch(function(error){
Toast({//提示引用的是mint-UI里toast
message: '获取config失败,请重试'
});
});
},
//报名缴费 ( 支付按钮绑定@click="toapply()"事件)
toapply(id){
var $this = this;
this.$http.post('**此处写后台提供的获取支付json数据接口**',{
encodeStr:Encrypt(id)//项目里的加密
})
.then(function(response) {
if(response.data.flag == true){
var data = JSON.parse(Decrypt(response.data.data));//将解密后的字符串转为对象
console.log(data);
wx.ready(function(){
wx.chooseWXPay({
appId:data.appId,
timestamp: data.timeStamp, // 支付签名时间戳,注意微信jssdk中的所有使用timestamp字段均为小写。但最新版的支付后台生成签名使用的timeStamp字段名需大写其中的S字符
nonceStr: data.nonceStr, // 支付签名随机串,不长于 32
package: data.package, // 统一支付接口返回的prepay_id参数值,提交格式如:prepay_id=\*\*\*)
signType: data.signType, // 签名方式,默认为'SHA1',使用新版支付需传入'MD5'
paySign: data.paySign, // 支付签名
success: function (res) {
//跳转到支付成功页面有这个页面
$this.$router.push({
path: "/success_page",
name:"success_page"
})
console.log(res);
},
cancel: function (res) {//提示引用的是mint-UI里toast
Toast('已取消支付');
},
fail: function (res) {
Toast('支付失败,请重试');
}
})
})
}else{
Toast({
message: '获取支付信息失败,请重试',
});
}
}).catch(function(error){
Toast({
message: '获取订单信息失败,请重试',
});
console.log(error);
});
},
}
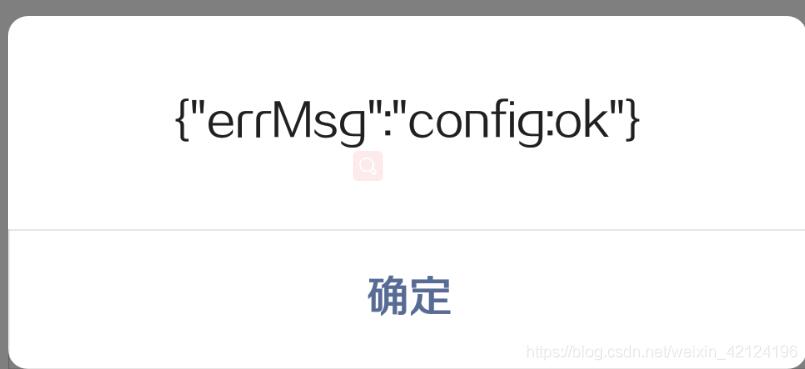
这里代码部份完成后,就支付测试看看提示,如若弹出以下提示说明签名是正确的
二、商户和公众号后台配置
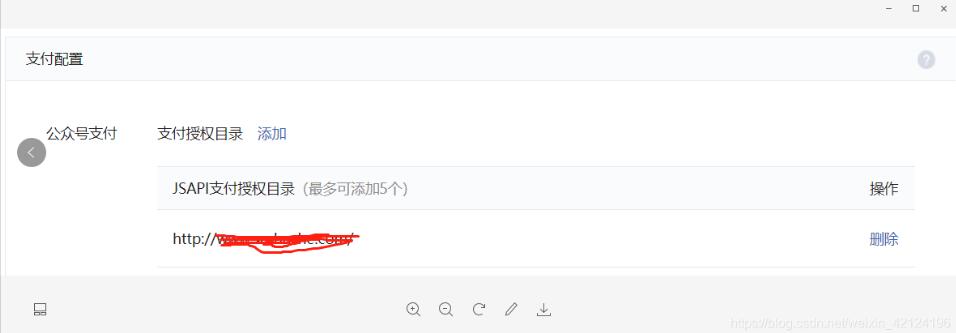
1.先去商户号后台里配置url域名:商户平台–>产品中心–>开发配置
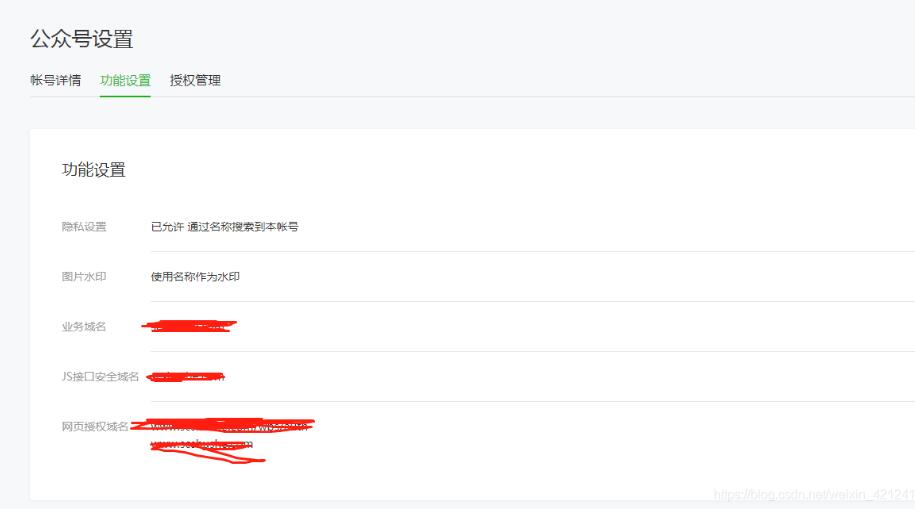
然后到微信公众号后台,公众号设置/功能设置里配置url域名
ps:这里要与商户后台里的配置域名同步
代码和配置都完成后,测试结果如下:
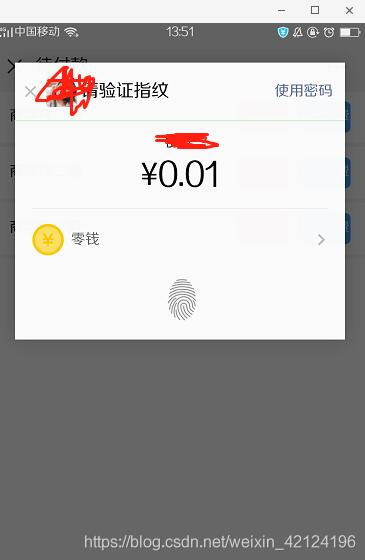
最后,讲讲我在支付过程中遇到的问题:
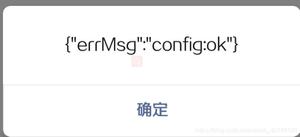
因为微信支付众所周知的测试麻烦,我是直接完成代码后打包给后台发布正式环境测试的,测试过程中一直出现以下的弹窗提示信息:
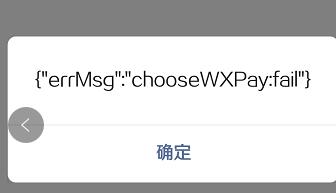
排除法,代码里的签名没有bug的情况下,还一直出现这个提示,那就只有一个问题,url路径配置,网上查了很多说url路径中不能带# ,说是需要把把路由的hash模式改为hostry模式,如下:
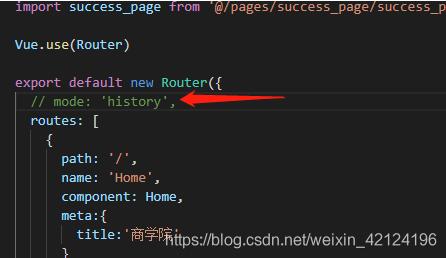
还说让后台也需要做去悼#相应的改动,按这个方法打包给后台测试 ,结果页面就出现404了,行不通,所以我是利用处理如下:
url.split("#")[0]直接丢弃#及后面的字符串
后台没有作#处理,后面就发现我们是商户后台没有配置url域名这个问题,是这里面的域名配置不能带有#, 配置好后台之后,测试就成功了,还别说,测试成功的那一刻,倍儿有成功感了
以上这篇vue 授权获取微信openId操作就是小编分享给大家的全部内容了,希望能给大家一个参考,也希望大家多多支持。
以上是 vue 授权获取微信openId操作 的全部内容, 来源链接: utcz.com/p/218743.html

