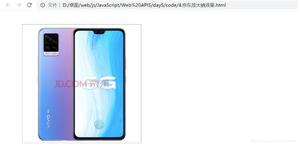
用js实现放大镜效果
本文实例为大家分享了js实现放大镜效果的具体代码,供大家参考,具体内容如下
该放大区域用背景图片放大
<!DOCTYPE html>
<html lang="zh">
<head>
<meta charset="UTF-8">
<meta name="viewport" content="width=device-width, initial-scale=1.0">
<meta http-equiv="X-UA-Compatible" content="ie=edge">
<title></title>
<style type="text/css">
body {
height: 1200px;
background-color: lightskyblue;
}
ul {
margin: 0;
padding: 0;
list-style: none;
}
.itemarea {
position: relative;
width: 500px;
height: 680px;
border: 1px black solid;
margin: 50px auto;
}
.itemarea .pic {
margin-bottom: 15px;
}
.itemarea img {
width: 500px;
height: 600px;
}
.itemarea .pic .cover {
position: absolute;
left: 0;
top: 0;
width: 200px;
height: 200px;
background-image: url(img/7.png);
opacity: 0.6;
display: none;
}
.itemarea .list {
display: flex;
}
.itemarea .list li {
margin: auto;
}
.itemarea .list img {
display: block;
width: 50px;
height: 50px;
}
.itemarea .detail {
position: absolute;
top: 0;
left: 500px;
/* 此处为放大2倍,显示框的大小是遮阴框宽高的2倍 */
width: 400px;
height: 400px;
display: none;
border: 1px black solid;
background: url(img/1.PNG);
/* 此处放大2倍,背景图片的宽高是左边显示图片的2倍 */
background-size: 1000px 1200px;
/* background-size: 200%; 或者这样写*/
}
.itemarea .list .current {
border: 2px green solid;
}
</style>
</head>
<body>
<div class="itemarea">
<div class="pic">
<img src="img/1.PNG">
<div class="cover"></div>
</div>
<ul class="list">
<li><img src="img/1.PNG"></li>
<li><img src="img/2.PNG"></li>
<li><img src="img/3.PNG"></li>
<li><img src="img/4.PNG"></li>
<li><img src="img/5.PNG"></li>
<li><img src="img/6.PNG"></li>
</ul>
<div class="detail">
</div>
</div>
<script type="text/javascript">
/*
需求
1,鼠标放入图片时候,会动态修改图片地址
2,鼠标放入大图,会动态修改右边图片位置
2.1显示图片的放大镜,
2.2显示右边效果
*/
var itemarea = document.querySelector(".itemarea");
var list = document.querySelector(".list");
/* 上面的大图片 */
img = document.querySelector(".pic img");
/* 所有的图片 */
imgs = list.querySelectorAll("img");
/* 主图片展示区域 */
pic = document.querySelector(".itemarea .pic");
/* 放大镜 */
cover = document.querySelector(".cover");
/* 放大的区域 */
detail = document.querySelector(".detail");
/* 监听事件,切换图片src */
list.addEventListener("mousemove", function(e) {
if (e.target.tagName == "IMG") {
img.src = e.target.src;
detail.style.backgroundImage = "url(" + e.target.src + ")";
/* 遍历 所有边框都为空*/
imgs.forEach(function(item) {
item.className = "";
})
/* 选中的改变边框颜色*/
e.target.className = "current";
}
})
pic.addEventListener("mousemove", function(e) {
/* 放大镜距离浏览器的距离 */
var x = e.clientX;
y = e.clientY;
/* 图片框距离浏览器的距离 */
cx = pic.getBoundingClientRect().left;
cy = pic.getBoundingClientRect().top;
tx = x - cx - 100;
ty = y - cy - 100;
if (tx < 0) {
tx = 0;
}
if (ty < 0) {
ty = 0;
}
/* 显示图片宽-遮阴框的宽 */
if (tx >300) {
tx = 300;
}
/* 显示图片高-遮阴框的高 */
if (ty > 400) {
ty = 400;
}
cover.style.left = tx + "px";
cover.style.top = ty + "px";
/* 根据遮阴框在盒子的移动距离百分比------对应放映框在大图片的移动距离百分比 */
/* tx,ty/遮阴框的极限范围 */
detail.style.backgroundPosition = tx / 300 * 100 + "%" + ty / 400 * 100 + "%";
})
/* 移除隐藏 */
itemarea.onmouseout = function() {
cover.style.display = "none";
detail.style.display = "none"
}
itemarea.onmouseover = function() {
cover.style.display = "block";
detail.style.display = "block";
}
</script>
</body>
</html>
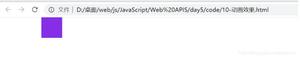
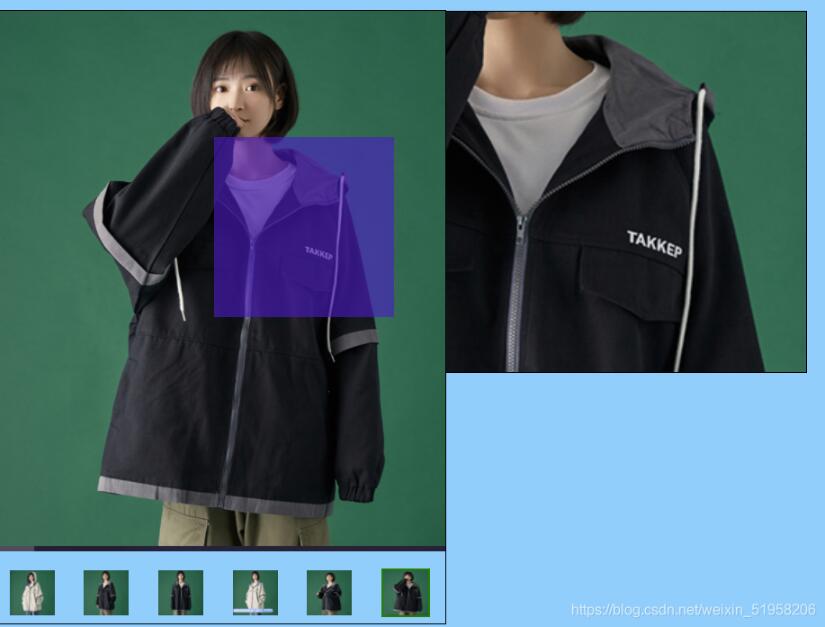
效果如下:
以上就是本文的全部内容,希望对大家的学习有所帮助,也希望大家多多支持。
以上是 用js实现放大镜效果 的全部内容, 来源链接: utcz.com/p/218400.html