React-Native 之 项目实战(一)

前言
- 本文有配套视频,可以酌情观看。
- 文中内容因各人理解不同,可能会有所偏差,欢迎朋友们联系我。
- 文中所有内容仅供学习交流之用,不可用于商业用途,如因此引起的相关法律法规责任,与我无关。
- 如文中内容对您造成不便,烦请联系 277511806@qq.com 处理,谢谢。
- 转载麻烦注明出处,谢谢。
资料:链接: https://pan.baidu.com/s/1b3abwy 密码: k8p5
源码托管到 github 上,需要源码的 点我下载,喜欢的话记得 Star,谢谢!
ES5转ES6
- 关于ES6语法,建议大家可以看下阮老师的 ECMAScriot 6
- 快速了解的话,大家可以参考一下 es6语法快速上手
项目简介
- 先来看下我们仿照的这款APP的效果:
- 从上图中,我们可以看出复杂度并不大,但是时间关系我们尽量将所有的模块都做完,并完善细节。
译注:
建议打开 视频 配合 文字 学习,以免有某些细节文中没有提到,但以文中内容为准(根据反馈进行相应更新)
之所以选择这款APP,和我个人的爱好有关,当然关键还是因为这个APP整体并不复杂,包含了市面上常见APP的样式,并且很顺利地就获取到所有请求参数和图片资源,很适合我们体验 React-native 大致的开发流程。
项目分析
在开发APP前,产品经理大致会进行需求的分析,然后开会讨论开发过程中需要使用到的技术、会遇到的难点、分配相应任务、倾听开发人员意见并进行相应的修改,最终确定整体原型图、开发流程、技术、周期等等,当然其中还有UI的介入,我们没有产品经理,UI也有现成的,所以大致给大家划分以下几块:
需求分析:这款APP主要是通过抓取各大电商平台的 商品优惠信息 进行筛选、分类并最终展现给用户,使用户可以方便、快捷、实时的获取高质量的优惠信息。
开发模型:我们这边类似基于 原型模型 开发。
使用的技术:React-Native
功能模块:主要分为 首页、海淘模块、小时风云榜 三大模块等其它附属模块(酌情增加)。
整体架构:
- 主体:由 TabBar 作为主体框架,以 首页、海淘模块、小时风云榜 为整体模块,根据 原型图 的效果选择相应的跳转方式
- 数据展示:根据 原型图 选择相应的数据展示方式
命名规则:参考 编码规范文档(不同公司之间都有差异,具体看公司提供的文档,这边先遵守下面提到的规则即可)
测试:MDZZ,谁测试→→!
工程环境配置
所有需要用到的资源点击下载。
首先,来配置 iOS 端。
将压缩包内的 Images.xcassets 文件夹直接替换掉我们iOS工程中的 Images.xcassets 文件夹。
这时候我们可以看到所有图片资源已经成功导入到iOS工程中,接着我们点击工程文件进行一些必要的配置。
General——App Icons and Launch Images—— 修改Launch Images Source为Images.xcassets文件夹内的 LaunchImage ,清除Launch Screen File内容。General——Deployment Info——Device Orientation—— 只保留 Portrait 选项。打开 info.plist 文件,找到 Bundle name 选项,将其内容修改为 逛丢学习
打开 info.plist 文件,找到 App Transport Security Settings 选项,给其添加 Allow Arbitrary Loads 选项并设置内容为 YES (如果使用
IPV6标准可以忽略这一步)OK,至此 iOS 端配置完毕。
接着,来配置 Android 端。
将压缩包内的 drawable-xxhdpi 文件夹复制粘贴到 GD/android/app/src/main/res/ 中。
设置 APP图标 进入 GD/android/app/sec/ 打开 AndroidManifest 文件,修改 android:icon 项,如下:
<applicatio>android:icon="@drawable/icon"
</application>
设置 APP名称 进入 GD/android/app/src/main/res/values/ 中,打开 strings.xml 文件,做如下修改:
<resources><string name="app_name">逛丢学习</string>
</resources>
OK,至此 Android 配置完毕。
目录结构与命名规则
- 为了方便理解,我们这边先不按照常规的React-native开发结构进行开发,后续章节再慢慢转变
- 这边我们将文件分为 main(入口)、home(首页)、ht(海淘)、hourList(小时风云榜) 4大部分,将相关的文件放入对应的文件夹,避免开发中频繁切换文档给新手带来烦躁感
- 命名规则:
- 文件夹命名方式我们就跟着 React-Native 默认的方式,采用 小写 + 下划线 进行命名
- 文件命名方式我们采用 前缀(大写) + 模块名称(帕斯卡) 的方式进行命名
- 函数、常量、变量等使用 驼峰命名规则
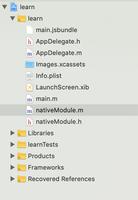
目录结构:
译注:
- 驼峰命名规则:首字母小写,后续单词以大写开头,详情点击 驼峰命名 查看阅读。
- 帕斯卡命名规则:和驼峰类似,只不过将首字母改为大写,详情点击 帕斯卡命名 查看阅读。
- 下划线命名规则:就是使用下划线分割单词。
第三方框架
这边来讲下在 React-Native 中怎么导入第三方框架
首先,第三方框架肯定是要到 GitHub 找喽。
在搜索框内搜索 react-native-tab-navigator 。
在下面的 说明 中告诉我们了,使用终端 —— 进到工程的主目录下 —— 复制命令行()—— 回车 —— 等待下载完成就导入到工程中了。
到此,第三方框架导入完成,使用在下面会提到。
主体框架搭建
上面提到使用 TabBar 作为主体框架,但是官方只提供了iOS端的 TabBarIOS ,时间原因为了加快开发进度,并且顺带讲解 第三方框架使用 所以我们使用 <react-native-tab-navigator>进行开发
既然要使用框架,肯定要先引入框架文件。
// 引用第三方框架 import TabNavigator from 'react-native-tab-navigator';
- 根据 使用说明 文档可以看出,使用方法和官方的 TabBarIOS 类似(不清楚的麻烦参考React Native 之 TabBarIOS和TabBarIOS.Item使用),所以我们把 三大模块 添加进TabBar,并且各个模块都是以 Navigator 的形式存在。
export default class GD extends Component { // ES6
// 构造
constructor(props) {
super(props);
// 初始状态
this.state = {
selectedTab:'home',
};
}
// 返回TabBar的Item
renderTabBarItem(title, selectedTab, image, selectedImage, component) {
return(
<TabNavigator.Item
selected={this.state.selectedTab === selectedTab}
title={title}
selectedTitleStyle={{color:'black'}}
renderIcon={() => <Image source={{uri:image}} style={styles.tabbarIconStyle} />}
renderSelectedIcon={() => <Image source={{uri:selectedImage}} style={styles.tabbarIconStyle} />}
onPress={() => this.setState({ selectedTab: selectedTab })}>
// 添加导航功能
<Navigator
// 设置路由
initialRoute={{
name:selectedTab,
component:component
}}
renderScene={(route, navigator) => {
let Component = route.component;
return <Component {...route.params} navigator={navigator} />
}}
/>
</TabNavigator.Item>
);
}
render() {
return (
<TabNavigator>
{/* 首页 */}
{this.renderTabBarItem("首页", 'home', 'tabbar_home_30x30', 'tabbar_home_selected_30x30', Home)}
{/* 海淘 */}
{this.renderTabBarItem("海淘", 'ht', 'tabbar_abroad_30x30', 'tabbar_abroad_selected_30x30', HT)}
{/* 小时风云榜 */}
{this.renderTabBarItem("小时风云榜", 'hourlist', 'tabbar_rank_30x30', 'tabbar_rank_selected_30x30', HourList)}
</TabNavigator>
);
}
}
const styles = StyleSheet.create({
container: {
flex: 1,
justifyContent: 'center',
alignItems: 'center',
backgroundColor: '#F5FCFF',
},
tabbarIconStyle: {
width:Platform.OS === 'ios' ? 30 : 25,
height:Platform.OS === 'ios' ? 30 : 25,
}
});
- 至此,主体框架搭建完毕。
自定义导航栏样式
从效果图中可以看出,导航栏的样式都差不多,因为我们前面已经设置了 Navigator ,这边的话我们还需要自定义 Navigator 的样式,可以看到所有的 Navigator 样式都是相近的,所以这边我们就抽出来,让所有的 Navigator 共用一个组件就可以了。
那么首先我们在 main 文件夹中创建 GDCommunalNavBar 文件并初始化一下里面基本的内容
接着,我们来看下首页的导航栏,首页导航栏分别有左中右三个按钮,左边为半小时热门,中间为点击下拉显示支持筛选的平台的列表,右边则是商品搜索,通常 Navigator 也只有这3个组件,为了使用者高度地自定义,这边我们只在 currencyNavBar 中设置3个组件的布局,然后提供接口,获取外部传入的值,并在内部判断是否需要创建相应的组件。
export default class GDCommunalNavBar extends Component {
static propTypes = {
leftItem:PropTypes.func,
titleItem:PropTypes.func,
rightItem:PropTypes.func,
};
// 左边
renderLeftItem() {
if (this.props.leftItem === undefined) return;
return this.props.leftItem();
}
// 中间
renderTitleItem() {
if (this.props.titleItem === undefined) return;
return this.props.titleItem();
}
// 右边
renderRightItem() {
if (this.props.rightItem === undefined) return;
return this.props.rightItem();
}
render() {
return (
<View style={styles.container}>
{/* 左边 */}
<View>
{this.renderLeftItem()}
</View>
{/* 中间 */}
<View>
{this.renderTitleItem()}
</View>
{/* 右边 */}
<View>
{this.renderRightItem()}
</View>
</View>
);
}
}
const styles = StyleSheet.create({
container: {
width:width,
height:Platform.OS === 'ios' ? 64 : 44,
backgroundColor:'white',
flexDirection:'row',
justifyContent:'space-between',
alignItems:'center',
borderBottomWidth:0.5,
borderBottomColor:'gray',
paddingTop:Platform.OS === 'ios' ? 15 : 0,
},
});
- 这边我们就已经完成了 Navigator 的样式,我们到首页来用一下,看好不好用,使用这边就不说了(1.引用外部文件;2.<CommunalNavBar ...参数/>)
![Upload 自定义Navigator样式.gif failed. Please try again.]
首页半小时热门
- 这边我们就先从 半小时热门 开始,像这样的数据展示,我们肯定是优先选择 ListView ,其中,cell 的样式分解如下:
我们先将数据请求下来,确定正确获取到数据后,再来定义 cell 的样式。
接下来我们来自定义一下 cell 样式
export default class GDCommunalNavBar extends Component {
static propTypes = {
image:PropTypes.string,
title:PropTypes.string,
};
render() {
return (
<View style={styles.container}>
{/* 左边图片 */}
<Image source={{uri:this.props.image}} style={styles.imageStyle} />
{/* 中间的文中 */}
<View>
<Text numberOfLines={3} style={styles.titleStyle}>{this.props.title}</Text>
</View>
{/* 右边的箭头 */}
<Image source={{uri:'icon_cell_rightArrow'}} style={styles.arrowStyle} />
</View>
);
}
}
const styles = StyleSheet.create({
container: {
flexDirection:'row',
alignItems:'center',
justifyContent:'space-between',
backgroundColor:'white',
height:100,
width:width,
borderBottomWidth:0.5,
borderBottomColor:'gray',
marginLeft:15
},
imageStyle: {
width:70,
height:70,
},
titleStyle: {
width:width * 0.65,
},
arrowStyle: {
width:10,
height:10,
marginRight:30
}
});
- 好了,到这里 cell 样式也定义完成并且效果是一样的。
export default class GDHalfHourHot extends Component {
// 构造
constructor(props) {
super(props);
// 初始状态
this.state = {
dataSource: new ListView.DataSource({rowHasChanged:(r1, r2) => r1 !== r2}),
};
// 绑定
this.fetchData = this.fetchData.bind(this);
}
// 网络请求
fetchData() {
fetch('http://guangdiu.com/api/gethots.php')
.then((response) => response.json())
.then((responseData) => {
this.setState({
dataSource: this.state.dataSource.cloneWithRows(responseData.data)
});
})
.done()
}
popToHome() {
this.props.navigator.pop();
}
// 返回中间按钮
renderTitleItem() {
return(
<Text style={styles.navbarTitleItemStyle}>近半小时热门</Text>
);
}
// 返回右边按钮
renderRightItem() {
return(
<TouchableOpacity
onPress={()=>{this.popToHome()}}
>
<Text style={styles.navbarRightItemStyle}>关闭</Text>
</TouchableOpacity>
);
}
// 返回每一行cell的样式
renderRow(rowData) {
return(
<CommunalHotCell
image={rowData.image}
title={rowData.title}
/>
);
}
componentDidMount() {
this.fetchData();
}
render() {
return (
<View style={styles.container}>
{/* 导航栏样式 */}
<CommunalNavBar
titleItem = {() => this.renderTitleItem()}
rightItem = {() => this.renderRightItem()}
/>
<ListView
dataSource={this.state.dataSource}
renderRow={this.renderRow}
showsHorizontalScrollIndicator={false}
style={styles.listViewStyle}
/>
</View>
);
}
}
const styles = StyleSheet.create({
container: {
flex:1,
alignItems: 'center',
},
navbarTitleItemStyle: {
fontSize:17,
color:'black',
marginLeft:50
},
navbarRightItemStyle: {
fontSize:17,
color:'rgba(123,178,114,1.0)',
marginRight:15
},
listViewStyle: {
width:width,
}
});
- 从效果图中可以看出,我们还少了上面的提示标题,这边很简单,我们也来快速完成一些
{/* 顶部提示 */} <View style={styles.headerPromptStyle}>
<Text>根据每条折扣的点击进行统计,每5分钟更新一次</Text>
</View>
样式部分:
headerPromptStyle: { height:44,
width:width,
backgroundColor:'rgba(239,239,239,0.5)',
justifyContent:'center',
alignItems:'center'
}
隐藏于显示TabBar之通知的使用
- 配置TabBar隐藏与显示条件
// ES6
// 构造
constructor(props) {
super(props);
// 初始状态
this.state = {
selectedTab:'home',
isHiddenTabBar:false, // 是否隐藏tabbar
};
}
<TabNavigator
tabBarStyle={this.state.isHiddenTabBar !== true ? {} : {height:0, overflow:'hidden'}}
sceneStyle={this.state.isHiddenTabBar !== true ? {} : {paddingBottom:0}}
>
{/* 首页 */}
{this.renderTabBarItem("首页", 'home', 'tabbar_home_30x30', 'tabbar_home_selected_30x30', Home)}
{/* 海淘 */}
{this.renderTabBarItem("海淘", 'ht', 'tabbar_abroad_30x30', 'tabbar_abroad_selected_30x30', HT)}
{/* 小时风云榜 */}
{this.renderTabBarItem("小时风云榜", 'hourlist', 'tabbar_rank_30x30', 'tabbar_rank_selected_30x30', HourList)}
</TabNavigator>
这边我们引入新的知识 —— 通知
使用通知很简单,首先需要注册通知并在适当的地方进行销毁
componentDidMount() {
// 注册通知
this.subscription = DeviceEventEmitter.addListener('isHiddenTabBar', (data)=>{this.tongZhi(data)});
}
componentWillUnmount() {
// 销毁
this.subscription.remove();
}
- 接着在我们需要的地方发送通知
componentWillMount() {
// 发送通知
DeviceEventEmitter.emit('isHiddenTabBar', true);
}
componentWillUnmount() {
// 发送通知
DeviceEventEmitter.emit('isHiddenTabBar', false);
}
以上是 React-Native 之 项目实战(一) 的全部内容, 来源链接: utcz.com/z/381056.html

