java冷知识:javac AbstractProcessor详解
它可以做什么?
它做的事情当然是生成新类或修改原始的类,比如你遇到这样的情况下就可以使用:
- 反射好慢,曾见过一个大厂大量是Gson,由于Gson序列化时大量使用了反射,每一个field,每一个get、set都需要用反射,由此带来了性能问题。解决方法就是使用它尽量减少反射(替换成JSONObject)
- 生成代码,只要是有注解的地方都可以读取,总之很多(有些android orm框架)
Processor
javax.annotation.processing.Processor 这个接口将提供注解处理,它遵循SPI规约进行拓展,jdk默认就有很多处理器的实现。
AbstractProcessor
注解处理器是最重要的拓展处理类了。
注意:请确认JAVA的环境变量已经配置成功,并且把tools.jar(它源于此包)加入到自己电脑的环境变量中
| ProcessingEnvironment | 是一个注解处理工具的集合 |
| Element | 是一个接口,表示一个程序元素,它可以是包、类、方法或者一个变量。Element已知的子接口有:
PackageElement 表示一个包程序元素。提供对有关包及其成员的信息的访问。 ExecutableElement 表示某个类或接口的方法、构造方法或初始化程序(静态或实例),包括注释类型元素。 TypeElement 表示一个类或接口程序元素。提供对有关类型及其成员的信息的访问。注意,枚举类型是一种类,而注解类型是一种接口。 VariableElement 表示一个字段、enum 常量、方法或构造方法参数、局部变量或异常参数。 |

源码
重点关注process方法
// 源于javax.annotation.processing;
public abstract class AbstractProcessor implements Processor {
// 集合中指定支持的注解类型的名称(这里必须时完整的包名+类名)
public Set<String> getSupportedAnnotationTypes() {
SupportedAnnotationTypes sat = this.getClass().getAnnotation(SupportedAnnotationTypes.class);
if (sat == null) {
if (isInitialized())
processingEnv.getMessager().printMessage(Diagnostic.Kind.WARNING,
"No SupportedAnnotationTypes annotation " +
"found on " + this.getClass().getName() +
", returning an empty set.");
return Collections.emptySet();
}
else
return arrayToSet(sat.value());
}
// 指定当前正在使用的Java版本
public SourceVersion getSupportedSourceVersion() {
SupportedSourceVersion ssv = this.getClass().getAnnotation(SupportedSourceVersion.class);
SourceVersion sv = null;
if (ssv == null) {
sv = SourceVersion.RELEASE_6;
if (isInitialized())
processingEnv.getMessager().printMessage(Diagnostic.Kind.WARNING,
"No SupportedSourceVersion annotation " +
"found on " + this.getClass().getName() +
", returning " + sv + ".");
} else
sv = ssv.value();
return sv;
}
// 初始化处理器
public synchronized void init(ProcessingEnvironment processingEnv) {
if (initialized)
throw new IllegalStateException("Cannot call init more than once.");
Objects.requireNonNull(processingEnv, "Tool provided null ProcessingEnvironment");
this.processingEnv = processingEnv;
initialized = true;
}
/**
* 这些注解是否由此 Processor 处理,该方法返回ture表示该注解已经被处理, 后续不会再有其他处理器处理; 返回false表示仍可被其他处理器处理
*/
public abstract boolean process(Set<? extends TypeElement> annotations,
RoundEnvironment roundEnv);
}
实现一个打印可以API的功能
由于本人是maven环境,以此展开讲
<build>
<plugins>
<plugin>
<groupId>org.apache.maven.plugins</groupId>
<artifactId>maven-compiler-plugin</artifactId>
<configuration>
<source>1.8</source>
<target>1.8</target>
<!--Disable annotation processing for ourselves-->
<!--<compilerArgument>-proc:none</compilerArgument>-->
</configuration>
</plugin>
</plugins>
</build>
步骤1:实现一个注解处理器
@Retention(RetentionPolicy.SOURCE)
@Target({ElementType.TYPE, ElementType.METHOD})
public @interface ApiAnnotation {
String author() default "alex.chen";
String date();
int version() default 1;
}
@SupportedAnnotationTypes({"com.kxtx.annotation.ApiAnnotation"})
@SupportedSourceVersion(SourceVersion.RELEASE_8)
//@AutoService(Processor.class)
public class MyProcessor extends AbstractProcessor {
//类名的前缀、后缀
public static final String SUFFIX = "AutoGenerate";
public static final String PREFIX = "My_";
@Override
public boolean process(Set<? extends TypeElement> annotations, RoundEnvironment env) {
Messager messager = processingEnv.getMessager();
for (TypeElement typeElement : annotations) {
for (Element e : env.getElementsAnnotatedWith(typeElement)) {
//打印
messager.printMessage(Diagnostic.Kind.WARNING, "Printing:" + e.toString());
messager.printMessage(Diagnostic.Kind.WARNING, "Printing:" + e.getSimpleName());
messager.printMessage(Diagnostic.Kind.WARNING, "Printing:" + e.getEnclosedElements().toString());
//获取注解
ApiAnnotation annotation = e.getAnnotation(ApiAnnotation.class);
//获取元素名并将其首字母大写
String name = e.getSimpleName().toString();
char c = Character.toUpperCase(name.charAt(0));
name = String.valueOf(c + name.substring(1));
//包裹注解元素的元素, 也就是其父元素, 比如注解了成员变量或者成员函数, 其上层就是该类
Element enclosingElement = e.getEnclosingElement();
//获取父元素的全类名,用来生成报名
String enclosingQualifiedname;
if (enclosingElement instanceof PackageElement) {
enclosingQualifiedname = ((PackageElement) enclosingElement).getQualifiedName().toString();
} else {
enclosingQualifiedname = ((TypeElement) enclosingElement).getQualifiedName().toString();
}
try {
//生成包名
String generatePackageName = enclosingQualifiedname.substring(0, enclosingQualifiedname.lastIndexOf("."));
// 生成的类名
String genarateClassName = PREFIX + enclosingElement.getSimpleName() + SUFFIX;
//创建Java 文件
JavaFileObject f = processingEnv.getFiler().createSourceFile(genarateClassName);
// 在控制台输出文件路径
messager.printMessage(Diagnostic.Kind.WARNING, "Printing: " + f.toUri());
Writer w = f.openWriter();
try {
PrintWriter pw = new PrintWriter(w);
pw.println("package " + generatePackageName + ";");
pw.println("\npublic class " + genarateClassName + " { ");
pw.println("\n /** 打印值 */");
pw.println(" public static void print" + name + "() {");
pw.println(" // 注解的父元素: " + enclosingElement.toString());
pw.println(" System.out.println(\"代码生成的路径: " + f.toUri() + "\");");
pw.println(" System.out.println(\"注解的元素: " + e.toString() + "\");");
pw.println(" System.out.println(\"注解的版本: " + annotation.version() + "\");");
pw.println(" System.out.println(\"注解的作者: " + annotation.author() + "\");");
pw.println(" System.out.println(\"注解的日期: " + annotation.date() + "\");");
pw.println(" }");
pw.println("}");
pw.flush();
} finally {
w.close();
}
} catch (IOException e1) {
processingEnv.getMessager().printMessage(Diagnostic.Kind.ERROR,
e1.toString());
}
}
}
return true;
}
}
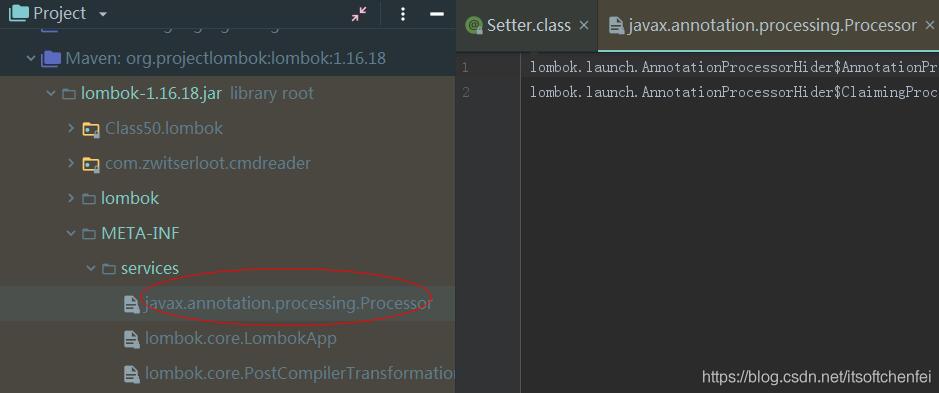
步骤2:配置一个spi,在resources目录新建META-INF/services/javax.annotation.processing.Processor,内容为MyProcessor类全名。
步骤3:在另一个项目中使用@ApiAnnotation就会发现生成了一个新My_feignAutoGenerate.class文件:
public class My_feignAutoGenerate {
public My_feignAutoGenerate() {
}
public static void printStartUp() {
System.out.println("代码生成的路径: file:/C:/Users/Administrator/Desktop/feign-async-master/target/generated-sources/annotations/My_feignAutoGenerate.java");
System.out.println("注解的元素: com.github.feign.StartUp");
System.out.println("注解的版本: 1");
System.out.println("注解的作者: alex");
System.out.println("注解的日期: 2019-03-6");
}
}
到这里基本上已经演示完了。
google的 auto-service
<dependency>
<groupId>com.google.auto.service</groupId>
<artifactId>auto-service</artifactId>
<version>1.0-rc2</version>
</dependency>
这个类库非常有用,它非常简单,使用@AutoService(Processor.class)会基于该接口和注解的类上自动帮我们生成META-INF/services下对应spi文件。它实现的原理就是通过注解处理器。
javapoet
有没有觉得上面pw.println("package " + generatePackageName + ";");这样的代码很痛苦啊?
JavaPoet is a Java API for generating .java source files.
package com.example.helloworld;
public final class HelloWorld {
public static void main(String[] args) {
System.out.println("Hello, JavaPoet!");
}
}
MethodSpec main = MethodSpec.methodBuilder("main")
.addModifiers(Modifier.PUBLIC, Modifier.STATIC)
.returns(void.class)
.addParameter(String[].class, "args")
.addStatement("$T.out.println($S)", System.class, "Hello, JavaPoet!")
.build();
TypeSpec helloWorld = TypeSpec.classBuilder("HelloWorld")
.addModifiers(Modifier.PUBLIC, Modifier.FINAL)
.addMethod(main)
.build();
JavaFile javaFile = JavaFile.builder("com.example.helloworld", helloWorld)
.build();
javaFile.writeTo(System.out);
你喜欢的lombok实现原理是怎样的呢?
lombok(用来帮助开发人员消除 Java 对象 的冗长),非常好用
里面源码就不再介绍了!!
以上为个人经验,希望能给大家一个参考,也希望大家多多支持。
以上是 java冷知识:javac AbstractProcessor详解 的全部内容, 来源链接: utcz.com/p/250569.html