深入Vue 的世界

Vue 实例上的属性
转载https://finget.github.io/2018/06/28/vue-family/?utm_medium=hao.caibaojian.com&utm_source=hao.caibaojian.com
组件树
-
$parent:用来访问组件实例的父实例 -
$root: 用来访问当前组件树的根实例 -
$children:用来访问当前组件实例的直接子组件实例 -
$refs:用来访问ref指令的子组件
DOM访问
-
$el:用来挂载当前组件实例的dom元素 -
$els:用来访问$el元素中使用了v-el指令的DOM元素
数据访问
-
$data:用来访问组件实例观察的数据对象 -
$options:用来访问组件实例化时的初始化选项对象
DOM方法的使用
-
$appendTo(elementOrSelector, callback):将el所指的DOM元素插入目标元素 -
$before(elementOrSelector, callback):将el所指的DOM元素或片段插入目标元素之前 -
$after(elementOrSelector, callback):将el所指的DOM元素或片段插入目标元素之后 -
$remove(callback):将el所指的DOM元素或片段从DOM中删除 -
$nextTick(callback):用来在下一次DOM更新循环后执行指定的回调函数
12 3 4 5 6 7 8 9 10 11 12 13 14 15 16 17 18 19 20 21 22 23 24 | // vue 的 渲染过程是异步的<template> <div id="app"> <p>{{text}}</p> </div> </template> <script> export default { data() { return { text: 0 }; } mounted(){ setInterval(()=> { this.text +=1; this.text +=1; this.text +=1; this.text +=1; this.text +=1; },1000) } } </script> |
可以看到text值的变化是0 5 10 15 … 而并没有出现 0 1 2 3 … 这样连续的变化
event方法的使用
1.监听
-
$on(event, callback):监听实例的自定义事件 -
$once(event, callback):同上,但只能触发一次 -
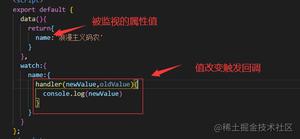
$watch(property,callback(new, old)): 监听属性的变化,拿到变化前后的值
12 3 4 5 6 7 8 9 10 11 12 13 14 15 16 | // 第一种写法watch: { text(new, old) { console.log(`${new}:${old}`); } } // 第二种写法 const unWatch = this.$watch('text',(new,old)=> console.log(`${new}:${old}`); }) // 2秒后销毁 unWatch setTimeout(()=> { unWatch(); },2000) // 两种写法的结果一样,只是第二种需要在组件销毁手动销毁$watch |
2.触发
-
$dispatch(event,args):派发事件,先在当前实例触发,再沿父链一层层向上,对应的监听函数返回false停止 -
$broadcast(event,args):广播事件,遍历当前实例的$children,如果对应的监听函数返回false,就停止 -
$emit(event, args):触发事件
3.删除
-
$off(event, callback):删除时间监听
4.其他
-
$forceUpdate():强制组件刷新 -
$set(ele,attr,value):给对象设置属性 -
$delete(ele,attr,value):删除对象属性
12 3 4 5 6 7 8 9 10 11 12 13 14 15 16 17 18 19 20 21 22 23 24 25 26 27 | <template> <div id="app"> <p>{{obj.a}}</p> </div> </template> <script> export default { data() { return { obj:{} }; } mounted(){ let i = 0; setInterval(()=> { i++; // 第一种 this.obj.a = i ; // obj.a没有定义,vue是无法监听到这个属性的变化,所以页面的值也不会变化,这时可以用$forceUpdate进行强制渲染,当然不推荐这种用法 this.$forceUpdate(); // 第二种 this.$set(this.obj,'a',i); },1000) } } </script> |
Vue 生命周期
vue 官方生命周期
12 3 4 5 6 7 8 9 10 11 | render (h) { throw new TypeError('render error') // console.log('render function invoked') // render 在beforeMount 和 mounted之间执行 // return h('div', {}, this.text) // 虚拟DOM }, renderError (h, err) { return h('div', {}, err.stack) }, errorCaptured () { // 会向上冒泡,并且正式环境可以使用 } |
如果要修改data里面的值,最早只能放到create生命周期中
Vue 数据绑定
12 3 4 5 6 7 8 9 10 11 12 13 14 15 16 17 18 19 20 21 22 23 24 25 26 27 28 29 30 31 32 33 34 35 36 37 38 39 40 41 42 43 44 45 46 47 48 49 50 51 | <template> <div id="app"> <p>{{isActive?'active':'notActive'}}</p> <p>{{arr.join(' ')}}</p> <p>{{Date.now()}}</p> <p v-html="html"></p> <div :class="{ active: isActive }" :style="[styles, styles2]" ></div> <div :class="[isActive? 'active':'']"></div> <ul> <li v-for="(item,index) in arr" :key="index">{{item}}</li> </ul> // 单个checkbox <input type="checkbox" v-model="a"> {{a}} <br/> // 多个checkbox 爱好:<input type="checkbox" v-model="b" value="游泳"> 游泳 <input type="checkbox" v-model="b" value="游泳"> 爬山 <input type="checkbox" v-model="b" value="游泳"> 睡觉 性别:<input type="radio" v-model="c" value="男"> 男 <input type="radio" v-model="c" value="女"> 女 // 只绑定一次 <p v-once="a"></p> </div> </template> <script> export default { data() { return { isActive: false, arr: [1, 2, 3], html: '<span>123</span>', styles: { color: 'red', appearance: 'none' }, styles2: { color: 'black' }, a: false, b:[], // 可以拿到checkbox 的 value c:'' // 性别 }; } } </script> |
v-model 的修饰符
来自官网的例子:
1..number
如果想自动将用户的输入值转为数值类型,可以给 v-model 添加 number 修饰符:
1 | <input v-model.number="age" type="number"> |
这通常很有用,因为即使在 type=”number” 时,HTML 输入元素的值也总会返回字符串。
2..trim
如果要自动过滤用户输入的首尾空白字符,可以给 v-model 添加 trim 修饰符:
1 | <input v-model.trim="msg"> |
3..lazy
在默认情况下,v-model 在每次 input 事件触发后将输入框的值与数据进行同步 。你可以添加 lazy修饰符,从而转变为使用 change 事件进行同步(当输入框失去焦点):
12 | <!-- 在“change”时而非“input”时更新 --><input v-model.lazy="msg" > |
数组和对象的注意事项
数组
由于 JavaScript 的限制,Vue 不能检测以下变动的数组:
- 当你利用索引直接设置一个项时,例如:vm.items[indexOfItem] = newValue
- 当你修改数组的长度时,例如:vm.items.length = newLength
12 3 4 5 6 7 | var vm = new Vue({ data: { items: ['a', 'b', 'c'] } }) vm.items[1] = 'x' // 不是响应性的 vm.items.length = 2 // 不是响应性的 |
为了解决第一类问题,以下两种方式都可以实现和 vm.items[indexOfItem] = newValue 相同的效果,同时也将触发状态更新:
12 | // Vue.setVue.set(vm.items, indexOfItem, newValue) |
12 | // Array.prototype.splicevm.items.splice(indexOfItem, 1, newValue) |
你也可以使用 vm.$set 实例方法,该方法是全局方法 Vue.set 的一个别名:
1 | vm.$set(vm.items, indexOfItem, newValue) |
为了解决第二类问题,你可以使用 splice:
1 | vm.items.splice(newLength) |
对象
Vue 不能检测对象属性的添加或删除:
12 3 4 5 6 7 8 9 | var vm = new Vue({ data: { a: 1 } }) // `vm.a` 现在是响应式的 vm.b = 2 // `vm.b` 不是响应式的 |
对于已经创建的实例,Vue 不能动态添加根级别的响应式属性。但是,可以使用 Vue.set(object, key, value) 方法向嵌套对象添加响应式属性。例如,对于:
12 3 4 5 6 7 | var vm = new Vue({ data: { userProfile: { name: 'Anika' } } }) |
你可以添加一个新的 age 属性到嵌套的 userProfile 对象:
1 | Vue.set(vm.userProfile, 'age', 27) |
你还可以使用 vm.$set 实例方法,它只是全局 Vue.set 的别名:
1 | vm.$set(vm.userProfile, 'age', 27) |
有时你可能需要为已有对象赋予多个新属性,比如使用 Object.assign() 或 _.extend()。在这种情况下,你应该用两个对象的属性创建一个新的对象。所以,如果你想添加新的响应式属性,不要像这样:
12 3 4 | Object.assign(vm.userProfile, { age: 27, favoriteColor: 'Vue Green' }) |
你应该这样做:
12 3 4 | vm.userProfile = Object.assign({}, vm.userProfile, { age: 27, favoriteColor: 'Vue Green' }) |
computed 计算属性
计算属性的使用
12 3 4 5 6 7 8 9 10 11 12 13 14 15 16 17 18 19 20 | <template> <div id="app"> <p>{{name}}</p> </div> </template> <script> export default { data() { return { firstName: 'Fin', lastName: 'Get', }; }, computed: { name() { return `${this.firstName}${this.lastName}` } } } </script> |
双向绑定的计算属性与Vuex
12 3 4 5 6 7 8 9 10 11 12 13 | // vuex state是无法直接修改的,官方给出了 v-model 的解决方案<input v-model="message"> computed: { message: { get () { return this.$store.state.obj.message }, set (value) { this.$store.commit('updateMessage', value) } } } |
如果在方法或者生命周期中使用了计算属性,则必须设置一个set
watch 监听器
watch 简单使用
12 3 4 5 6 7 8 9 10 11 12 13 14 15 16 17 18 | <div id="demo">{{ fullName }}</div>var vm = new Vue({ el: '#demo', data: { firstName: 'Foo', lastName: 'Bar', fullName: 'Foo Bar' }, watch: { // watch 方法最初绑定的时候,它是不会执行的,只有变化了才会执行 firstName: function (val) { this.fullName = val + ' ' + this.lastName }, lastName: function (val) { this.fullName = this.firstName + ' ' + val } } }) |
12 3 4 5 6 7 8 9 | watch: { // 声明一个handler,这样在初始化时就会执行一次 handler firstName: { handler(val) { this.fullName = val + ' ' + this.lastName }, immediate: true } } |
监听对象属性的变化
12 3 4 5 6 7 8 9 10 11 12 13 14 15 16 17 18 19 20 | <div id="demo">{{ obj.a }}</div><input v-model="obj.a" /> var vm = new Vue({ el: '#demo', data: { obj: { a: '123' } }, watch: { obj: { handler() { console.log('obj.a changed'); }, immediate: true, deep: true // 如果不加这一句,在输入框中输入值,并不会打印 obj.a changed } } }) |
12 3 4 5 6 7 8 | // 这样写就能监听到属性值的变化watch: { 'obj.a': { handler() { console.log('obj.a changed'); } } } |
Vue 组件
Vue 组件中的data为什么必须是函数
官网解释
在Vue组件中data必须是函数,但是在 new Vue()中data可以是一个对象
12 3 4 5 6 | Vue.component('MyComponent', { template: '<div>this is a component</div>', data() { return {} // 返回一个唯一的对象,不要和其他组件共用一个对象进行返回 }, }) |
上面定义了一个MyComponent组件,在这里我们可以把这个组件看成一个构造函数。在其他页面引入,并注册组件时,实际上是对这个构造函数的一个引用。当在模板中正真使用组件时类似于实例化了一个组件对象。
12 3 4 5 6 7 8 9 10 11 12 13 14 15 16 | // 模拟一下let MyComponent = function() { // 定义一个构造函数 } MyComponent.prototype.data = { name: 'component', age: 0 } // 实例化组件对象 let componentA = new MyComponent(); let componentB = new MyComponent(); componentA.data.name === componentB.data.name; // true componentA.data.age = 4; componentB.data.name; |
可以看出,两个实例组件对象的data是一模一样的,一个改变也会导致另一个改变,这在实际开发中是不符合组件式思想的。
12 3 4 5 6 7 8 9 10 11 | // 模拟一下let MyComponent = function() { // 定义一个构造函数 } // 这样就行了 写成函数,函数有自己的作用域,不会相互影响 MyComponent.prototype.data = function() { return { name: 'component', age: 0 } } |
用 Vue.use() 定义全局组件
12 3 4 5 6 7 8 9 | // 定义一个 button 组件// button.vue <template> <div class="button"> 按钮 </div> </template> <script> </script> |
12 3 4 5 6 7 8 | // button.jsimport ButtonComponent from './button.vue'; const Button={ install:function (Vue) { Vue.component('Button',ButtonComponent) } } export default Button; |
12 3 | // main.jsimport Button from './component/button.js'; Vue.use(Button); |
完成上面的步骤就可以在全局使用button组件了,其实最重要的Vue.component('Button',ButtonComponent), Vue.use(Button)会执行install方法,也可以直接在main.js使用Vue.component()注册全局组件。
props
12 3 4 5 6 7 8 9 10 11 12 13 14 15 16 17 18 19 20 21 22 23 24 25 26 27 28 29 30 31 32 33 34 35 36 37 38 39 40 41 42 | <template> <div class="button"> 按钮 </div> </template> <script> export default { props: ['msg'], // 没有任何限制 // 输入限制 props: { // 基础的类型检查 (`null` 匹配任何类型) propA: Number, // 多个可能的类型 propB: [String, Number], // 必填的字符串 propC: { type: String, required: true }, // 带有默认值的数字 propD: { type: Number, default: 100 }, // 带有默认值的对象 propE: { type: Object, // 对象或数组且一定会从一个工厂函数返回默认值 default: function () { return { message: 'hello' } } }, // 自定义验证函数 propF: { validator: function (value) { // 这个值必须匹配下列字符串中的一个 return ['success', 'warning', 'danger'].indexOf(value) !== -1 } } } } </script> |
子组件是不能直接修改props的。
Vue组件之间的通信问题可以看这里…
Vue 组件 extend
使用Vue.extend 就是构造了一个Vue构造函数的“子类”。它的参数是一个包含组件选项的对象,其中data选项必须是函数。
12 3 4 5 6 7 8 9 10 11 12 13 14 15 16 17 18 19 20 21 22 23 24 25 26 27 28 29 30 31 32 33 34 35 36 37 38 | import Vue from 'vue'// 一个包含组件选项的对象 const compoent = { props: { active: Boolean, propOne: String }, template: ` <div> <input type="text" v-model="text"> <span v-show="active">see me if active</span> </div> `, data () { return { text: 0 } }, mounted () { // 这个mounted先打印 console.log('comp mounted'); } } // 创建一个“子类” const CompVue = Vue.extend(compoent); // 实例化一个“子类” new CompVue({ el: '#root', propsData: { // 这里如果用props,组件内是拿不到值的 propOne: 'xxx' }, data: { text: '123' }, mounted () { console.log('instance mounted'); } }) |
12 3 4 5 6 7 8 9 10 11 12 13 14 15 16 17 18 19 20 21 22 23 24 25 26 27 28 29 30 31 32 | const component2 = { extends: component, // 继承于 component data(){ return { text: 1 } }, mounted () { this.$parent.text = '111111111'; // 可以改变父组件的值 console.log('comp2 mounted') } } new Vue({ name: 'Root', el: '#root', mounted () { console.log(this.$parent.$options.name) }, components: { Comp: componet2 }, data: { text: 23333 }, template: ` <div> <span>{{text}}</span> <comp></comp> </div> ` }) |
Vue 组件高级属性
Vue 组件插槽
通常我们会向一个组件中传入一些自定义的内容,这个时候就可以用到插槽。插槽内可以包含任何模板代码,包括HTML或者是一个组件。
12 3 4 5 6 7 8 9 10 11 12 13 14 15 16 17 18 19 20 21 22 23 | // 定义一个带插槽的组件const component = { name: 'comp', template: ` <div> <slot></slot> </div> ` } new CompVue({ el: '#root', components:{ Comp }, template: ` <div> <comp> <p>这里的内容显示在插槽内</p> </comp> </div> ` } |
具名插槽
官网链接:https://cn.vuejs.org/v2/guide/components-slots.html
12 3 4 5 6 7 8 9 10 11 12 13 14 | <div class="container"> <header> <!-- 我们希望把页头放这里 --> <slot name="header"></slot> </header> <main> <!-- 我们希望把主要内容放这里 --> <slot name="main"></slot> </main> <footer> <!-- 我们希望把页脚放这里 --> <slot name="footer"></slot> </footer> </div> |
具名插槽的使用:
第一种:在一个父组件的 <template>元素上使用 slot 特性
12 3 4 5 6 7 8 9 10 11 12 13 14 | <base-layout> <template slot="header"> <h1>Here might be a page title</h1> </template> <template slot="main"> <p>A paragraph for the main content.</p> <p>And another one.</p> </template> <template slot="footer"> <p>Here's some contact info</p> </template> </base-layout> |
第二种:直接在普通元素上使用
12 3 4 5 6 7 8 9 10 | <base-layout> <h1 slot="header">Here might be a page title</h1> <div slot="main"> <p>A paragraph for the main content.</p> <p>And another one.</p> </div> <p slot="footer">Here's some contact info</p> </base-layout> |
插槽的默认内容
在插槽中可以设置一个默认内容,如果用户没有设置新的内容,则会显示默认内容
12 3 | <button> <slot>提交</slot> </button> |
作用域插槽
2.1.0+ 新增 在 2.5.0+,slot-scope 不再限制在 <template> 元素上使用,而可以用在插槽内的任何元素或组件上。
12 3 4 5 6 7 8 9 10 11 12 13 14 15 16 17 18 19 20 21 22 | const component = { name: 'comp', template: ` <div> <slot value="456" name="finget"></slot> </div> ` } new CompVue({ el: '#root', components:{ Comp }, template: ` <div> <comp> <p slot-scope="props">{{props.value}} {{props.name}}</p> // 456 finget </comp> </div> ` } |
provide/inject 跨级组件交互
2.2.0 新增
这对选项需要一起使用,以允许一个祖先组件向其所有子孙后代注入一个依赖,不论组件层次有多深,并在起上下游关系成立的时间里始终生效。
12 3 4 5 6 7 8 9 10 11 12 13 14 15 16 | // 父级组件提供 'foo'var Provider = { provide: { foo: 'bar' }, // ... } // 子组件注入 'foo' var Child = { inject: ['foo'], created () { console.log(this.foo) // => "bar" } // ... } |
如果是注入一个父级组件内部的值,provide需要作为一个函数,类似于data
12 3 4 5 6 7 8 9 10 11 12 13 14 15 16 17 18 19 20 21 22 23 24 25 26 27 28 29 30 | const component = { name: 'comp', inject: ["value"] template: ` <div>子组件 {{value}}</div> ` } new CompVue({ el: '#root', data() { return { value: '123' } } components:{ Comp }, provide() { // 这里如果只是一个对象的话是无法拿到this.value的 return { value: this.value } }, template: ` <div> <comp></comp> <input type="text" v-model="value"> </div> ` } |
如果要监听父级组件的属性值的变化,从而自动更新子组件的值,需要手动实现监听
12 3 4 5 6 7 8 9 10 11 12 13 14 15 16 17 18 19 20 21 | const component = { name: 'comp', inject: ["data"] template: ` <div>子组件 {{data.value}}</div> ` } ... provide() { const data = {} // 这是vue双向绑定的基础 Object.defineProperty(data,"value",{ get: () => this.value, enumerable: true }) return { data } }, ... |
Vue 的render
Vue模板的解析:https://finget.github.io/2018/05/31/mvvm-vue/
Vue-router
router构建选项
重定向:
12 3 4 | { path: '/', redirect: '/app' } |
History 模式:
12 3 4 | const router = new VueRouter({ mode: 'history', routes: [...] }) |
vue-router 默认 hash 模式 —— 使用 URL 的 hash 来模拟一个完整的 URL,于是当 URL 改变时,页面不会重新加载。
不过这种模式要玩好,还需要后台配置支持。因为我们的应用是个单页客户端应用,如果后台没有正确的配置,当用户在浏览器直接访问 http://oursite.com/user/id 就会返回 404,这就不好看了。
给个警告页:
12 3 4 5 6 | const router = new VueRouter({ mode: 'history', routes: [ { path: '*', component: NotFoundComponent } ] }) |
base
12 3 4 5 6 7 | const router = new VueRouter({ mode: 'history', base: '/base/', routes: [ { path: '/hello', component: hello } ] }) |
当访问localhost:8080/hello会变成localhost:8080/base/hello,所有的路由路径都会加上/base,当然手动删除/base还是可以打开页面
linkActiveClass 和 linkExactActiveClass
12 | <router-link to="/app">app</router-link><router-link to="/login">login</router-link> |
router-link在页面中会渲染成a标签,点击之后会添加两个类名:router-link-exact-active 和 router-link-active
12 3 4 | const router = new VueRouter({ linkActiveClass: 'active-link', linkExactActiveClass: 'exact-active-link' }) |
这相当于是重新命名了两个类名。
两者的不同点:
12 | <router-link to="/login">login</router-link><router-link to="/login/exact">login exact</router-link> |
上面这两个路由有一部分/login是相同的,在点击了login exact路由调转到/login/exact后:
/login 上还保留了router-link-active类名
scrollBehavior
使用前端路由,当切换到新路由时,想要页面滚到顶部,或者是保持原先的滚动位置,就像重新加载页面那样。
注意: 这个功能只在支持 history.pushState 的浏览器中可用。
12 3 4 5 6 7 8 9 10 | const router = new VueRouter({ scrollBehavior(to, form, savedPosition){ if (savedPosition) { return savedPosition } else { return { x: 0, y: 0 } } }, routes: [...] }) |
scrollBehavior 方法接收 to 和 from 路由对象。第三个参数 savedPosition 当且仅当 popstate 导航 (通过浏览器的 前进/后退 按钮触发) 时才可用。
parseQuery 和 stringifyQuery
提供自定义查询字符串的解析/反解析函数。覆盖默认行为。
12 3 4 5 6 7 8 | const router = new VueRouter({ parseQuery (query) { console.log(query) }, stringifyQuery (obj) { console.log(obj) } }) |
fallback
当浏览器不支持 history.pushState 控制路由是否应该回退到 hash 模式。默认值为 true。
在 IE9 中,设置为 false 会使得每个 router-link 导航都触发整页刷新。它可用于工作在 IE9 下的服务端渲染应用,因为一个 hash 模式的 URL 并不支持服务端渲染。
12 3 | const router = new VueRouter({ fallback: true }) |
路由元信息
官网例子:
12 3 4 5 6 7 8 9 10 11 12 13 14 15 16 | const router = new VueRouter({ routes: [ { path: '/foo', component: Foo, children: [ { path: 'bar', component: Bar, // a meta field meta: { requiresAuth: true } } ] } ] }) |
那么如何访问这个 meta 字段呢?
首先,我们称呼 routes 配置中的每个路由对象为 路由记录。路由记录可以是嵌套的,因此,当一个路由匹配成功后,他可能匹配多个路由记录
例如,根据上面的路由配置,/foo/bar 这个 URL 将会匹配父路由记录以及子路由记录。
一个路由匹配到的所有路由记录会暴露为 $route 对象 (还有在导航守卫中的路由对象) 的 $route.matched 数组。因此,我们需要遍历 $route.matched 来检查路由记录中的 meta 字段。
下面例子展示在全局导航守卫中检查元字段:
12 3 4 5 6 7 8 9 10 11 12 13 14 15 16 | router.beforeEach((to, from, next) => { if (to.matched.some(record => record.meta.requiresAuth)) { // this route requires auth, check if logged in // if not, redirect to login page. if (!auth.loggedIn()) { next({ path: '/login', query: { redirect: to.fullPath } }) } else { next() } } else { next() // 确保一定要调用 next() } }) |
命名视图
在一个路由下展示多个视图组件,用的并不多
12 3 4 | // 在这个页面中要分别展示三个视图<router-view></router-view> // 默认的 <router-view name="a"></router-view> // 视图a <router-view name="b"></router-view> // 视图b |
12 3 4 5 6 7 8 9 10 11 12 | const router = new VueRouter({ routes: [ { path: '/', components: { // 加s default: Foo, // 对应默认router-view a: Bar, // name = "a" b: Baz // name = "b" } } ] }) |
导航守卫
路由改变时,按顺序触发的钩子函数
全局守卫
12 3 4 5 6 7 8 9 10 | const router = new VueRouter({ ... })router.beforeEach((to, from, next) => { console.log('before each invoked'); next(); }) router.beforeResolve((to, from, next) => { console.log('before resolve invoked'); next(); }) |
每个守卫方法接收三个参数:
确保要调用 next 方法,否则钩子就不会被 resolved。
路由对象
一个路由对象 (route object) 表示当前**的路由的状态信息,包含了当前 URL 解析得到的信息,还有 URL 匹配到的路由记录 (route records)。
路由对象是不可变 (immutable) 的,每次成功的导航后都会产生一个新的对象。
路由对象属性:
$route.path
- 类型: string
字符串,对应当前路由的路径,总是解析为绝对路径,如 “/foo/bar”。
$route.params
- 类型: Object
一个 key/value对象,包含了动态片段和全匹配片段,如果没有路由参数,就是一个空对象。
$route.query
- 类型: Object
一个 key/value 对象,表示 URL 查询参数。例如,对于路径 /foo?user=1,则有 $route.query.user == 1,如果没有查询参数,则是个空对象。
$route.hash
- 类型: string
当前路由的 hash 值 (带 #) ,如果没有 hash 值,则为空字符串。
$route.fullPath
- 类型: string
完成解析后的 URL,包含查询参数和 hash 的完整路径。
$route.matched
- 类型: Array
一个数组,包含当前路由的所有嵌套路径片段的路由记录 。路由记录就是 routes 配置数组中的对象副本 (还有在 children 数组)。
12 3 4 5 6 7 8 9 10 11 | const router = new VueRouter({ routes: [ // 下面的对象就是路由记录 { path: '/foo', component: Foo, children: [ // 这也是个路由记录 { path: 'bar', component: Bar } ] } ] }) |
当 URL 为 /foo/bar,$route.matched 将会是一个包含从上到下的所有对象 (副本)。
全局后置钩子
12 3 | router.afterEach((to, from) => { console.log('after each invoked'); }) |
路由独享的守卫
12 3 4 5 6 7 8 9 10 11 | const router = new VueRouter({ routes: [ { path: '/foo', component: Foo, beforeEnter: (to, from, next) => { // ... } } ] }) |
组件内的守卫
12 3 4 5 6 7 8 9 10 11 12 13 14 15 16 17 18 | const Foo = { template: `...`, beforeRouteEnter (to, from, next) { // 在渲染该组件的对应路由被 confirm 前调用 // 不!能!获取组件实例 `this` // 因为当守卫执行前,组件实例还没被创建 }, beforeRouteUpdate (to, from, next) { // 在当前路由改变,但是该组件被复用时调用 // 举例来说,对于一个带有动态参数的路径 /foo/:id,在 /foo/1 和 /foo/2 之间跳转的时候, // 由于会渲染同样的 Foo 组件,因此组件实例会被复用。而这个钩子就会在这个情况下被调用。 // 可以访问组件实例 `this` }, beforeRouteLeave (to, from, next) { // 导航离开该组件的对应路由时调用 // 可以访问组件实例 `this` } } |
beforeRouteEnter 守卫 不能 访问 this,因为守卫在导航确认前被调用,因此即将登场的新组件还没被创建。
不过,你可以通过传一个回调给 next来访问组件实例。在导航被确认的时候执行回调,并且把组件实例作为回调方法的参数。
12 3 4 5 | beforeRouteEnter (to, from, next) { next(vm => { // 通过 `vm` 访问组件实例 }) } |
完整的导航解析流程
- 导航被触发。
- 在失活的组件里调用离开守卫。
- 调用全局的
beforeEach 守卫。 - 在重用的组件里调用
beforeRouteUpdate 守卫 (2.2+)。 - 在路由配置里调用
beforeEnter。 - 解析异步路由组件。
- 在被**的组件里调用
beforeRouteEnter。 - 调用全局的
beforeResolve 守卫 (2.5+)。 - 导航被确认。
- 调用全局的
afterEach 钩子。 - 触发
DOM 更新。 - 用创建好的实例调用
beforeRouteEnter 守卫中传给 next 的回调函数。
异步路由
在路由文件中,直接import所有组件势必造成页面首次渲染时间变长,异步路由,当进入对应的路由才加载对应的页面。
12 3 4 5 6 7 | const router = new VueRouter({ routes: [ { path: '/foo', component: () => import('../view/...'), } ] }) |
这种写法需要安装syntax-dynamic-import,并在.babelrc进行配置
12 3 4 | // .babelrc{ "plugins": ["syntax-dynamic-import"] } |
Vux
以下内容来自官网:https://vuex.vuejs.org/zh/
简单使用vuex
12 3 4 5 6 7 8 9 10 11 12 13 14 15 16 17 18 | // store.jsimport Vuex from 'vuex' import Vue from 'vue' Vue.use(Vuex) const store = new Vuex.Store({ state: { count: 0 }, mutations: { updateCount(state, num) { state.count = num } } }) export default store |
12 3 4 5 6 7 8 9 10 11 12 13 | // main.jsimport Vue from 'vue' import App from './App' import store from './store/store.js' Vue.config.productionTip = false /* eslint-disable no-new */ new Vue({ el: '#app', store, // 挂载 components: { App }, template: '<App/>' }) |
12 3 4 5 6 7 8 9 10 11 12 13 | // 任意组件mounted(){ console.log(this.$store) let i = 1 setInterval(() => { this.$store.commit('updateCount', i++) }) }, computed: { count() { return this.$store.state.count } } |
核心概念
State
Vuex 使用单一状态树——是的,用一个对象就包含了全部的应用层级状态。至此它便作为一个“唯一数据源 (SSOT)”而存在。这也意味着,每个应用将仅仅包含一个 store 实例。单一状态树让我们能够直接地定位任一特定的状态片段,在调试的过程中也能轻易地取得整个当前应用状态的快照。
大白话: state就相当于是个全局对象,通过Vue.use(Vuex)全局注册了vuex之后,在任意组件中可以用this.$store.state拿到该对象
Vuex的状态存储是响应式的,从store实例中读取状态最简单的方法就是在计算属性中返回某个状态。
12 3 4 5 | computed: { count() { return this.$store.state.count } } |
当state中的count变化时,自动会更新computed,从而改变相关DOM
mapState 辅助函数
当一个组件需要获取多个状态时候,将这些状态都声明为计算属性会有些重复和冗余。为了解决这个问题,我们可以使用mapState辅助函数帮助我们生成计算属性,让你少按几次键:
12 3 4 5 6 7 8 9 10 11 12 13 14 15 16 17 18 | // 在单独构建的版本中辅助函数为 Vuex.mapStateimport { mapState } from 'vuex' export default { // ... computed: mapState({ // 箭头函数可使代码更简练 count: state => state.count, // 传字符串参数 'count' 等同于 `state => state.count` countAlias: 'count', // 为了能够使用 `this` 获取局部状态,必须使用常规函数 不能用箭头函数 countPlusLocalState (state) { return state.count + this.localCount } }) } |
当映射的计算属性的名称与 state 的子节点名称相同时,我们也可以给 mapState 传一个字符串数组。
12 3 4 5 6 7 8 9 10 11 12 13 14 15 16 17 | computed: mapState([ // 映射 this.count 为 store.state.count 'count' ]) // 常用操作 computed: { ...mapState(['count']) } // 换一个变量名 computed: { ...mapState({ count1 : 'count', count2 : state => state.count }) } |
Getter
Getter就是vuex种state的computed,通过state派生出新的state,而且它会被缓存起来,只有依赖的state发生变化才会重新计算
12 3 4 5 | export default { fullName(state) { // 默认接收state作为第一个参数 return `${state.firstName}${state.lastName}` } } |
mapGetters 辅助函数
getter的使用和state类似,可以把它看成state来用。
12 3 4 5 6 7 8 9 10 11 12 13 | import { mapGetters } from 'vuex'export default { // ... computed: { // 使用对象展开运算符将 getter 混入 computed 对象中 ...mapGetters([ 'doneTodosCount', 'anotherGetter', // ... ]) } } |
如果想给getter换个名字,方法和state一样,不重复
Mutation
Mutation必须是同步的
更改 Vuex 的 store 中的状态的唯一方法是提交 mutation。Vuex 中的 mutation 非常类似于事件:每个 mutation 都有一个字符串的 事件类型 (type) 和 一个 回调函数 (handler)。这个回调函数就是我们实际进行状态更改的地方,并且它会接受 state 作为第一个参数:
12 3 4 5 6 7 8 9 10 11 | const store = new Vuex.Store({ state: { count: 1 }, mutations: { increment (state) { // 变更状态 state.count++ } } }) |
你不能直接调用一个 mutation handler。这个选项更像是事件注册:“当触发一个类型为 increment 的 mutation 时,调用此函数。”要唤醒一个 mutation handler,你需要以相应的 type 调用 store.commit 方法:
1 | store.commit('increment') |
提交载荷(传参)
你可以向 store.commit 传入额外的参数,即 mutation 的 载荷(payload):
12 3 4 5 6 7 8 | // ...mutations: { increment (state, n) { state.count += n } } store.commit('increment', 10) |
在大多数情况下,载荷应该是一个对象,这样可以包含多个字段并且记录的 mutation 会更易读:
12 3 4 5 6 7 8 9 | // ...mutations: { increment (state, payload) { state.count += payload.amount } } store.commit('increment', { amount: 10 }) |
对象风格的提交方式
提交 mutation 的另一种方式是直接使用包含 type 属性的对象:
12 3 4 | store.commit({ type: 'increment', amount: 10 }) |
当使用对象风格的提交方式,整个对象都作为载荷传给 mutation 函数,因此 handler 保持不变:
12 3 4 5 | mutations: { increment (state, payload) { state.count += payload.amount } } |
使用常量替代 Mutation 事件类型
使用常量替代mutation 事件类型在各种 Flux 实现中是很常见的模式。这样可以使 linter 之类的工具发挥作用,同时把这些常量放在单独的文件中可以让你的代码合作者对整个 app 包含的 mutation一目了然:
12 3 4 5 6 7 8 9 10 11 12 13 14 15 | // mutation-types.jsexport const SOME_MUTATION = 'SOME_MUTATION' // store.js import Vuex from 'vuex' import { SOME_MUTATION } from './mutation-types' const store = new Vuex.Store({ state: { ... }, mutations: { // 我们可以使用 ES2015 风格的计算属性命名功能来使用一个常量作为函数名 [SOME_MUTATION] (state) { // mutate state } } }) |
在组件中提交 Mutation
你可以在组件中使用 this.$store.commit('xxx') 提交 mutation,或者使用 mapMutations 辅助函数将组件中的 methods 映射为 store.commit 调用(需要在根节点注入 store)。
12 3 4 5 6 7 8 9 10 11 12 13 14 15 16 | import { mapMutations } from 'vuex'export default { // ... methods: { ...mapMutations([ 'increment', // 将 `this.increment()` 映射为 `this.$store.commit('increment')` // `mapMutations` 也支持载荷: 'incrementBy' // 将 `this.incrementBy(amount)` 映射为 `this.$store.commit('incrementBy', amount)` ]), ...mapMutations({ add: 'increment' // 将 `this.add()` 映射为 `this.$store.commit('increment')` }) } } |
Action
Action 可以包含异步操作
Action跟Mutation类似,Action是调用commit方法,提交mutation的。
12 3 4 5 6 7 8 9 10 11 12 13 14 15 | const store = new Vuex.Store({ state: { count: 0 }, mutations: { increment (state) { state.count++ } }, actions: { increment (context) { context.commit('increment') } } }) |
Action 函数接受一个与 store 实例具有相同方法和属性的 context 对象,因此你可以调用 context.commit 提交一个 mutation,或者通过 context.state 和 context.getters 来获取 state 和 getters。
实践中,我们会经常用到 ES2015 的 参数解构 来简化代码(特别是我们需要调用 commit 很多次的时候):
12 3 4 5 6 | actions: {// {commit} = context 解构出来 increment ({ commit }) { commit('increment') } } |
实际代码:
在组件中分发 Action
你在组件中使用 this.$store.dispatch('xxx') 分发 action,或者使用 mapActions 辅助函数将组件的 methods 映射为 store.dispatch 调用(需要先在根节点注入 store):
12 3 4 5 6 7 8 9 10 11 12 13 14 15 16 | import { mapActions } from 'vuex'export default { // ... methods: { ...mapActions([ 'increment', // 将 `this.increment()` 映射为 `this.$store.dispatch('increment')` // `mapActions` 也支持载荷: 'incrementBy' // 将 `this.incrementBy(amount)` 映射为 `this.$store.dispatch('incrementBy', amount)` ]), ...mapActions({ add: 'increment' // 将 `this.add()` 映射为 `this.$store.dispatch('increment')` }) } } |
严格模式
开启严格模式,仅需在创建 store 的时候传入 strict: true:
12 3 4 | const store = new Vuex.Store({ // ... strict: true }) |
在严格模式下,无论何时发生了状态变更且不是由 mutation 函数引起的,将会抛出错误。这能保证所有的状态变更都能被调试工具跟踪到。
开发环境与发布环境
不要在发布环境下启用严格模式!严格模式会深度监测状态树来检测不合规的状态变更——请确保在发布环境下关闭严格模式,以避免性能损失。
类似于插件,我们可以让构建工具来处理这种情况:
12 3 4 | const store = new Vuex.Store({ // ... strict: process.env.NODE_ENV !== 'production' }) |
以上是 深入Vue 的世界 的全部内容,
来源链接:
utcz.com/z/377742.html


