vue 3 安装使用

## 安装 vue 3" title="vue 3">vue 3
```
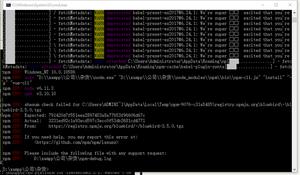
npm install @vue/cli
```
## 项目创建 选择
```
vue create ****
```
##### 选择配置方式
default (babel,eslint) 默认配置
Manually select features 可选配置
输入 1 或 2
##### 选择 所需模块
按<space>选择,<a>切换所有,<i>反转选择
- ( ) TypeScript // 支持使用 TypeScript 书写源码
- ( ) Progressive Web App (PWA) Support // PWA 支持
- ( ) Router // 支持 vue-router
- ( ) Vuex // 支持 vuex
- ( ) CSS Pre-processors // 支持 CSS 预处理器。
- ( ) Linter / Formatter // 支持代码风格检查和格式化。
- ( ) Unit Testing // 支持单元测试。
- ( ) E2E Testing
##### 路由器使用历史模式
Use history mode for router? (Requires proper server setup for index fallback in production)
// 路由使用history模式?(在生产环境中需要适当的服务器设置以备索引)
No,这样打包出来丢到服务器上可以直接使用了,后期要用的话,也可以自己再开起来。
- yes 话需要服务器那边再进行设置
```
自己配置
export default new Router({
mode: 'history',
})
```
##### 安装 css 预 处理器
##### ESLint 选择 ESLint 是一个代码规范和错误检查工具
使用 1 2 3 4 进行选择
###### 检测时间
- ( ) Lint on save // 保存就检测 ( )
- ( ) Lint and fix on commit // 确认 和 提交 时候检查
##### 所配置的文件放在哪
- In dedicated config files // 独立文件放置
- In package.json // 放package.json里
##### 将babel与typescript一起用于自动检测填充
```
use babel alongside typescript for auto-detected polyfills
```
##### 使用类风格的组件语法?
```
Use class-style component syntax?
```
##### 保存这个作为未来项目的预置?
Save this as a preset for future projects? (y/N)
##### 选择一个单元测试解决方案
- Jest Jest是由Facebook发布的开源的、基于Jasmine的JavaScript单元测试框架。
##### e2e 单元测试
vue3 vue-property-decorator 结合 ts
// 子组件<template>
<div class="table">
<el-table
:data="tableData"
style="width: 100%">
<el-table-column
prop="date"
label="日期"
width="180">
</el-table-column>
<el-table-column
prop="name"
label="姓名"
width="180">
</el-table-column>
<el-table-column
prop="address"
label="地址">
</el-table-column>
</el-table>
<input type="checkbox" :checked=checked @change="changed"/>
<br/>
<br/>
<h1>{{label}}</h1>
</div>
</template>
<script lang="ts">
import { Component, Prop,Model,Vue } from 'vue-property-decorator';
@Component
export default class TableView extends Vue {
label: Boolean = true
@Prop() private msg!: string; // 父组件传值
@Model('change') checked!: boolean // 双向绑定
changed(ev:any) { // 事件
this.label = ev.target.checked
};
tableData!: Array<any>
// 定义方法
getNum():void{
this.tableData = [
{
date: '2016-05-02',
name: '王小虎',
address: '上海市普陀区金沙江路 1518 弄'
}, {
date: '2016-05-04',
name: '王小虎',
address: '上海市普陀区金沙江路 1517 弄'
}, {
date: '2016-05-01',
name: '王小虎',
address: '上海市普陀区金沙江路 1519 弄'
}, {
date: '2016-05-03',
name: '王小虎',
address: '上海市普陀区金沙江路 1516 弄'
}
]
}
// 周期用法
created(){
this.getNum()
}
}
</script>
// 父组件
<template>
<div class="home">
<img alt="Vue logo" src="../assets/logo.png">
<HelloWorld msg="Welcome to Your Vue App"/>
</div>
</template>
<script lang="ts">
import { Component, Vue } from 'vue-property-decorator';
import HelloWorld from '@/components/HelloWorld.vue'; // @ is an alias to /src
@Component({ // 模块引入方式
components: {
HelloWorld,
},
})
export default class Home extends Vue {}
</script>
以上是 vue 3 安装使用 的全部内容, 来源链接: utcz.com/z/375304.html

