Unity3D实现控制摄像机移动
本文实例为大家分享了Unity3D实现控制摄像机移动的具体代码,供大家参考,具体内容如下
最近公司的几个项目开发内容基本相同,很多脚本直接复制过来就可以拼接项目。之前一直是代码爱好者,能自己敲的绝对不去复制粘贴。但是开发速度确实是被耽误了,所以接下来打算把开发中常用的脚本都发到博客上。自己需要的时候直接拿来。也希望能帮到你们。
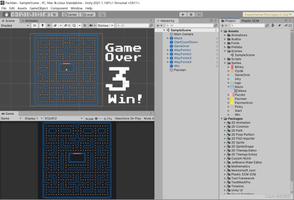
unity编辑器中按住鼠标右键,在通过控制键盘的wasdqe键可以自由控制视野。
下面就是实现操作的代码:
using System.Collections;
using System.Collections.Generic;
using UnityEngine;
//巡游模式摄像机控制
public class CameraMove : MonoBehaviour
{
public static CameraMove Instance = null;
private Vector3 dirVector3;
private Vector3 rotaVector3;
private float paramater = 0.1f;
//旋转参数
private float xspeed = -0.05f;
private float yspeed = 0.1f;
private float dis;
void Awake ()
{
Instance = this;
}
private void Start()
{
rotaVector3 = transform.localEulerAngles;
dis = UIFuc.Instance.Dis;
}
// Update is called once per frame
void FixedUpdate ()
{
//旋转
if (Input.GetMouseButton(1))
{
rotaVector3.y += Input.GetAxis("Horizontal") * yspeed;
rotaVector3.x += Input.GetAxis("Vertical") * xspeed;
transform.rotation = Quaternion.Euler(rotaVector3);
}
//移动
dirVector3 =Vector3.zero;
if (Input.GetKey(KeyCode.W))
{
if(Input.GetKey(KeyCode.LeftShift)) dirVector3.z = 3;
else dirVector3.z = 1;
}
if (Input.GetKey(KeyCode.S))
{
if (Input.GetKey(KeyCode.LeftShift)) dirVector3.z = -3;
else dirVector3.z = -1;
}
if (Input.GetKey(KeyCode.A))
{
if (Input.GetKey(KeyCode.LeftShift)) dirVector3.x = -3;
else dirVector3.x = -1;
}
if (Input.GetKey(KeyCode.D))
{
if (Input.GetKey(KeyCode.LeftShift)) dirVector3.x = 3;
else dirVector3.x = 1;
}
if (Input.GetKey(KeyCode.Q))
{
if (Input.GetKey(KeyCode.LeftShift)) dirVector3.y = -3;
else dirVector3.y = -1;
}
if (Input.GetKey(KeyCode.E))
{
if (Input.GetKey(KeyCode.LeftShift)) dirVector3.y = 3;
else dirVector3.y = 1;
}
transform.Translate(dirVector3 * paramater,Space.Self);
//限制摄像机范围
transform.position = Vector3.ClampMagnitude(transform.position, dis);
}
}
由于项目需要限制摄像机的移动范围,所以我在最后加上了限制的代码。
以上是 Unity3D实现控制摄像机移动 的全部内容, 来源链接: utcz.com/z/359295.html