layui实现文件或图片上传记录
本文为大家分享了layui实现文件或图片上传记录的具体代码,供大家参考,具体内容如下
首先是layui自己的官网关于图片/文件上传的帮助文档:
接下来是我自己的使用记录:
1.首先在js中定义一个全局变量
var uploadListIns;
2.进行赋值
//多文件列表示例
/**
* 图片上传
*/
layui.use('upload', function(){
var $ = layui.jquery,upload = layui.upload;
var demoListView = $('#proImageList');
uploadListIns = upload.render({
elem: '#chooseFile', //选择文件的按钮
url: 'upload!ftp.action', //后台处理文件长传的方法
data:{'serviceName':'外协订单供应商上传检验报告','tableName':'T_OUTSOURCE_ORDER','fileType':'图片'},
accept: 'file',
multiple: true, //是否允许多文件上传
acceptMime: 'image/*', //规定打开文件选择框时,筛选出的文件类型
field:'upload',
auto: false,
bindAction: '#upload', //用来触发上传的按钮ID
choose: function(obj){ //选择文件后的回调函数,本例中在此将选择的文件进行展示
var files = this.files = obj.pushFile(); //将每次选择的文件追加到文件队列
//读取本地文件
obj.preview(function(index, file, result){
var tr = $(['<tr id="upload-'+ index +'">'
,'<td>'+ file.name +'</td>'
,'<td>'+ (file.size/1014).toFixed(1) +'kb</td>'
,'<td>等待上传</td>'
,'<td>'
,'<button class="layui-btn layui-btn-xs demo-reload layui-hide">重传</button>'
,'<button class="layui-btn layui-btn-xs layui-btn-danger demo-delete">删除</button>'
,'</td>'
,'</tr>'].join(''));
//单个重传
tr.find('.demo-reload').on('click', function(){
obj.upload(index, file);
});
//删除
tr.find('.demo-delete').on('click', function(){
delete files[index]; //删除对应的文件
tr.remove();
uploadListIns.config.elem.next()[0].value = ''; //清空 input file 值,以免删除后出现同名文件不可选
});
demoListView.append(tr);
});
},
done: function(res, index, upload){ //多文件上传时,只要有一个文件上传成功后就会触发这个回调函数
console.info(res);
if(res.status == "success"){ //上传成功
var tr = demoListView.find('tr#upload-'+ index)
,tds = tr.children();
tds.eq(2).html('<span style="color: #5FB878;">上传成功</span>');
tds.eq(3).html('<a href="'+res.url+'" rel="external nofollow" >查看</a>'); //清空操作
return delete this.files[index]; //删除文件队列已经上传成功的文件
}else{
alert(res.message);
}
this.error(index, upload);
},
allDone: function(obj){ //当文件全部被提交后,才触发
if(obj.total > obj.successful){
layer.msg("有文件上传失败,暂不更新生产进度,请重试或联系管理员");
}else {
//更新生产进度
updateProductionSchedule(currentId, currentSchedule);
}
},
error: function(index, upload){
var tr = demoListView.find('tr#upload-'+ index)
,tds = tr.children();
tds.eq(2).html('<span style="color: #FF5722;">上传失败</span>');
tds.eq(3).find('.demo-reload').removeClass('layui-hide'); //显示重传
}
});
$(".layui-upload-file").hide();
});
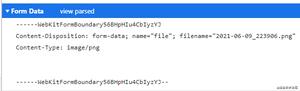
上述js代码中出现的相关html元素如下,相关引入js文件和css为:bootstrap3的js和css及layui的js文件即可
<!-- 模态框(Modal) -->
<div class="modal fade" id="uploadModal" tabindex="-1" role="dialog" aria-labelledby="myModalLabel" aria-hidden="true">
<div class="modal-dialog">
<div class="modal-content">
<div class="modal-header">
<button type="button" class="close" data-dismiss="modal" aria-hidden="true">
×
</button>
<h4 class="modal-title" id="myModalLabel">
上传检验报告
</h4>
</div>
<div class="modal-body">
<button type="button" class="btn btn-primary" id="chooseFile">选择多文件</button>
<button type="button" class="btn btn-success" id="upload">开始上传</button>
<div class="table-responsive">
<table class="table table-hover">
<thead><tr>
<th>文件名</th>
<th>大小</th>
<th>状态</th>
<th>操作</th>
</tr></thead>
<tbody id="proImageList"></tbody>
</table>
</div>
</div>
<div class="modal-footer">
<button type="button" class="btn btn-default" data-dismiss="modal">关闭
</button>
</div>
</div><!-- /.modal-content -->
</div><!-- /.modal -->
</div>
3.在打开模态框时可以对1中定义的变量进行动态赋值,这些变量会相应的传到后台中:
function showUploadModal(id) {
//动态赋值
uploadListIns.config.data.tableRecordId = id;
uploadListIns.config.data.filenamePrefix = id+".自检pass.";
$("#uploadModal").modal("show");
}
4.最终前端实现效果如下:
以上是 layui实现文件或图片上传记录 的全部内容, 来源链接: utcz.com/z/358095.html