Vue 动态设置路由参数的案例分析
1.使用this.$router.go(),与js histroy.go() 用法一直,前进1,后退-1,当前页面:0
注意 使用go时 必须是已经有访问历史记录了
案例:
<template>
<div>
<button @click="goht">后退<button> <br/>
<button @click="goqj">前进<button> <br/>
<button @click="gosx">刷新当前<button>
</div>
</template>
<script>
export default {
methods: {
goht(){
this.$router.go(-1);
},
goqj(){
this.$router.go(1);
},
gosx(){
this.$router.go(0); //或者 this.$router.go();
}
}
}
</script>
2.使用push调用:
案例
<template>
<div>
<button @click="pageA">去A页面</button> <br/>
<button @click="pageB">去B页面</button> <br/>
</div>
</template>
<script>
exprot default {
methods: {
pageA(){
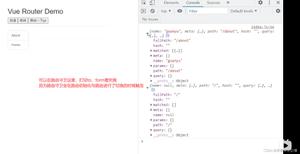
//去路由A页面,字符串形式只能是path,类似to="path"
this.$router.push('/RouterA');
},
pageB(){
//去路由B页面,数组形式,类似 :to="{}"
this.$router.push(
{
name: 'RouterB',
query: {'name': 'name1', title: 'title1'}
//,params:{'name': 'name2', title: 'title2'}
}
);
}
}
}
</script>
总结
以上所述是小编给大家介绍的Vue 动态设置路由参数的案例分析,希望对大家有所帮助,如果大家有任何疑问请给我留言,小编会及时回复大家的。在此也非常感谢大家对网站的支持!
以上是 Vue 动态设置路由参数的案例分析 的全部内容, 来源链接: utcz.com/z/336719.html