Unity3D Shader实现贴图切换效果
本文实例为大家分享了shader实现基于世界坐标的贴图置换效果。
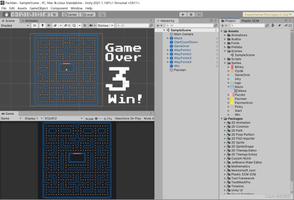
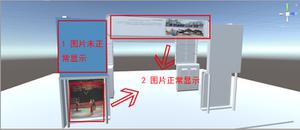
效果如下:
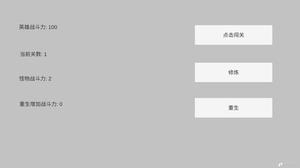
设置面板如下:
可在面板上设置切换方向,与切换对象,及其切换速度。
shader实现如下:
Shader "XM/Effect/SwapTexture" {
Properties {
_Color ("Color", Color) = (1,1,1,1)
_MainTex ("Albedo (RGB)", 2D) = "white" {}
_TargetTex ("Target Tex", 2D) = "white" {}//目标贴图
[KeywordEnum(Up, Down, Left, Right, Forward, Back)] _mode ("Mode", Int) = 0//切换方向
_SwapBlend ("Blend", Range(0,1)) = 0//0-1混合值
_SwapMin("Min Value", Float) = 0//最小世界坐标
_SwapMax("Max Value", Float) = 0//最大世界坐标
_Glossiness ("Smoothness", Range(0,1)) = 0.5
_Metallic ("Metallic", Range(0,1)) = 0.0
}
SubShader {
Tags { "RenderType"="Opaque" }
LOD 200
CGPROGRAM
// Physically based Standard lighting model, and enable shadows on all light types
#pragma surface surf Standard fullforwardshadows vertex:vert
// Use shader model 3.0 target, to get nicer looking lighting
#pragma target 3.0
sampler2D _MainTex;
sampler2D _TargetTex;
struct Input {
float2 uv_MainTex;
float3 worldPos;
};
half _mode;
half _SwapBlend;
float _SwapMin;
float _SwapMax;
half _Glossiness;
half _Metallic;
fixed4 _Color;
void vert (inout appdata_full v, out Input o) {
UNITY_INITIALIZE_OUTPUT(Input,o);
}
void surf (Input IN, inout SurfaceOutputStandard o) {
half useTarget = 0;
float targetValue = 0;
switch(_mode)//模式选择
{
case 0://up
targetValue = (_SwapMax - _SwapMin) * _SwapBlend + _SwapMin;
useTarget = IN.worldPos.y > targetValue?0:1;
break;
case 1://down
targetValue = (_SwapMax - _SwapMin) * (1 - _SwapBlend) + _SwapMin;
useTarget = IN.worldPos.y < targetValue?0:1;
break;
case 2://left
targetValue = (_SwapMax - _SwapMin) * (1 - _SwapBlend) + _SwapMin;
useTarget = IN.worldPos.x < targetValue?0:1;
break;
case 3://right
targetValue = (_SwapMax - _SwapMin) * _SwapBlend + _SwapMin;
useTarget = IN.worldPos.x > targetValue?0:1;
break;
case 4://forward
targetValue = (_SwapMax - _SwapMin) * _SwapBlend + _SwapMin;
useTarget = IN.worldPos.z > targetValue?0:1;
break;
case 5://back
targetValue = (_SwapMax - _SwapMin) * (1 - _SwapBlend) + _SwapMin;
useTarget = IN.worldPos.z < targetValue?0:1;
break;
}
// Albedo comes from a texture tinted by color
fixed4 c;
if(useTarget == 1)
{
c = tex2D (_TargetTex, IN.uv_MainTex);
}
else
{
c = tex2D (_MainTex, IN.uv_MainTex);
}
c *= _Color;
o.Albedo = c.rgb;
// Metallic and smoothness come from slider variables
o.Metallic = _Metallic;
o.Smoothness = _Glossiness;
o.Alpha = c.a;
}
ENDCG
}
FallBack "Diffuse"
}
配合使用的脚本如下:
using System;
using System.Collections;
using UnityEngine;
namespace XM.Effect
{
public class SwapTexture : MonoBehaviour
{
public enum SwapDirection
{
Up,
Down,
Left,
Right,
Forward,
Back
}
public Shader _shader;//"XM/Effect/SwapTexture” shader
public SwapDirection _swapDir;//切换方向
public Renderer _target;//目标对象
[Range(0, 1)]
public float _speed;//速度
private Material _matOld;
private Material _matNew;
public void Swap(Texture tex, Action<bool> onComplete)
{
if (_matOld != null)
{
StopAllCoroutines();
if (null != onComplete)
{
onComplete(false);
}
_target.material = _matOld;
}
_matOld = _target.material;
_matNew = new Material(_shader);
_matNew.SetTexture("_MainTex", _target.material.GetTexture("_MainTex"));
_matNew.SetTexture("_TargetTex", tex);
_matNew.SetInt("_mode", (int)_swapDir);
_matNew.SetFloat("_SwapBlend", 0);
StartCoroutine("_StartChange", onComplete);
}
private IEnumerator _StartChange(Action<bool> onComplete)
{
float deltaVal = 0;
_target.material = _matNew;
Vector3 vtMin;
Vector3 vtMax;
float minVal = 0;
float maxVal = 0;
while (deltaVal != 1)
{
vtMin = _target.bounds.min;
vtMax = _target.bounds.max;
switch (_swapDir)
{
case SwapDirection.Up:
case SwapDirection.Down:
minVal = vtMin.y;
maxVal = vtMax.y;
break;
case SwapDirection.Left:
case SwapDirection.Right:
minVal = vtMin.x;
maxVal = vtMax.x;
break;
case SwapDirection.Forward:
case SwapDirection.Back:
minVal = vtMin.z;
maxVal = vtMax.z;
break;
}
minVal -= 0.01f;
maxVal += 0.01f;
_matNew.SetFloat("_SwapMin", minVal);
_matNew.SetFloat("_SwapMax", maxVal);
deltaVal = Mathf.Clamp01(deltaVal + _speed * Time.deltaTime);
_matNew.SetFloat("_SwapBlend", deltaVal);
yield return null;
}
_matOld.SetTexture("_MainTex", _matNew.GetTexture("_TargetTex"));
_target.material = _matOld;
_matNew = null;
_matOld = null;
if (null != onComplete)
{
onComplete(true);
}
}
public void OnDrawGizmos()
{
if (_target != null)
{
Gizmos.DrawWireCube(_target.bounds.center, _target.bounds.size);
Gizmos.DrawWireSphere(_target.bounds.min, 0.1f);
Gizmos.DrawWireSphere(_target.bounds.max, 0.1f);
}
}
//test
public Texture testTex;
private void OnGUI()
{
if (GUILayout.Button("SwapTexture"))
{
Swap(testTex, (t) =>
{
Debug.Log("Swap>" + t);
});
}
}
//
}
}
以上是 Unity3D Shader实现贴图切换效果 的全部内容, 来源链接: utcz.com/z/312774.html