Android开发实现抽屉菜单
本文实例为大家分享了Android开发实现抽屉菜单的具体代码,供大家参考,具体内容如下
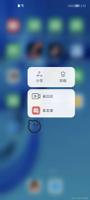
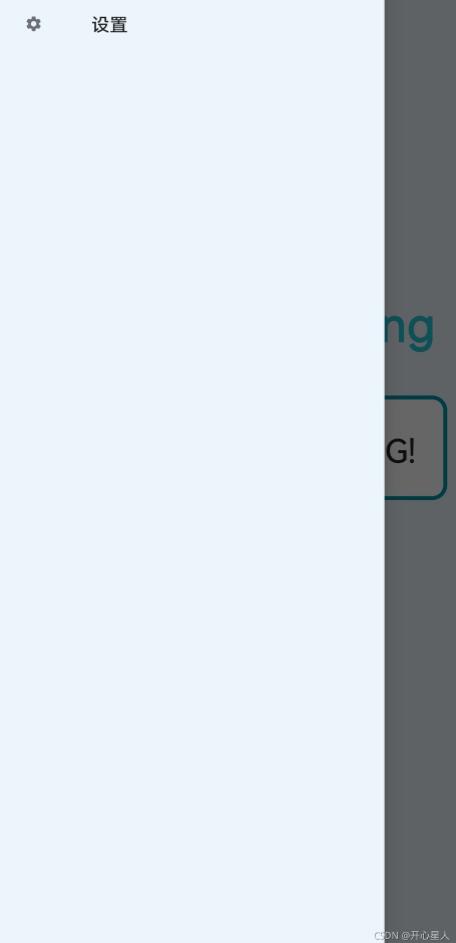
实现效果

点击菜单图表即可进入抽屉
代码实现
1、打开app/build.gradle文件,在dependencies闭包中添加如下内容:
dependencies {
compile fileTree(dir: 'libs', include: ['*.jar'])
compile 'com.android.support:appcompat-v7:24.2.1'
testCompile 'junit:junit:4.12'
compile 'com.android.support:design:24.2.1'
compile 'de.hdodenhof:circleimageview:2.1.0'
}
2、进入想要添加抽屉的界面的layout布局
添加DrawerLayout控件
首先DrawerLayout是一个布局,在布局中允许放入两个直接子控件,第一个子控件是主屏幕中的内容,第二个空间是滑动菜单中显示的内容
原本的界面所有布局内容就放在第一个子控件中
<?xml version="1.0" encoding="utf-8"?>
<androidx.drawerlayout.widget.DrawerLayout xmlns:android="http://schemas.android.com/apk/res/android"
xmlns:app="http://schemas.android.com/apk/res-auto"
xmlns:tools="http://schemas.android.com/tools"
android:id="@+id/drawerLayout"
android:layout_width="match_parent"
android:layout_height="match_parent"
android:background="@mipmap/bk_1"
tools:context="com.luckyxmobile.graphserviceping.MainActivity">
<!-- 内容区 -->
<LinearLayout
android:layout_width="match_parent"
android:layout_height="wrap_content"
android:orientation="vertical">
<ImageView
android:id="@+id/setting"
android:layout_width="56dp"
android:layout_height="56dp"
android:layout_marginLeft="8dp"
android:background="@drawable/ic_baseline_menu1"
/>
<!-- android:background="@drawable/ic_baseline_menu_24"-->
<!--原图标宽高 40 52-->
<TextView
android:layout_width="wrap_content"
android:layout_height="wrap_content"
android:layout_gravity="center"
android:layout_marginTop="180dp"
android:id="@+id/graphServicePing"
android:gravity="center"
android:text="Graph Service Ping"
android:textColor="#26C6DA"
android:textSize="36dp"/>
<LinearLayout
android:layout_marginTop="32dp"
android:layout_gravity="center_horizontal"
android:background="@drawable/bloder"
android:layout_width="match_parent"
android:layout_height="80dp"
android:layout_marginStart="16dp"
android:layout_marginEnd="16dp"
android:paddingHorizontal="4dp">
<!-- android:paddingHorizontal="16dp"-->
<!-- android:layout_height="wrap_content"-->
<Button
android:minHeight="50dp"
android:id="@+id/btn_input"
android:layout_width="0dp"
android:layout_weight="8"
android:layout_height="wrap_content"
android:textSize="20dp"
android:layout_marginLeft="8dp"
android:background="@null"
/>
<Button
android:id="@+id/btn_ping"
android:background="@null"
android:layout_weight="4"
android:text="Ping!"
android:textColor="#262626"
android:textSize="25sp"
android:layout_width="0dp"
android:layout_height="80dp"
/>
<!-- android:layout_weight="2"-->
<!-- android:layout_width="50dp"-->
<!-- android:layout_height="50dp"-->
</LinearLayout>
</LinearLayout>
<com.google.android.material.navigation.NavigationView
android:id="@+id/nav_view"
android:background="@mipmap/bk_1"
android:layout_height="match_parent"
android:layout_width="match_parent"
android:layout_gravity="start"
app:menu="@menu/nav_menu">
</com.google.android.material.navigation.NavigationView>
</androidx.drawerlayout.widget.DrawerLayout>
android:layout_gravity="start"这一句很重要,一定要加上
3.NavigationView用来优化滑动菜单页面的
menu用来在NavigationView中显示具体的菜单项,headerLayout则用来在NavigationView中显示头布局(这里我只用到了menu,所以我只写menu)
在res下如果没有menu目录,可以新建一个menu文件夹,然后右键menu->new_menu resource file
menu代码:
<?xml version="1.0" encoding="utf-8"?>
<menu xmlns:android="http://schemas.android.com/apk/res/android">
<item
android:id="@+id/nav_setting"
android:icon="@drawable/ic_launcher_setting_foreground"
android:title="设置">
</item>
</menu>
可以添加多个item,不要忘了引用menu
app:menu="@menu/nav_menu"
4.设置主界面菜单图表的点击事件
跟intent不同
setting.setOnClickListener(new View.OnClickListener() { //设置点击事件
@Override
public void onClick(View v) {
mDrawerLayout.openDrawer(GravityCompat.START);
}
});
5、设置抽屉菜单item点击事件
DrawerLayout mDrawerLayout;
mDrawerLayout=findViewById(R.id.drawerLayout);
NavigationView navView=(NavigationView)findViewById(R.id.nav_view);
navView.setNavigationItemSelectedListener(new NavigationView.OnNavigationItemSelectedListener(){
@Override
public boolean onNavigationItemSelected(MenuItem item) {
switch(item.getItemId()){
case R.id.nav_setting:
startActivity(new Intent(MainActivity.this, Setting.class));
break;
}
mDrawerLayout.closeDrawers();
return false;
}
});
以上就是本文的全部内容,希望对大家的学习有所帮助,也希望大家多多支持。
以上是 Android开发实现抽屉菜单 的全部内容, 来源链接: utcz.com/p/244102.html