Vue自定义树形控件使用详解
本文实例为大家分享了Vue自定义树形控件的使用方法,供大家参考,具体内容如下
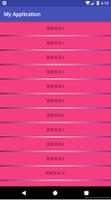
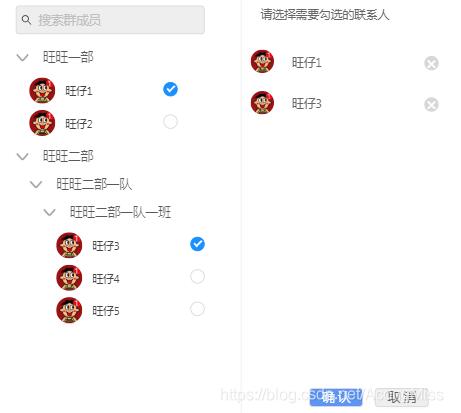
效果图:
数据结构:
tree: {
title: '', // 标题(姓名)
key: '0',
head: '', // 头像
selectStatus: false, // checkBox选中状态
children: [
{
title: '旺旺一部',
key: '0-0',
head: '',
selectStatus: false,
children: [
{
key: '0-0-0',
title: '旺仔1',
head: require('@/assets/wan.jpg'),
selectStatus: false
}
]
},
{
title: '旺旺二部',
key: '0-1',
head: '',
selectStatus: false,
children: [
{
title: '旺旺二部一队',
key: '0-1-0',
head: '',
selectStatus: false,
children: [
{
title: '旺旺二部一队一班',
key: '0-1-0-2',
head: '',
selectStatus: false,
children: [
{
title: '旺仔3',
key: '0-1-0-2-0',
head: require('@/assets/wan.jpg'),
selectStatus: false
}
]
}
]
}
]
}
]
},
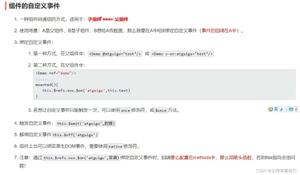
思路:
/*自定义树形控件的核心就是“组件自己调用自己” 这里将树形控件封装成一个子组件*/
<template>
<div>
<div class="tree-custom">
<div :style="indent" @click="toggleChildren"> //toggleChildren事件为“展开内容”、“关闭内容”的控制事件
/*
这里是递归数据显示的具体内容
例如:本项目递归的具体内容从效果图上看就是“图片/头像”、“标题/名字”、“null/CheckBox”
效果图显示逻辑是:
<div v-if="!headImg && label" >
//如果没有头像图片有标题,则显示 “箭头-标题”样式
</div>
<div v-if="headImg">
//如果有头像图片,则显示 “头像-姓名-checkBox”样式
</div>
*/
</div>
<tree-custom // “自己调用自己”
:key="children.key" // key值唯一
v-for="children in treeData"
v-if="showChildren" // 根据 toggleChildren事件 判断是否展开内容
:treeData="children.children" // 下面都是一些属性,应该都能看懂吧!不多说了!
:label="children.title"
:headImg="children.head"
:pkid="children.key"
:depth="depth+1" // 这个是用来控制每行缩进的样式,可移步下方=>indent ()看具体用处
:selectStatus="children.selectStatus"
v-bind="$attrs" // 这两个是用来实现祖孙组件通信的
v-on="$listeners"
>
</tree-custom>
</div>
</div>
</template>
<script>
export default {
name: 'TreeCustom', // 要给我们的组件一个名字!不然怎么调用呢
data () {
return {
showChildren: true, // 这个就是控制是否显示内容的data~也就是展开和收起!
currentInfoData: {} // 这个的用处是获取当前行的数据,为了简洁在上方代码的具体用处已经被我删掉了~意义不大
}
},
//对象的默认值应由一个工厂函数返回,避免采坑
props: {
treeData: {
type: Array,
default: () => []
},
label: {
type: String,
default: () => ''
},
depth: {
type: Number,
default: () => 0
},
headImg: {
type: String,
default: () => ''
},
pkid: {
type: String,
default: () => ''
},
selectStatus: {
type: Boolean,
default: () => null
}
},
computed: {
indent () { // 定义不同层级的缩进样式
return { transform: `translate(${(this.depth - 1) * 15}px)` }
}
},
methods: {
toggleChildren () {
this.showChildren = !this.showChildren
},
checkBoxSelectChange (e) {
const checked = e.target.checked
if (checked) {
//使用$listeners方法调用祖辈的函数,因为这边是递归组件所以组件之间可能并不是严格的父子关系,所以$emit、$parent等方法都是不合适的
this.$listeners.addSelectedData(this.currentInfoData)
}
if (!checked) {
this.$listeners.deleteSelectedData(this.currentInfoData)
}
},
getCurrentInfo (label, headImg, pkid) {
this.currentInfoData = {
key: pkid,
title: label,
head: headImg
}
}
}
}
</script>
/*组件调用方法*/
<div class="tree-scroll">
<tree-custom
:label="tree.title"
:headImg="tree.head"
:treeData="tree.children"
:pkid="tree.key"
:depth="0"
:selectStatus="tree.selectStatus"
@addSelectedData="addSelectedData"
@deleteSelectedData="deleteSelectedData" />
</div>
以上就是本文的全部内容,希望对大家的学习有所帮助,也希望大家多多支持。
以上是 Vue自定义树形控件使用详解 的全部内容, 来源链接: utcz.com/p/239563.html