Vuex的热更替如何实现
前言
我们在使用Vuex的时候,会时不时的更改Vuex内的数据,但是页面不会随之更新,如果数据量大,一个数据依赖另一个数据的话,这样我们要是再刷新页面的话会把以前依赖的数据清空,效率特别低。所以,今天我总结了怎么实现Vuex热更替的功能。
实现
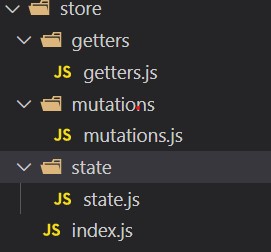
首先,我们这里使用了Vue CLI3。在根目录下的src目录下我们有一个存放Vuex的文件夹叫做store文件夹。首先我们分割成几个模块。
下面我们把它们分别引入,这里没有分割actions,不过与其他属性同理,这里有不做介绍。下面我们在index.js编辑下面代码:
import Vuex from 'vuex'
// 引入分割的模块
import state from './state/state'
import mutations from './mutations/mutations'
import getters from './getters/getters'
export default ()=>{
// 这里需要赋给一个store变量
const store = new Vuex.Store({
state:state,
mutations:mutations,
getters:getters
})
// 热更新模块
if(module.hot){
// 跟上面一样,写入对应的分割模块路径
module.hot.accept([
'./state/state',
'./mutations/mutations',
'./getters/getters'
],()=>{
// 开启热更替
const newState = require('./state/state').default
const newMutations = require('./mutations/mutations').default
const newGetters = require('./getters/getters').default
store.hotUpdate({
state:newState,
mutations:newMutations,
getters:newGetters
})
})
}
return store
}
我们还需要在main.js修改:
import Vue from 'vue'
import App from './App.vue'
import Vuex from 'vuex'
import createStore from './store/index.js'
Vue.config.productionTip = false
Vue.use(Vuex)
const store=createStore();
new Vue({
store,
render: h => h(App)
}).$mount('#app')
一些其他api
// store.registerModule({ //动态添加模块
// })
// 相当于getter
// store.watch((state)=>state.count+1,(newCount)=>{
// console.log('new count watched , '+newCount)
// })
// mutation被调用时
// store.subscribe((mutation,state)=>{
// console.log(mutation.type)
// console.log(mutation.payload)
// })
// action被调用时
// store.subscribeAction((action,state)=>{
// console.log(action.type)
// console.log(action.payload)
// })
结语
以上就完成了Vuex的热更替功能。需要注意的是,直接在state中更改是看不到效果的哦!
到此这篇关于Vuex的热更替如何实现的文章就介绍到这了,更多相关Vuex 热更替内容请搜索以前的文章或继续浏览下面的相关文章希望大家以后多多支持!
以上是 Vuex的热更替如何实现 的全部内容, 来源链接: utcz.com/p/237354.html