微信小程序实现拍照和相册选取图片
本文实例为大家分享了微信小程序实现拍照和相册选取图片的具体代码,供大家参考,具体内容如下
布局:
<!--pages/camera/camera.wxml-->
<view
class="tui-menu-list"
id="view1"
style="display:flex;flex-direction:space-between">
<button
id="b1"
size="mini"
type="primary"
bindtap="chooseimage">
获取图片
</button>
<button
id="b2"
size="mini"
type="primary"
bindtap="savePhone">
保存
</button>
</view>
<image
src="{{tempFilePaths}}"
catchtap="chooseImageTap"
mode="aspectFit"
style="width:100%;height:400px;background-color:#ffffff;">
</image>
样式:
/* pages/camera/camera.wxss */
.view1 {
height: 25px
}
.tui-menu-list {
display: flex;
flex-direction: row;
margin: 20rpx;
padding: 20rpx;
}
获取图片路径,显示图片和保存
// pages/camera/camera.js
Page({
data: {
tempFilePaths: 'http://pic2.cxtuku.com/00/01/08/b207004f7104.jpg'
},
chooseimage: function () {
var that = this;
wx.showActionSheet({
itemList: ['从相册选择', '拍照'],
itemColor: "#CED63A",
success: function (res) {
if (!res.cancel) {
if (res.tapIndex == 0) {
that.chooseWxImage('album')
} else if (res.tapIndex == 1) {
that.chooseWxImage('camera')
}
}
}
})
},
chooseWxImage: function (type) {
var that = this
wx.chooseImage({
sizeType: ['original', 'compressed'],
sourceType: [type],
count: 1,
success: function (res) {
console.log(res)
that.setData({
tempFilePaths: res.tempFilePaths[0],
})
}
})
},
savePhone: function () {
wx.getImageInfo({
src: this.data.tempFilePaths,
success: function (res) {
var path = res.path
wx.saveImageToPhotosAlbum({
filePath: path,
success: function () {
wx.showToast({
title: '保存成功',
})
},
fail: function (res) {
wx.showToast({
title: '保存失败',
icon: 'none'
})
}
})
}
})
}
})
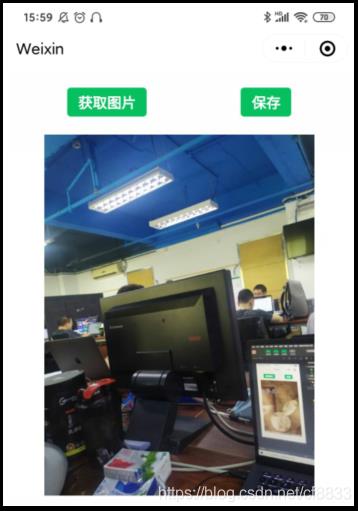
效果图:
以上就是本文的全部内容,希望对大家的学习有所帮助,也希望大家多多支持。
以上是 微信小程序实现拍照和相册选取图片 的全部内容, 来源链接: utcz.com/p/220348.html