【JS】vue3实战笔记 | 快速入门🚀
前言
vue3正式版已经发布好几个月了。相信有不少人早已跃跃欲试,这里根据这几天的项目经验罗列几点在项目中可能用到的知识点跟大家分享总结,在展开功能点介绍之前,先从一个简单的demo帮助大家可以快速入手新项目🌉
案例🌰
<template><div>
<el-button type="primary" @click="handleClick">{{
`${vTitle}${state.nums}-${staticData}`
}}</el-button>
<ul>
<li v-for="(item, index) in state.list" :key="index"> {{ item }} </li>
</ul>
</div>
</template>
<script lang="ts">
import { defineComponent, reactive, ref, watch, onMounted, computed, nextTick } from 'vue';
interface State {
nums: number;
list: string[];
}
export default {
setup() {
const staticData = 'static';
let title = ref('Create');
const state = reactive<State>({
nums: 0,
list: [],
});
watch(
() => state.list.length,
(v = 0) => {
state.nums = v;
},
{ immediate: true }
);
const vTitle = computed(() => '-' + title.value + '-');
function handleClick() {
if (title.value === 'Create') {
title.value = 'Reset';
state.list.push('小黑');
} else {
title.value = 'Create';
state.list.length = 2;
}
}
const getList = () => {
setTimeout(() => {
state.list = ['小黄', '小红'];
}, 2000);
nextTick(() => {
console.log('nextTick');
});
};
onMounted(() => {
getList();
});
return {
staticData,
state,
handleClick,
title,
vTitle,
};
},
};
</script>
效果如下👇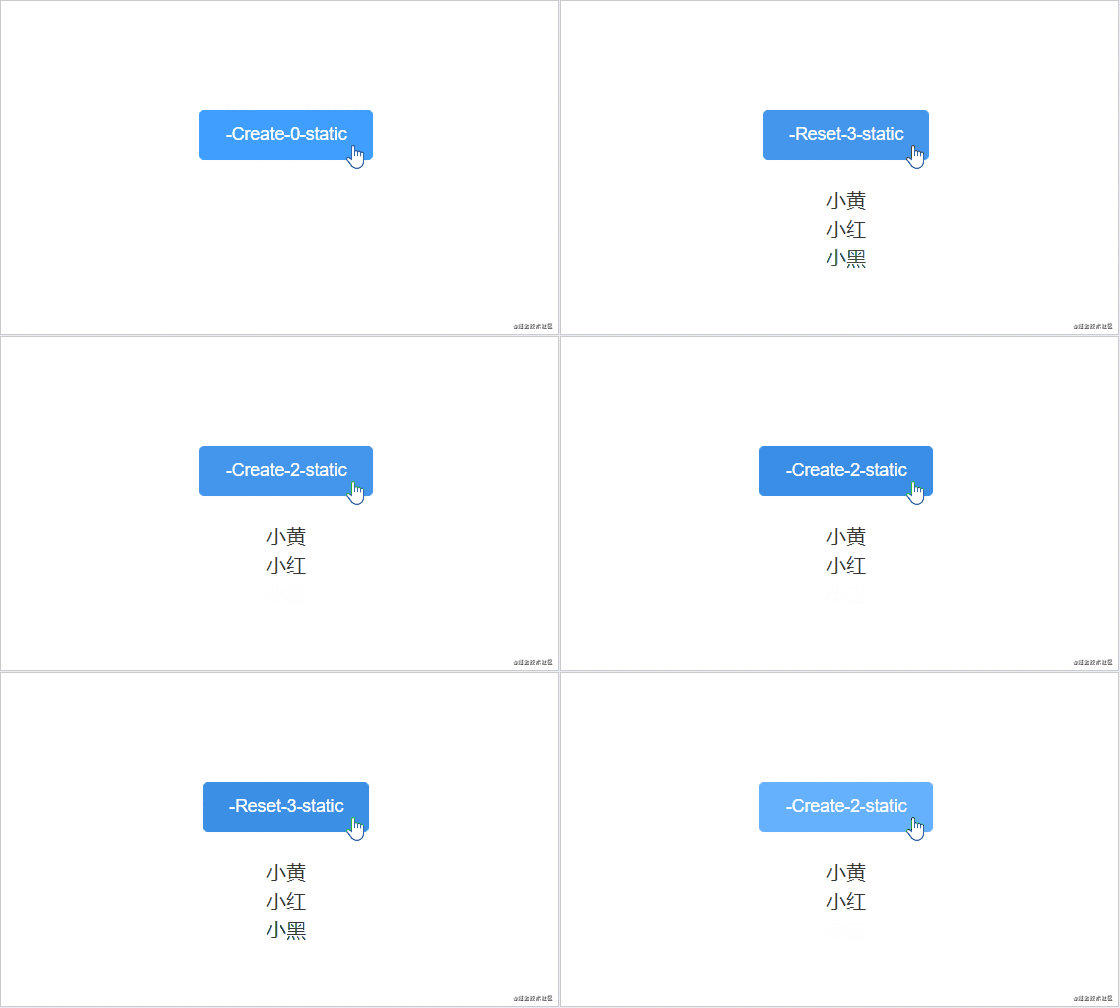
vue3生命周期
| vue2 | vue3 |
|---|---|
| beforeCreate | setup |
| created | setup |
| beforeMount | onBeforeMount |
| mounted | onMounted |
| beforeUpdate | onBeforeUpdate |
| updated | onUpdated |
| beforeDestroy | onBeforeUnmount |
| destroyed | onUnmounted |
| activated | onActivated |
| deactivated | onDeactivated |
扩展
- 可以看出来vue2的
beforeCreate和created变成了setup - 绝大部分生命周期都是在原本vue2的生命周期上带上了
on前缀
使用
在setup中使用生命周期:
import { onMounted } from 'vue';export default {
setup() {
onMounted(() => {
// 在挂载后请求数据
getList();
})
}
};
vue3常用api
上述案例中使用了一些常用的api,下面带大家一一认识下我们的新朋友
setup()
该函数有2个参数:
- props
- context
其中context是一个上下文对象,具有属性(attrs,slots,emit,parent,root),其对应于vue2中的this.$attrs,this.$slots,this.$emit,this.$parent,this.$root。
setup也用作在tsx中返回渲染函数:
setup(props, { attrs, slots }) {return () => {
const propsData = { ...attrs, ...props } as any;
return <Modal {...propsData}>{extendSlots(slots)}</Modal>;
};
},
*注意:this关键字在setup()函数内部不可用,在方法中访问setup中的变量时,直接访问变量名就可以使用。扩展
为什么props没有被包含在上下文中?
- 组件使用props的场景更多,有时甚至只需要使用props
- 将props独立出来作为一个参数,可以让TypeScript对props单独做类型推导,不会和上下文中其他属性混淆。这也使得setup、render和其他使用了TSX的函数式组件的签名保持一致。
reactive, ref
用法
<template><div class="contain">
<el-button type="primary" @click="numadd">add</el-button>
<span>{{ `${state.str}-${num}` }}</span>
</div>
</template>
<script lang="ts">
import { reactive, ref } from 'vue';
interface State {
str: string;
list: string[];
}
export default {
setup() {
const state = reactive<State>({
str: 'test',
list: [],
});
//ref需要加上value才能获取
const num = ref(1);
const numadd = () => {
num.value++;
};
return { state, numadd, num };
},
};
</script>
效果如下👇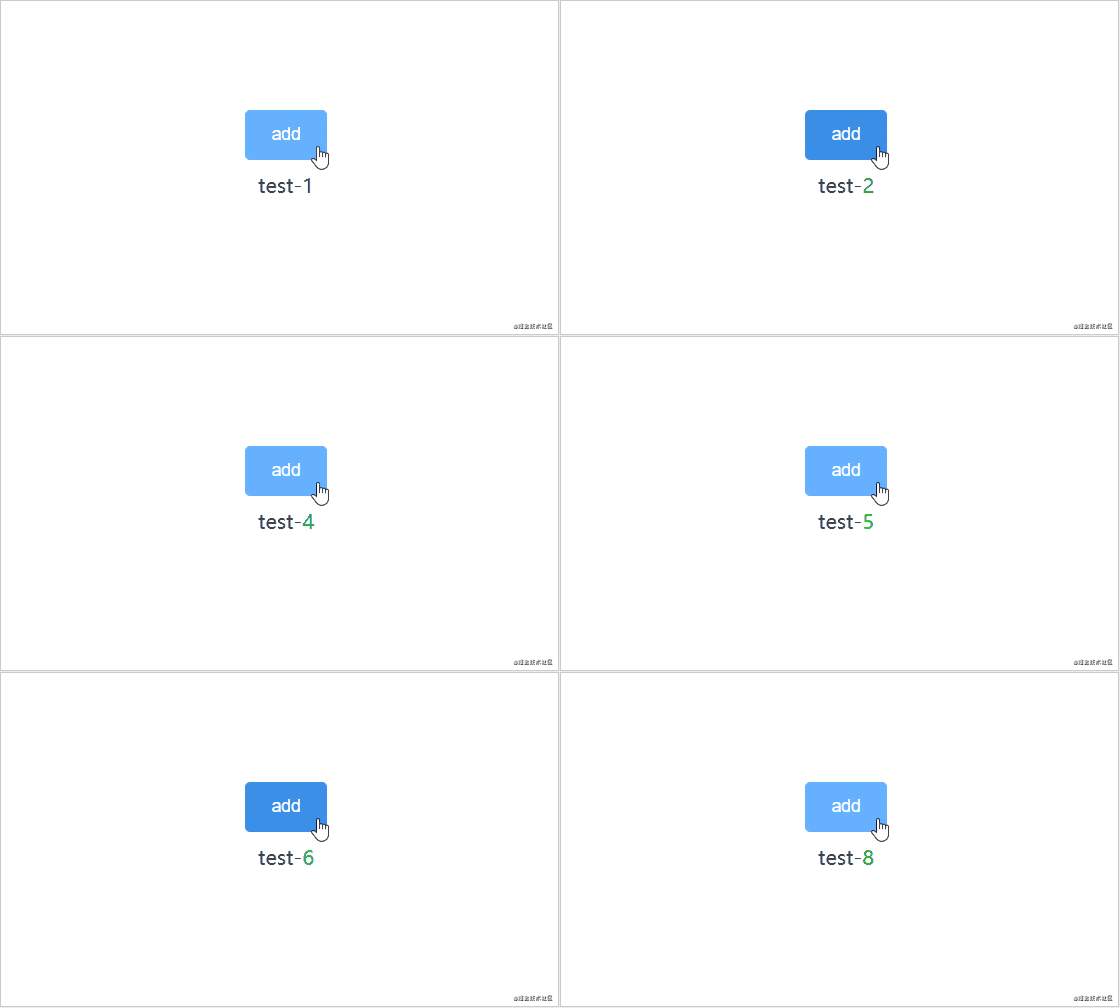
区别
- 使用时在
setup函数中需要通过内部属性.value来访问ref数据,return出去的ref可直接访问,因为在返回时已经自动解套;reactive可以直接通过创建对象访问 ref接受一个参数,返回响应式ref对象,一般是基本类型值(String、Nmuber、Boolean等)或单值对象。如果传入的参数是一个对象,将会调用reactive方法进行深层响应转换(此时访问ref中的对象会返回Proxy对象,说明是通过reactive创建的);引用类型值(Object、Array)使用reactive
toRefs
使用reactive return 出去的值每个都需要通过reactive对象 .属性的方式访问非常麻烦,我们可以通过解构赋值的方式范围,但是直接解构的参数不具备响应式,此时可以使用到这个api(也可以对props中的响应式数据做此处理)
将前面的例子作如下👇修改使用起来更加方便:
<template><div class="contain">
<el-button type="primary" @click="numadd">add</el-button>
- <span>{{ `${state.str}-${num}` }}</span>
+ <span>{{ `${str}-${num}` }}</span>
</div>
</template>
<script lang="ts">
import { reactive, ref, toRefs } from 'vue';
interface State {
str: string;
list: string[];
}
export default {
setup() {
const state = reactive<State>({
str: 'test',
list: [],
});
//ref需要加上value才能获取
const num = ref(1);
const numadd = () => {
num.value++;
};
- return { state, numadd, num };
+ return { ...toRefs(state), numadd, num };
},
};
</script>
toRef
用法
- reactive数据类型
/* reactive数据类型 */let obj = reactive({ name: '小黄', sex: '1' });
let state = toRef(obj, 'name');
state.value = '小红';
console.log(obj.name); // 小红
console.log(state.value); // 小红
obj.name = '小黑';
console.log(obj.name); // 小黑
console.log(state.value); // 小黑
- 引用数据类型
<template><span>ref----------{{ state1 }}</span>
<el-button type="primary" @click="handleClick1">change</el-button>
<!-- 点击后变成小红 -->
<span>toRef----------{{ state2 }}</span>
<el-button type="primary" @click="handleClick2">change</el-button>
<!-- 点击后还是小黄 -->
</template>
<script>
import { ref, toRef, reactive } from 'vue';
export default {
setup() {
let obj = { name: '小黄' };
const state1 = ref(obj.name); // 通过ref转换
const state2 = toRef(obj, 'name'); // 通过toRef转换
const handleClick1 = () => {
state1.value = '小红';
console.log('obj:', obj); // obj:小黄
console.log('ref', state1); // ref:小红
};
const handleClick2 = () => {
state2.value = '小红';
console.log('obj:', obj); // obj:小红
console.log('toRef', state2); // toRef:小红
};
return { state1, state2, handleClick1, handleClick2 };
},
};
</script>
小结
ref是对原数据的拷贝,响应式数据对象值改变后会同步更新视图,不会影响到原始值。toRef是对原数据的引用,响应式数据对象值改变后不会改变视图,会影响到原始值。
isRef
setup() {const one = ref(0);
const two = 0;
const third = reactive({
data: '',
});
let four = toRef(third, 'data');
const { data } = toRefs(third);
console.log(isRef(one)); // true
console.log(isRef(data)); // true
console.log(isRef(four)); // true
console.log(isRef(two)); // false
console.log(isRef(third)); // false
}
unref
setup() {const hello = ref('hello');
console.log(hello); // { __v_isRef: true,value: "hello"... }
const newHello = unref(hello);
console.log(newHello); // hello
}
watch, watchEffect
watch
用法和vue2有些区别
语法为:watch(source, callback, options)
source:用于指定监听的依赖对象,可以是表达式,getter函数或者包含上述两种类型的数组(如果要监听多个值)callback:依赖对象变化后执行的回调函数,带有2个参数:newVal,oldVal。如果要监听多个数据每个参数可以是数组[newVal1, newVal2, ... newValN],[oldVal1, oldVal2, ... oldValN]options:可选参数,用于配置watch的类型,可以配置的属性有immediate(立即触发回调函数)、deep(深度监听)
let title = ref('Create');let num = ref(0);
const state = reactive<State>({
nums: 0,
list: [],
});
// 监听ref
watch(title, (newValue, oldValue) => {
/* ... */
});
// 监听reactive
watch(
// getter
() => state.list.length,
// callback
(v = 0) => {
state.nums = v;
},
// watch Options
{ immediate: true }
);
// 监听多个ref
watch([title, num], ([newTitle, newNum], [oldTitle, oldNum]) => {
/* ... */
});
// 监听reactive多个值
watch([() => state.list, () => state.nums], ([newList, newNums], [oldList, oldvNums]) => {
/* ... */
});
<template><div class="contain">
<el-button type="primary" @click="numadd">add</el-button>
<span>{{ num }}</span>
</div>
</template>
<script lang="ts">
import { ref, watchEffect } from 'vue';
export default {
setup() {
const num = ref(1);
const numadd = () => {
num.value++;
};
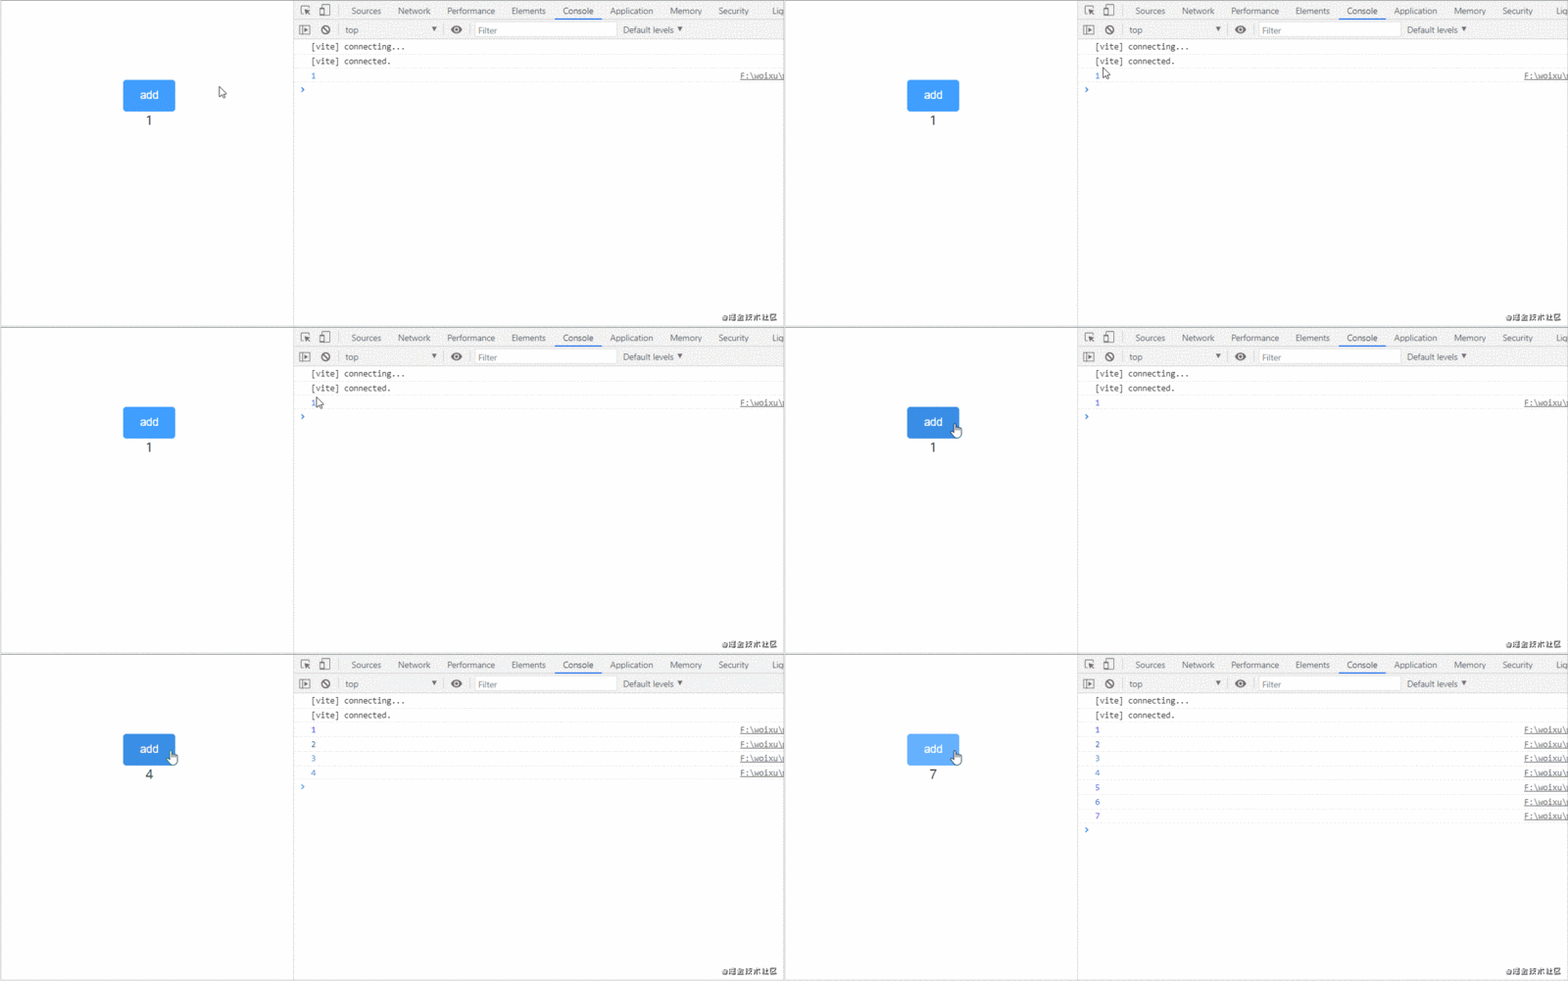
watchEffect(() => {
console.log(num.value); // 1,2,3...
});
return { numadd, num };
},
};
</script>
computed
setup() {let title = ref('Create');
const vTitle = computed(() => '-' + title.value + '-');
function handleClick() {
if (title.value === 'Create') {
title.value = 'Reset';
} else {
title.value = 'Create';
}
}
}
反转字符串:
setup() {const state = reactive({
value: '',
rvalue: computed(() =>
state.value
.split('')
.reverse()
.join('')
)
})
return toRefs(state)
}
provide, inject
// 父组件<script>
import {provide} from 'vue'
export default {
setup() {
const obj = ref('johnYu')
// 向子孙组件传递数据provide(名称,数据)
provide('name', obj)
}
}
</script>
// 孙组件
<script>
import {inject} from 'vue'
export default {
setup() {
// 接收父组件传递过来的数据inject(名称)
const name = inject('name') // johnYu
return {name}
}
}
</script>
getCurrentInstance
import { getCurrentInstance, onBeforeUnmount } from 'vue';const instance = getCurrentInstance();
// 判断当前组件实例是否存在
if (instance) {
onBeforeUnmount(() => {
/* ... */
});
}
$Refs
<template><div ref="root">This is a root element</div>
</template>
<script>
import { ref, onMounted } from 'vue'
export default {
setup() {
// 获取渲染上下文的引用
const root = ref(null)
onMounted(() => {
// 仅在初次渲染后才能获得目标元素
console.log(root.value) // <div>This is a root element</div>
})
return {
root
}
}
}
</script>
.sync
vue2.0
<el-pagination:current-page.sync="currentPage1"
>
</el-pagination>
vue3.0
<el-paginationv-model:current-page="currentPage1"
>
</el-pagination>
v-slot
Child.vue
<template><div class="child">
<h3>具名插槽</h3>
<slot name="one" />
<h3>作用域插槽</h3>
<slot :data="list" />
<h3>具名作用域插槽</h3>
<slot name="two" :data="list" />
</div>
</template>
<script>
export default {
data: function() {
return {
list: ['zhangsan', 'lisi']
}
}
}
</script>
vue2用法
<template><div>
<child>
<div slot="one">
<span>菜单</span>
</div>
<div slot-scope="user">
<ul>
<li v-for="(item, index) in user.data" :key="index">{{ item }}</li>
</ul>
</div>
<div slot="two" slot-scope="user">
<div>{{ user.data }}</div>
</div>
</child>
</div>
</template>
vue3用法
<template><div>
<child>
<template v-slot:one>
<div><span>菜单</span></div>
</template>
<template v-slot="user">
<ul>
<li v-for="(item, index) in user.data" :key="index">{{ item }}</li>
</ul>
</template>
<template v-slot:two="user">
<div>{{ user.data }}</div>
</template>
<!-- 简写 -->
<template #two="user">
<div>{{ user.data }}</div>
</template>
</child>
</div>
</template>

Composition API 结合vuex4, Vue Router 4
createStore,useStore,useRouter,useRoute
store/index.ts
import {createStore} from 'vuex';const store = createStore({
state: {
user: null,
},
mutations: {
setUser(state, user) {
state.user = user;
}
},
actions: {},
modules: {}
});
router/index.ts
import { createRouter, createWebHashHistory, RouteRecordRaw } from 'vue-router';import { scrollBehavior } from './scrollBehaviour.ts';
const routes: Array<RouteRecordRaw> = [
{
path: '/',
name: 'Home',
component: () => import('/@/views/home.vue') // vite.config.vue中配置alias
}
];
const router = createRouter({
history: createWebHashHistory(),
routes,
strict: true,
scrollBehavior: scrollBehavior,
});
export default router;
main.ts
import { createApp } from 'vue';import App from './App.vue';
import router from './router';
import store from './store';
import { getTime } from '/@/utils'
const app = createApp(App);
app.config.globalProperties.$getTime = getTime // vue3配置全局变量,取代vue2的Vue.prototype
app.use(store).use(router)
app.mount('#app');
App.vue
import { reactive } from "vue";import { useRouter } from "vue-router";
import { useStore } from "vuex";
import { ElMessage } from 'element-plus';
export default {
name: "App",
setup() {
const store = useStore();
const router = useRouter();
// 用户名和密码
const Form = reactive({
username: "johnYu",
password: "123456",
});
// 登录
function handelLogin() {
store.commit("setUser", {
username: Form.username,
password: Form.password,
});
ElMessage({
type: 'success',
message: '登陆成功',
duration: 1500,
});
// 跳转到首页
router.push({
name: 'Home',
params: {
username: Form.username
},
});
}
return {
Form,
handelLogin
};
}
home.vue
import { useRouter, useRoute } from 'vue-router';import Breadcrumb from '/@/components/Breadcrumb.vue';
export default defineComponent({
name: 'Home',
components: {
Breadcrumb,
},
setup() {
const route = useRoute();
// 接收参数
const username = route.params.username;
return {username}
}
})
导航守卫
import { onBeforeRouteUpdate, onBeforeRouteLeave } from 'vue-router';setup() {
onBeforeRouteUpdate((to) => {
if (to.name === 'Home'){
/* ... */
}
});
}
useLink
<template><div ref="root">This is a root element</div>
</template>
<script>
import { computed } from 'vue';
import { RouterLink, useLink } from 'vue-router';
export default {
name: 'AppLink',
props: {
...RouterLink.props,
inactiveClass: String,
},
setup(props) {
const { route, href, isActive, isExactActive, navigate } = useLink(props);
const isExternalLink = computed(
() => typeof props.to === 'string' && props.to.startsWith('http')
);
return { isExternalLink, href, navigate, isActive };
},
};
</script>
插槽 prop 的对象包含下面几个属性:
href:解析后的 URL。将会作为一个 a 元素的 href attribute。route:解析后的规范化的地址。navigate:触发导航的函数。会在必要时自动阻止事件,和 router-link 同理。isActive:如果需要应用激活的 class 则为 true。允许应用一个任意的 class。isExactActive:如果需要应用精确激活的 class 则为 true。允许应用一个任意的 class。
扩展
样式 scoped
vue2
/* 深度选择器 *//*方式一:*/
>>> .foo{ }
/*方式二:*/
/deep/ .foo{ }
/*方式三*/
::v-deep .foo{ }
vue3
/* 深度选择器 */::v-deep(.foo) {}
.env环境扩展
.env文件
VITE_USE_MOCK = true使用:
import.meta.env.VITE_APP_CONTEXT使用Composition API替换mixin
- 每个
mixin都可以定义自己的props、data,它们之间是无感的,所以很容易定义相同的变量,导致命名冲突。 - 另外对组件而言,如果模板中使用不在当前组件中定义的变量,那么就会不太容易知道这些变量在哪里定义的,这就是数据来源不清晰。
以这个经典的Vue 2组件为例,它定义了一个"计数器"功能:
//counter.jsexport default {
data() {
return {
count: 0
};
},
methods: {
increment() {
this.count++;
}
}
}
用法如下:
<template><div>
{{ count }}
<el-button @click="increment()">add</el-button>
</div>
</template>
<script>
import counter from './mixins/counter'
import getTime from './mixins/getTime'
export default {
mixins: [counter,getTime]
}
</script>
假设这边我们引用了counter和getTime两个mixin,则无法确认count和increment()方法来源,并且两个mixin中可能会出现重复命名的概率
下面是使用Composition API定义的完全相同的组件:
// counter.tsimport { ref } from 'vue';
export default function () {
const count = ref(0);
function increment() {
count.value++;
}
return { count, increment };
}
<template><div>
{{ count }}
<el-button @click="increment()">add</el-button>
</div>
</template>
<script lang="ts">
import { defineComponent } from 'vue';
import counter from '/@/composables/counter';
export default defineComponent({
setup() {
const { count, increment } = counter();
return {
count,
increment,
};
},
});
</script>
总结
使用Composition API可以清晰的看到数据来源,即使去编写更多的hook函数,也不会出现命名冲突的问题。🚄
Composition API 除了在逻辑复用方面有优势,也会有更好的类型支持,因为它们都是一些函数,在调用函数时,自然所有的类型就被推导出来了,不像 Options API 所有的东西使用 this。另外,Composition API 对 tree-shaking 友好,代码也更容易压缩。vue3的Composition API会将某个逻辑关注点相关的代码全都放在一个函数里,这样当需要修改一个功能时,就不再需要在文件中跳来跳去
参考文章 📜
❤️ 快速使用Vue3最新的15个常用API
❤️ vue 3.x 如何有惊无险地快速入门
扩展 🏆
如果你觉得本文对你有帮助,可以查看我的其他文章❤️:
👍 10个简单的技巧让你的 vue.js 代码更优雅🍊
👍 零距离接触websocket🚀
👍 Web开发应了解的5种设计模式
👍 Web开发应该知道的数据结构
以上是 【JS】vue3实战笔记 | 快速入门🚀 的全部内容, 来源链接: utcz.com/a/92180.html


