RN(react-native)踩坑实录--编写项目

编写app
DEMO:查询天气app
起步
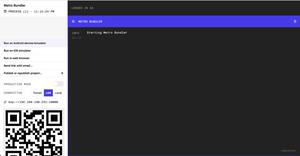
搭建一个自己的app
react-native init NewWeathercd NewWeather
项目目录分析
| 目录 | 说明 |
|---|---|
| android | Android项目目录,包含了使用AndroidStudio开发项目的环境配置文件 |
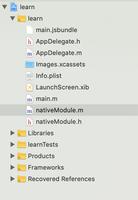
| ios | iOS项目目录,包含了XCode的环境 |
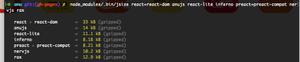
| node_modules | 项目依赖 |
| .babelrc | Babel配置文件,在.babelrc配置文件中,主要是对预设(presets)和插件(plugins)进行配置,因此不同的转译器作用不同的配置项 |
| .buckconfig | Buck的配置文件,buck是Facebook开源的高效构建系统 |
| .flowconfig | Flow的配置文件 |
| .gitattributes | git配置文件,指定非文本文件的对比合并方式 |
| .gitignore | git配置文件,用于忽略你不想提交到Git上的文件 |
| .watchmanconfig | watchman的配置文件,watchman用于监控文件变化,辅助实现工程修改信息 |
| App.js | 项目页面 |
| index.js | ios或android的入口 |
| app.json | app的json文件 |
| package.json | 项目基本信息以及依赖信息 |
| yarn.lock | yarn生成的文件,记录当前yarn package的信息 |
编写页面
定位到App.js,该文件已经写了一个“Welcome to React Native!”的页面,现在就从这里开始编写。
demo用到了react-native-elements
安装react-native-elements
cd NewWeatheryarn add react-native-elements
# or with npm
npm i react-native-elements --save
获取api
此demo所用api为百度api,在百度地图api开放平台获取自己的AK。
const baseUrl = 'http://api.map.baidu.com/telematics/v3/weather?output=json&ak={你的AK}&location='引入组件
React Native只使用JavaScript也能编写原生移动应用。 它在设计原理上和React一致,通过声明式的组件机制来搭建丰富多彩的用户界面。
引入所需要用到的组件。
import React, { Component } from 'react'import { Modal, FlatList, StyleSheet, Text, View,Button,TextInput } from "react-native";
import { Card} from 'react-native-elements'
const baseUrl = 'http://api.map.baidu.com/telematics/v3/weather?output=json&ak={AK}&location=';
编写组件
React Native 内置了对 ES2015(ES6) 标准的支持,可以放心使用而无需担心兼容性问题。
export default class Main extends React.Component{ constructor(props){
super(props);
this.state={//初始化声明一些数据
data: [],
index:[],
location:'乌鲁木齐',
modalVisible: false,
}
this.fetchData = this.fetchData.bind(this)//绑定this
}
fetchData(){//fetch调用api获取天气数据
fetch(baseUrl+this.state.location).then(response => response.json())
.then(responseData => {
this.setState({//更新state
data: this.state.data.concat(responseData.results[0].weather_data),
index: this.state.data.concat(responseData.results[0].index),
});
})
.catch(error => {
console.error(error);
});
}
setModalVisible(visible) {
this.setState({ modalVisible: visible });
}
componentDidMount() {
this.fetchData();
}
render(){
return(
<View>
<Modal
animationType="slide"
transparent={false}
visible={this.state.modalVisible}
onRequestClose={() => {
this.setModalVisible(!this.state.modalVisible);
}}
>
<Button
title='关闭'
onPress={() => {
this.setModalVisible(!this.state.modalVisible);
}}
/>
<FlatList
data={this.state.index}
renderItem={this.renderindex}
/>
</Modal>
<View style={styles.btncontainer}>
<TextInput
style={{height: 40,width:200, borderColor: '#2089dc', borderBottomWidth: 1}}
onChangeText={(location) => this.setState({location})}
value={this.state.location}
/>
<Button
title='查询'
width= '40'
onPress={() => {
this.setState({
data: [],
index: [],
});
this.fetchData();
}}
/>
<Button
title='指数'
width= '40'
onPress={() => {
this.setModalVisible(true);
}}
/>
</View>
<View style={styles.flatList}>
<FlatList
data={this.state.data}
renderItem={this.renderItem}
/>
</View>
</View>
)
}
renderindex({ item,i }){
//{ item }是一种“解构”写法
// item也是FlatList中固定的参数名
return(
<Card key={i} title={item.title}>
<Text style={styles.list}>{item.tipt} : {item.zs}</Text>
<Text style={styles.list}>{item.des}</Text>
</Card>
)
}
renderItem({ item,i }){
return(
<Card key={i} title={item.date}>
<Text style={styles.list}>{item.weather}</Text>
<Text style={styles.list}>{item.wind}</Text>
<Text style={styles.list}>{item.temperature}</Text>
</Card>
)
}
}
添加样式
在 React Native 中,并不需要学习什么特殊的语法来定义样式。仍然是使用 JavaScript 来写样式。所有的核心组件都接受名为style的属性。这些样式名基本上是遵循了 web 上的 CSS 的命名,只是按照 JS 的语法要求使用了驼峰命名法,例如将background-color改为backgroundColor。
var styles = StyleSheet.create({ btncontainer:{
flexDirection: 'row',
justifyContent: 'space-around',
alignItems: "center",
},
list: {
fontSize: 15,
paddingTop: 10,
},
flatList:{
paddingBottom: 120,
}
})
以上是 RN(react-native)踩坑实录--编写项目 的全部内容, 来源链接: utcz.com/z/383807.html