React Native 应用在键盘弹出时优雅地响应

本文转载自:https://blog.csdn.net/sinat_17775997/article/details/72953940
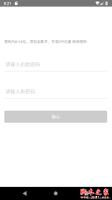
在使用 React Native 应用时,一个常见的问题是当你点击文本输入框时,键盘会弹出并且遮盖住输入框。就像这样:
有几种方式可以避免这种情况发生。一些方法比较简单,另一些稍微复杂。一些是可以自定义的,一些是不能自定义的。今天,我将向你展示 3 种不同的方式来避免 React Native 应用中的键盘遮挡问题。
文章中所有的代码都托管在 GitHub 上
KeyboardAvoidingView
最简单、最容易安装使用的方法是 KeyboardAvoidingView。这是一个核心组件,同时也非常简单。
你可以使用这段存在键盘覆盖输入框问题的 代码,然后更新它,使输入框不再被覆盖。你要做的第一件事是用 KeyboardAvoidView 替换 View,然后给它加一个 behavior 的
prop。查看文档的话你会发现,他可以接收三个不同的值作为参数 —— height, padding, position。我发现 padding 的表现是最在我意料之内的,所以我将使用它。
import React from 'react';import { View, TextInput, Image, KeyboardAvoidingView } from 'react-native';
import styles from './styles';
import logo from './logo.png';
const Demo = () => {
return (
<KeyboardAvoidingView
style={styles.container}
behavior="padding"
>
<Image source={logo} style={styles.logo} />
<TextInput
placeholder="Email"
style={styles.input}
/>
<TextInput
placeholder="Username"
style={styles.input}
/>
<TextInput
placeholder="Password"
style={styles.input}
/>
<TextInput
placeholder="Confirm Password"
style={styles.input}
/>
<View style={{ height: 60 }} />
</KeyboardAvoidingView>
);
};
export default Demo;
它的表现如下,虽然不是非常完美,但几乎不需要任何工作量。这在我看来是相当好的。
需要注意的事,在上个实例代码中的第 30 行,设置了一个高度为 60 的 View。我发现keyboardAvoidingView 对最后一个元素不适用,即使是添加了 padding/margin 属性也不奏效。所以我添加了一个新的元素去
“撑开” 一些像素。
使用这个方法时,顶部的图片会被推出到视图之外。在后面我会告诉你如何解决这个问题。
针对 Android 开发者:我发现这种方法是处理这个问题最好,也是唯一的办法。在
AndroidManifest.xml中添加android:windowSoftInputMode="adjustResize"。操作系统将为你解决大部分的问题,KeyboardAvoidingView会为你解决剩下的问题。参见 这个。接下的部分可能不适用于你。
Keyboard Aware ScrollView
下一种解决办法是使用 react-native-keyboard-aware-scroll-view,他会给你很大的冲击。实际上它使用了 ScrollView 和 ListView 处理所有的事情(取决于你选择的组件),让滑动交互变得更加自然。它另外一个优点是它会自动将屏幕滚动到获得焦点的输入框处,这会带来非常流畅的用户体验。
它的使用方法同样非常简单 —— 只需要替换 基础代码 的 View。下面是具体代码,我会做一些相关的说明:
import React from 'react';import { View, TextInput, Image } from 'react-native';
import { KeyboardAwareScrollView } from 'react-native-keyboard-aware-scroll-view'
import styles from './styles';
import logo from './logo.png';
const Demo = () => {
return (
<KeyboardAwareScrollView
style={{ backgroundColor: '#4c69a5' }}
resetScrollToCoords={{ x: 0, y: 0 }}
contentContainerStyle={styles.container}
scrollEnabled={false}
>
<Image source={logo} style={styles.logo} />
<TextInput
placeholder="Email"
style={styles.input}
/>
<TextInput
placeholder="Username"
style={styles.input}
/>
<TextInput
placeholder="Password"
style={styles.input}
/>
<TextInput
placeholder="Confirm Password"
style={styles.input}
/>
</KeyboardAwareScrollView>
);
首先你需要设置 ScrollView 的 backgroundColor(如果你想使用滚动的话)。接下来你需要告诉默认组件在哪里,当你的键盘收起时,界面就会返回到默认的那个位置
—— 如果省略 View 的这个 prop,可能会导致键盘在关闭之后界面依旧停留在顶部。
在设置好 resetScrollToCoords 这个 prop 之后你需要设置 contentContainerStyle ——
这本质上会替换掉你之前给 View 设置的样式。最后一件事是禁止掉从用户产生的滚动交互。这可能并不是完全适合你的 UI 交互(比如对于用户需要编辑很多字段的界面),但是在这里,允许用户滚动没有任何意义,因为并没有其它的内容需要用户来进行滚动操作。
把这些所有的 prop 放到一起就会产生下面的效果,看起来很不错:
Keyboard Module
这是迄今为止最为手动的方式,但也同时给开发者最大的控制权。你可以使用一些动画库来帮助实现之前看到的那种平滑滚动。
React Native 在官方文档是没有说 Keyboard Module 可以监听从设备上产生的键盘事件。你使用的事件是 keyboardWillShow 和 keyboardWillHide,来产生一个键盘展开的动画(或者其他信息)。
当 keyboardWillShow 事件产生时,需要设置一个动画变量到键盘的最终高度,并使其与键盘弹出滑动时间保持一致。然后你可以用这个动画变量的值在容器的底部设置 padding,将所有的内容上移。
我会在后面展示具体代码,先展示一下上面所说的内容会产生的效果:
这次我将修复 UI 中的那个图片。为此,需要使用动画变量的值来管理图片的高度,你可以在弹出键盘的同时调整图片的高度。下面是具体代码:
import React, { Component } from 'react';import { View, TextInput, Image, Animated, Keyboard } from 'react-native';
import styles, { IMAGE_HEIGHT, IMAGE_HEIGHT_SMALL} from './styles';
import logo from './logo.png';
class Demo extends Component {
constructor(props) {
super(props);
this.keyboardHeight = new Animated.Value(0);
this.imageHeight = new Animated.Value(IMAGE_HEIGHT);
}
componentWillMount () {
this.keyboardWillShowSub = Keyboard.addListener('keyboardWillShow', this.keyboardWillShow);
this.keyboardWillHideSub = Keyboard.addListener('keyboardWillHide', this.keyboardWillHide);
}
componentWillUnmount() {
this.keyboardWillShowSub.remove();
this.keyboardWillHideSub.remove();
}
keyboardWillShow = (event) => {
Animated.parallel([
Animated.timing(this.keyboardHeight, {
duration: event.duration,
toValue: event.endCoordinates.height,
}),
Animated.timing(this.imageHeight, {
duration: event.duration,
toValue: IMAGE_HEIGHT_SMALL,
}),
]).start();
};
keyboardWillHide = (event) => {
Animated.parallel([
Animated.timing(this.keyboardHeight, {
duration: event.duration,
toValue: 0,
}),
Animated.timing(this.imageHeight, {
duration: event.duration,
toValue: IMAGE_HEIGHT,
}),
]).start();
};
render() {
return (
<Animated.View style={[styles.container, { paddingBottom: this.keyboardHeight }]}>
<Animated.Image source={logo} style={[styles.logo, { height: this.imageHeight }]} />
<TextInput
placeholder="Email"
style={styles.input}
/>
<TextInput
placeholder="Username"
style={styles.input}
/>
<TextInput
placeholder="Password"
style={styles.input}
/>
<TextInput
placeholder="Confirm Password"
style={styles.input}
/>
</Animated.View>
);
}
};
export default Demo;
它确实是一个和其他解决方案不一样的方案。使用 Animated.View 和 Animated.Image 而非 View 和 Image,以便可以使用动画变量的值。有趣的部分是 keyboardWillShow 和 keyboardWillHide,它们会改变动画变量的参数。
这里用两个动画同时并行驱动 UI 的改变。会给你留下下面的印象:
虽然写了非常多的代码,但好歹让整个操作看上去非常流畅。你有很大的余地去选择你要做什么,真正的自定义与你所关心内容的互动。
Combining Options
如果想提炼一些代码,我倾向于结合几种情况在一起。例如: 通选方案 1 和方案 3,你就只需要关心和图像高度相关的动画。
随着 UI 复杂性的增加,使用下面代码会比方案 3 精简很多:
import React, { Component } from 'react';import { View, TextInput, Image, Animated, Keyboard, KeyboardAvoidingView } from 'react-native';
import styles, { IMAGE_HEIGHT, IMAGE_HEIGHT_SMALL } from './styles';
import logo from './logo.png';
class Demo extends Component {
constructor(props) {
super(props);
this.imageHeight = new Animated.Value(IMAGE_HEIGHT);
}
componentWillMount () {
this.keyboardWillShowSub = Keyboard.addListener('keyboardWillShow', this.keyboardWillShow);
this.keyboardWillHideSub = Keyboard.addListener('keyboardWillHide', this.keyboardWillHide);
}
componentWillUnmount() {
this.keyboardWillShowSub.remove();
this.keyboardWillHideSub.remove();
}
keyboardWillShow = (event) => {
Animated.timing(this.imageHeight, {
duration: event.duration,
toValue: IMAGE_HEIGHT_SMALL,
}).start();
};
keyboardWillHide = (event) => {
Animated.timing(this.imageHeight, {
duration: event.duration,
toValue: IMAGE_HEIGHT,
}).start();
};
render() {
return (
<KeyboardAvoidingView
style={styles.container}
behavior="padding"
>
<Animated.Image source={logo} style={[styles.logo, { height: this.imageHeight }]} />
<TextInput
placeholder="Email"
style={styles.input}
/>
<TextInput
placeholder="Username"
style={styles.input}
/>
<TextInput
placeholder="Password"
style={styles.input}
/>
<TextInput
placeholder="Confirm Password"
style={styles.input}
/>
</KeyboardAvoidingView>
);
}
};
export default Demo;
每种实现都有它的优点和缺点 —— 你必须选择最适合给定用户体验的方案。
- 怎么解决RN TextInput 被键盘遮挡的问题
我的实践
场景
类似于 QQ 聊天窗的场景
<View><View></View> // 输入框
<ScrollView></Scrollview> // 对话 View
<View></View> // TextInput
<View>
解决方案
前提
采用 flex 布局,两个 View 是固定高度,ScrollView 在中间占满剩余空间
监听键盘谈起事件,计算键盘高度。
在最后一个 View 后面填充 空间占用View,高度由 state 控制,取自键盘高度。
<View><View></View> // 输入框
<ScrollView></Scrollview> // 对话 View
<View><TextInput /></View> // TextInput
<View></View> // 空间占用 View
<View>
问题
ScrollView 长度变短之后,里面的内容并没有发生滚动。产生键盘覆盖 ScrollView 内容的效果
解决方案
过程中自定义 ScrollView 的滚动。滚到最底部:
componentDidUpdate() { const {
// 键盘高度
keyboardHeight,
// 键盘是否展开
keyboardStatus
} = this.props
const {
scrollViewHeight
} = this.state;
// 键盘展开
// 键盘展开时 scrollview 变小,内容位置不会发生变化,所以减去键盘高度滑动到最底
// 键盘关闭时 scrollView 变大,所以再减一个键盘高度
if (keyboardStatus === 1) {
this.scrollView.scrollTo({
y: scrollViewHeight - keyboardHeight,
animated: true
})
} else {
this.scrollView.scrollTo({
y: scrollViewHeight - 2*keyboardHeight,
animated: true
})
}
}
如何如果 ScrollView 的 scrollViewHeight ?
<ScrollViewref={ref => this.scrollView = ref}
>
<View style={styles.lineView}>
<EasySpeak
pos='right'
text='今天天气怎么样'
/>
</View>
<View style={styles.lineView}>
<EasySpeak
pos='left'
text='你所在地区是哈尔滨,今天温度 -40 度,注意身体别冻死自己'
/>
</View>
<View style={styles.lineView}>
<MultiImgText />
</View>
<View style={styles.lineView}>
<MultiImgText />
</View>
<View onLayout={e => this.setState({scrollViewHeight: e.nativeEvent.layout.y})}/>
</ScrollView>
即 下面铺一层 View,计算 onLayout 时的位置
尾语
只在 IOS 模拟器上做了简单测试,目前尚不清楚是否有其他问题。这里只做一些记录https://github.com/rccoder/blog/issues/25
以上是 React Native 应用在键盘弹出时优雅地响应 的全部内容, 来源链接: utcz.com/z/382846.html

