React Native 在现有项目中的探路

移动开发中,native开发性能和效果上无疑是最好的。
但是在众多的情况下,native开发并不是最优的选择。当需求经常改动的时候,当预算有限的时候,当deadline很近的时候,native开发的成本也就体现出来了。
这时候,webview开始大放异彩,快速开发、无需重新发布版本、人员成本低的特点就显现出来了。(这里不指hybrid)。
当使用WebView后,就会逐渐发现,用户体验变得一塌糊涂,长时间的loading、操作dom造成的性能问题等等等等···
react native出现后,开辟的一条新的道路。
公司现在的产品经历了2个大的版本更新后(纯native和部分WebView),现在要经历第三个重大版本的升级了。但这次版本出现了一些情况。
版面全部更新、人员有限、预算有限、开发时间短。这就是面临的问题所在。
hybrid是一整套的将html转为native的开发方式,但使用此方法将会面临的问题是:全部项目需要推翻重做、没有做过此类开发、没有经验。这对我们来说是一个很大的冒险。否决!
后续讨论后,使用native进行框架方面的搭建,大量使用webview进行过渡,开始逐步接入react native。
这样的好处就是基础内容仍然在可控范围内,可大量重复使用之前的代码。大量使用webview是为了保证项目可以在规定时间内赶工完成···纯属无奈之举。
使用react native是为了后续逐步替代webview而进行的。由于在rn方面没有很足的经验,只能一步一步的来,不敢一次性引入太多。
rn的好处就是在于可以在已有的项目中接入开发,而不像hybrid那样,需要全部替换才可以使用。这样就可以保证当rn遇到坑无法解决的时候,可以用较少的代价替换回native,保证项目的可控性。
#1 react native开发服务器
开发时,还是使用服务器来装载内容较为方便。这里使用的是ubuntu server 14.04。
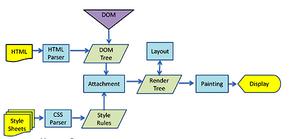
这里还是提一句,rn是如何工作的。
在开发时,我们的框架是这样的:
当正式发布进入到生产环境时,开发服务器上所有的js文件将会被编译成包的形式,直接嵌入到客户端内。这时,已经不再需要开发服务器的支持了。(热更新后续继续写)
#2 详细的搭建步奏
#2.0 服务器搭建
由于资金有限,所以直接搞的虚拟机,安装的ubuntu server,基础设置:安装的node版本是v5.8.0。
这里就不详细的讲解node如何安装了···大家自行查找···网上很多···
首先安装Watchman和Flow
git clone https://github.com/facebook/watchman.git
cd watchman
git checkout v4.1.0 # the latest stable release
./autogen.sh
./configure
make
sudo make install
sudo npm install -g flow-bin
具体方法详见:https://facebook.github.io/react-native/docs/getting-started-linux.html#getting-started-on-linux (后面的安装android不需要)
然后创建一个存放代码的目录,比如我的目录是:/var/react/tykReact
切换到此目录下,执行下面语句进行初始化设置。
npm init
如果此语句在设置时不太会用,可在目录下创建package.json文件,文件中的内容如下:
{
"name": "tykReact",
"version": "1.0.0",
"description": "",
"main": "index.js",
"scripts": {
"start": "node_modules/react-native/packager/packager.sh"
},
"author": "LunaGao",
"license": "MIT",
"dependencies": {
"react-native":"^0.20.0"
}
}
注意:
1. dependencies下的"react-native":"^0.20.0"是必须的,直接npm install react-native安装在后续会出现问题。
2. scripts下的"start": "node_modules/react-native/packager/packager.sh"是为了启动使用的。(也可以不用)
此时,就可以执行以下语句进行下载react了。
npm install
这个时间比较长,需要耐心等待(我下载了1个小时...)。当然,最好加上sudo,以免出现没有权限等问题。
当安装好后,创建两个文件:index.ios.js和index.android.js。这是用来测试使用的。
index.ios.js
'use strict';import React, {
Text,
View
} from 'react-native';
var styles = React.StyleSheet.create({
container: {
flex: 1,
backgroundColor: 'red'
}
});
class SimpleApp extends React.Component {
render() {
return (
<View style={styles.container}>
<Text>This is a simple application.</Text>
</View>
)
}
}
React.AppRegistry.registerComponent('TestView', () => SimpleApp);
index.android.js
'use strict';import React, {
Text,
View
} from 'react-native';
class MyAwesomeApp extends React.Component {
render() {
return (
<View style={styles.container}>
<Text style={styles.hello}>Hello, World</Text>
</View>
)
}
}
var styles = React.StyleSheet.create({
container: {
flex: 1,
justifyContent: 'center',
},
hello: {
fontSize: 20,
textAlign: 'center',
margin: 10,
},
});
React.AppRegistry.registerComponent('TestView', () => MyAwesomeApp);
两个文件的代码并不相同,这是直接从
https://facebook.github.io/react-native/docs/embedded-app-android.html#add-js-to-your-app
和
https://facebook.github.io/react-native/docs/embedded-app-ios.html#create-your-react-native-app
复制而来。
至此,目录下应该是如下的样子:
请忽略116221-这样的文件和11f83243da86022a90031e1ca9d758bc,这些是服务启动后自动生成的。npm-debug.log.4046290474这个是错误的日志文件。
没问题后,我们开始启动服务,执行如下语句:
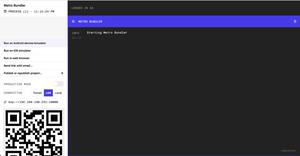
npm start
正常的情况如下图所示:
此时,打开浏览器,输入地址进行访问(192.168.0.203是我的服务器地址,需要替换成实际的地址,本机运行可直接使用localhost):
http://192.168.0.203:8081/index.ios.bundle?platform=ios
http://192.168.0.203:8081/index.android.bundle?platform=android
当返回类似于下图的内容时,证明服务器已经正常启动了(返回的内容其实很多···)。
#2.1 ios集成
创建一个测试用的ios项目,如:react-test
使用pod进行集成,首先要使用npm安装react-native(使用命令:npm install react-native),这个过程可能有点久,然后修改pod文件内容如下:
#platform :ios,'9.0'
use_frameworks!
target "react-test" do
pod 'React', :path => './node_modules/react-native', :subspecs => [
'Core',
'RCTImage',
'RCTNetwork',
'RCTText',
'RCTWebSocket',
# Add any other subspecs you want to use in your project
]
end
pod如何使用这里就不做过多解释了。
然后,在storyboard中拖入一个view,把view的class改为ReactTestView。然后创建ReactTestView,继承自UIView。
ReactTestView.h
//// ReactTestView.h
// react-test
//
// Created by Luna Gao on 16/3/3.
// Copyright © 2016年 gao.luna.com. All rights reserved.
//
#import <UIKit/UIKit.h>
#import "RCTRootView.h"
@interface ReactTestView : UIView
@end
ReactTestView.m
//// ReactTestView.m
// react-test
//
// Created by Luna Gao on 16/3/3.
// Copyright © 2016年 gao.luna.com. All rights reserved.
//
#import "ReactTestView.h"
@implementation ReactTestView
- (void)awakeFromNib {
NSString *urlString = @"http://192.168.0.203:8081/index.ios.bundle?platform=ios";
NSURL *jsCodeLocation = [NSURL URLWithString:urlString];
// NSURL *jsCodeLocation = [[NSBundle mainBundle] URLForResource:@"main" withExtension:@"jsbundle"];
RCTRootView *rootView = [[RCTRootView alloc] initWithBundleURL:jsCodeLocation moduleName:@"TestView" initialProperties:nil launchOptions:nil];
[self addSubview:rootView];
rootView.frame = self.bounds;
}
@end
然后就可以跑起来了。运行效果如下图(样子可能不一样,我的storyboard中增加了tab bar controller):
#2.2 Android集成
内容较多,请参考https://facebook.github.io/react-native/docs/embedded-app-android.html#prepare-your-app
注:这里时需要做 prepare-your-app 和 add-native-code 这两段中的内容。
将onCreate方法修改为:
super.onCreate(savedInstanceState);setContentView(R.layout.activity_main);
mReactRootView = (ReactRootView) findViewById(R.id.test_js);
mReactInstanceManager = ReactInstanceManager.builder()
.setApplication(getApplication())
.setBundleAssetName("index.android.bundle")
.setJSMainModuleName("index.android")
.addPackage(new MainReactPackage())
.setUseDeveloperSupport(BuildConfig.DEBUG)
.setInitialLifecycleState(LifecycleState.RESUMED)
.build();
mReactRootView.startReactApplication(mReactInstanceManager, "TestView", null);
在activity_main.xml文件中增加一个ReactRootView,id命名为:test_js。代码如下:
<com.facebook.react.ReactRootViewandroid:id="@+id/test_js"
android:layout_width="match_parent"
android:layout_height="match_parent"
android:layout_below="@id/test_text"/>
请注意:在AndroidManifest.xml文件中增加
<activity android:name="com.facebook.react.devsupport.DevSettingsActivity"/>
此时运行代码,界面如下:
在命令行中执行:adb shell input keyevent 82
将弹出如下对话框:
点击Dev Settings,点击 Debug server host & port for device 选项如下图:
输入ip地址和端口号,如:192.168.0.203:8081,点击ok。
返回到应用打开页面,再次使用adb shell input keyevent 82命令,点击Reload JS,重新加载js文件。此时就会正常显示界面了。如下图:
#3 如何发布
发布时,我们需要先编译js文件。
在服务器中切换到刚刚的目录下(如/var/react/tykReact),执行如下两个命令:
sudo react-native bundle --minify --entry-file index.ios.js --bundle-output /tmp/ios.jsbundle --platform ios
sudo react-native bundle --minify --entry-file index.android.js --bundle-output /tmp/android.jsbundle --platform android
会在/tmp目录下出现两个文件:
ios.jsbundle 和 android.jsbundle。
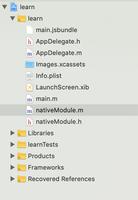
将这两个文件分别放入到ios项目和android asset目录下,如下图:
修改ios代码:
ReactTestView.m
// NSString *urlString = @"http://192.168.0.203:8081/index.ios.bundle?platform=ios";// NSURL *jsCodeLocation = [NSURL URLWithString:urlString];
NSURL *jsCodeLocation = [[NSBundle mainBundle] URLForResource:@"ios" withExtension:@"jsbundle"];
RCTRootView *rootView = [[RCTRootView alloc] initWithBundleURL:jsCodeLocation moduleName:@"TestView" initialProperties:nil launchOptions:nil];
[self addSubview:rootView];
rootView.frame = self.bounds;
注意:这里需要将ios.jsbundle文件加入到项目中。
修改android代码:
super.onCreate(savedInstanceState);setContentView(R.layout.activity_main);
mReactRootView = (ReactRootView) findViewById(R.id.test_js);
mReactInstanceManager = ReactInstanceManager.builder()
.setApplication(getApplication())
.setBundleAssetName("android.jsbundle")
.setJSMainModuleName("android")
.addPackage(new MainReactPackage())
.setUseDeveloperSupport(BuildConfig.DEBUG)
.setInitialLifecycleState(LifecycleState.RESUMED)
.build();
mReactRootView.startReactApplication(mReactInstanceManager, "TestView", null);
至此,项目就可以不在依赖开发服务器而直接使用安装包进行运行了~
另:debug模式需要在正式发布的时候取消掉。
以上是 React Native 在现有项目中的探路 的全部内容, 来源链接: utcz.com/z/381740.html


