Vue 组件(七)

1、组件创建及使用
(1)在 components 目录下,新建 Learn.vue 文件,示例代码如下:
<template><!-- 只能存在一个根容器 -->
<div class="container">
<p>hello world</p>
</div>
</template>
<script>
export default {
name: "Learn",
// 所有初始化数据全部放入 data 中
data() {
}
}
</script>
<!-- 样式,scope 属性表示样式只在当前组件生效 -->
<style lang="css" scoped>
</style>
(2)在 App.vue 文件中引入刚刚创建的 Learn.vue:
<template><div >
<Learn />
</div>
</template>
<script>
// 导入组件
import Learn from "./components/Learn"
export default {
name: "App",
components: {
Learn // 注入
},
data() {
return {
message: ''
}
}
};
</script>
2、使用 props 传递数据(父传子)
通常常父组件的模板中包含子组件,父组件要正向地向子组件传递数据或参数,子组件接收到后根据参数的不同来渲染不同的内容或执行操作。这个正向传递数据的过程就是通过 props 来实现的。
在组件中,使用选项props 来声明需要从父级接收的数据, props 的值可以是两种, 一种是字符串数组,一种是对象:
1、使用字符串数组方式传递:
父组件 App.vue:
<template><div >
<!-- 将 message 参数传递给子组件 -->
<Learn message="来自父组件的数据"/>
</div>
</template>
<script>
// 导入组件
import Learn from "./components/Learn"
export default {
name: "App",
components: {
Learn // 注入
},
data() {
return {
}
}
};
</script>
Learn.vue 子组件:
<template><!-- 只能存在一个根容器 -->
<div class="container">
<p>{{ message }}</p>
</div>
</template>
<script>
export default {
name: "Learn",
// 所有初始化数据全部放入 data 中
data() {
},
// 接收父级组件传递的数据
props: ['message']
}
</script>
2、使用对象方式传递:
父组件 App.vue:
<template><div >
<!-- 将 message 参数传递给子组件,传递的数据为一个对象 -->
<Learn :message="message"/>
</div>
</template>
<script>
// 导入组件
import Learn from "./components/Learn"
export default {
name: "App",
components: {
Learn // 注入
},
data() {
return {
// 返回一个对象
message: {
id: 1,
text: '这是父组件数据'
}
}
}
};
</script>
子组件 Learn.vue:
<template><!-- 只能存在一个根容器 -->
<div class="container">
<p>{{ message.text }}</p>
</div>
</template>
<script>
export default {
name: "Learn",
// 所有初始化数据全部放入 data 中
data() {
},
// 接收父级组件传递的数据
props: ['message']
}
</script>
3、自定义事件向父组件传递数据(子传父)
当子组件需要向父组件传递数据时,就要用到自定义事件。我们在介绍指令v-on 时有提到,v-on 除了监昕DOM 事件外,还可以用于组件之间的自定义事件。
子组件用 $emit() 来触发事件,父组件用 $on 来监听子组件的事件。
子组件 Learn.vue :
<template><!-- 只能存在一个根容器 -->
<div class="container">
<button @click="sendMsg" type="button" name="button">传递数据</button>
</div>
</template>
<script>
export default {
name: "Learn",
// 所有初始化数据全部放入 data 中
data() {
},
methods: {
sendMsg() {
// 第一个参数 getMsg 为自定义事件名,第二个为传递的值
this.$emit("getMsg", "这是儿子的数据")
}
}
}
</script>
父组件 App.vue:
<template><div >
接收的子组件数据:{{ message }}
<!-- 监听自定义事件 getMsg -->
<Learn @getMsg="getSonMsg"/>
</div>
</template>
<script>
// 导入组件
import Learn from "./components/Learn"
export default {
name: "App",
components: {
Learn // 注入
},
data() {
return {
message: ''
}
},
methods: {
getSonMsg(message) {
// message 为子组件传递的参数值
this.message = message
}
}
};
</script>
如上,在点击传递数据按钮后,可以看到子组件给父组件传递的数据。
4、在自定义组件上使用 v-model 指令
子组件 Learn.vue:
<template><!-- 只能存在一个根容器 -->
<div class="container">
<input type="text" v-model="searchText">
<button @click="sendMsg" type="button" name="button">传递数据</button>
</div>
</template>
<script>
export default {
name: "Learn",
// 所有初始化数据全部放入 data 中
data() {
return {
searchText: ''
}
},
methods: {
sendMsg() {
// 第一个参数 getMsg 为自定义事件名,第二个为传递的值
this.$emit("getMsg", this.searchText)
}
}
}
</script>
父组件 App.vue:
<template><div >
接收的子组件数据:{{ message }}
<!-- 监听自定义事件 getMsg -->
<Learn @getMsg="getSonMsg"/>
</div>
</template>
<script>
// 导入组件
import Learn from "./components/Learn"
export default {
name: "App",
components: {
Learn // 注入
},
data() {
return {
message: ''
}
},
methods: {
getSonMsg(message) {
// message 为子组件传递的参数值
this.message = message
}
}
};
</script>
如上,当在文本框输入信息后,再点击传递数据按钮,父组件成功接收到子组件传递的数据。
5、props 验证
一般当你组件需要提供给别人使用时,推荐都进行数据验证。比如某个数据必须是数字类型,如果传入字符串,就会在控制台显示警告。
父组件 App.vue:
<template><div >
<Learn name="张三" age="26"/>
</div>
</template>
<script>
// 导入组件
import Learn from "./components/Learn"
export default {
name: "App",
components: {
Learn // 注入
},
data() {
return {
}
}
};
</script>
子组件 Learn.vue:
<template><!-- 只能存在一个根容器 -->
<div class="container">
<p>{{ name }}</p>
<p>{{ age }}</p>
</div>
</template>
<script>
export default {
name: "Learn",
// 所有初始化数据全部放入 data 中
data() {
return {
}
},
props: {
// 必须是字符串类型
name: String,
// 自定义一个验证函数
age: {
validator: function(value) {
return value > 30
}
}
}
}
</script>
通过浏览器控制台发现,当父组件传递给子组件的参数验证失败时,会给出相应的警告信息。
props 常用验证示例如下:
6、处理边界情况
(1)访问根实例:
main.js:
import Vue from 'vue'import App from './App'
Vue.config.productionTip = false
/* eslint-disable no-new */
new Vue({
el: '#app',
render: h => h(App),
// 设置根实例数据
data: function() {
return {
name: 'rootData'
}
},
// 设置根实例方法
methods: {
rootMethod: function() {
return "rootHandler"
}
},
// 设置根实例计算属性
computed: {
rootComputed: function() {
return "rootComputed"
}
}
})
App.vue:
<template><div >
<Learn/>
<button @click="getRootData">获取根实例数据</button>
</div>
</template>
<script>
// 导入组件
import Learn from "./components/Learn"
export default {
name: "App",
components: {
Learn // 注入
},
data() {
return {
}
},
methods: {
getRootData() {
// 访问根实例中的 data 数据
console.log(this.$root.name);
// 访问根实例中的方法
console.log(this.$root.rootMethod)
// 访问根实例中的计算属性
console.log(this.$root.rootComputed)
// 写入根实例的数据
this.$root.age = 20;
console.log(this.$root.age);
}
}
};
</script>
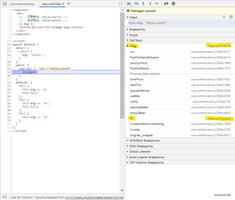
当点击按钮后,成功获取到根实例的相关信息。
对于小型应用,这样的使用方式是很方便的。不过这个模式扩展到中大型应用来说就不然了。因此在绝大多数情况下,还是推荐使用 Vuex 来处理。
(2)访问父级组件实例:
父组件 App.vue :
<template><div >
<Learn/>
</div>
</template>
<script>
// 导入组件
import Learn from "./components/Learn"
export default {
name: "App",
components: {
Learn // 注入
},
// 设置父组件实例数据
data() {
return {
parentName: 'parentName'
}
},
// 设置父组件实例方法
methods: {
parentMethod: function() {
return "parentMethod"
}
},
// 设置父组件实例计算属性
computed: {
parentComputed: function() {
return "parentComputed"
}
}
};
</script>
子组件 Learn.vue :
<template><!-- 只能存在一个根容器 -->
<div class="container">
<button @click="getParentInfo">获取父组件实例数据</button>
</div>
</template>
<script>
export default {
name: "Learn",
// 所有初始化数据全部放入 data 中
data() {
return {
}
},
methods: {
getParentInfo: function() {
// 访问父组件实例的 data 数据
console.log(this.$parent.parentName);
// 访问父组件实例的方法
console.log(this.$parent.parentMethod);
// 访问父组件实例的计算属性
console.log(this.$parent.parentComputed);
}
}
}
</script>
当点击按钮后,成功获取到父组件实例的相关数据。
(3)访问子组件实例:
有时候仍可能需要在 JavaScript 里直接访问一个子组件。为了达到这个目的,可以通过 ref 特性为这个子组件赋予一个ID引用。
子组件 Learn.vue :
<template><!-- 只能存在一个根容器 -->
<div class="container">
</div>
</template>
<script>
export default {
name: "Learn",
// 设置子组件 data 数据
data() {
return {
childData: 'childData'
}
},
// 设置子组件方法
methods: {
childMethod: function() {
return "childMethod"
}
},
// 设置子组件计算属性
computed: {
childComputed: function() {
return "childComputed"
}
}
}
</script>
父组件 App.vue :
<template><div >
<!-- 给子组件 Learn 赋予一个 ID引用 -->
<Learn ref="child"/>
<button @click="getChildInfo">获取子组件实例数据</button>
</div>
</template>
<script>
// 导入组件
import Learn from "./components/Learn"
export default {
name: "App",
components: {
Learn // 注入
},
data() {
return {
}
},
methods: {
getChildInfo: function() {
// 访问子组件实例 data 数据
console.log(this.$refs.child.childData);
// 访问子组件实例的方法
console.log(this.$refs.child.childMethod);
// 访问子组件实例的计算属性
console.log(this.$refs.child.childComputed);
}
}
};
</script>
当点击按钮后,成功获取到子组件实例的相关数据。
参考:
《Vue.js 实战》
https://cn.vuejs.org/v2/guide/
以上是 Vue 组件(七) 的全部内容, 来源链接: utcz.com/z/380077.html