Vue学习之商城项目

建立一个商城项目,以及一个github仓库。
下载安装git
https://git-scm.com/download/win
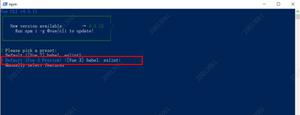
配置参数:
Additional icons 附加图标
On the Desktop 在桌面上
Windows Explorer integration Windows资源管理器集成鼠标右键菜单
Git Bash Here
Git GUI Here
Git LFS (Large File Support) 大文件支持
Associate .git* configuration files with the default text editor 将 .git 配置文件与默认文本编辑器相关联
Associate .sh files to be run with Bash 将.sh文件关联到Bash运行
Use a TrueType font in all console windows 在所有控制台窗口中使用TrueType字体
Check daily for Git for Windows updates 每天检查Git是否有Windows更新
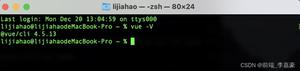
安装完成后我们可以使用git了:
git initgit remote add origin https://github.com/snailbuster/supermall.git
这样就可以和我们的git仓库关联了。
此时和仓库的内容没有同步,所以先使用:
git pull --rebase origin master
通过命令git add -A把VUE.JS目录下的所有文件添加到暂存区里面去,然后通过命令git commit 把刚刚提交到暂存区里的文件提交到仓库。git commit -m "提交所有文件",-m 后面的文字是注释,方便查看历史记录时知道每一次提交提交的是什么。
这里可能让我们添加一下用户邮箱和id正常添加就可以了。
然后我们就可以上传我们的项目了:
git push -u origin master
成功了。
之后我们划分一个目录结构:
src目录下有asserts和components:
我们在assets下面存放我们的资源,创建两个新的文件夹一个是img另一个是css用来存放这两类资源。
components用来存放组件,这里注意要存放的是公共组件,单独使用的组件我们新建一个同级文件夹views来存储。
然后在src目录下还要建一个router(路由相关)一个store(状态管理)还有个network(网络)三个文件夹。在搞一个common存放公共js文件(公共方法、工具类)。
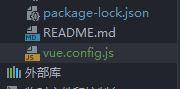
配置别名:
脚手架3的别名配置方式是:现在项目目录新建一个vue.config.js文件,然后添加代码:
这里默认@是src的别名。
module.exports={ configureWebpack:{
resolve:{
alias:{
\'assets\':\'@/assets\',
\'common\':\'@/common\',
\'components\':\'@/components\',
\'network\':\'@/network\',
\'views\':\'@/views\',
}
}
}
}
五个文件夹五个别名。
在加入一些通用配置,添加一个.editorconfig文件:
root = true[*]
charset = utf-8
indent_style = space
indent_size = 2
end_of_line = lf
insert_final_newline = true
trim_trailing_whitespace = true
之后可以开发项目了:
安装下路由:
npm install vue-router --save
路由配置不必多说,这里值得一提的是我们想用以前项目中写过的那个tabbar,于是我们路由这里直接复制了以前的tabbar的代码,然后把tabbar、tabbaritem和maintabbar都搞过来。里面路径的代码需要重新写一下。
由于前面已经配置了别名我们可以直接使用别名就不会报错了。
import MainTabBar from \'components/content/mainTabbar/maintabbar\'
如果在dom中使用别名需要增加一个小波浪线:
<img slot="item-icon-active" src="~assets/img/cop-active.svg" alt="">
加入之后不需要配置什么东西就可以跑起来项目了。还报错就看看:1.文件夹嵌套的文件夹名字是否有错误,或者漏了。2.组件是否注册了。
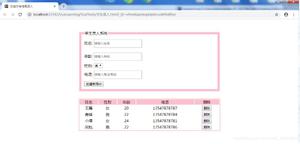
新增加一个导航栏:使用一个具名插槽,这里插槽一定要用div包起来好调整样式。
<template><div class="nav-bar">
<div class="left"><slot name="left"></slot></div>
<div class="center"><slot name="center"></slot></div>
<div class="right"><slot name="right"></slot></div>
</div>
</template>
后来这里排版不对,是因为第一个div的class写错成id,那样下面的css样式就不生效了:
<style scoped>.nav-bar{
display:flex;
height:44px;
line-height : 44px;
text-align:center;
}
.left,.right{
width:60px;
background-color:red;
}
.center{
flex:1;
background-color: blue;
}
</style>
display选择flex后就可以排在一排了。然后home中使用一下这个navbar
<script>import NavBar from "components/common/navbar/NavBar"
export default {
name:\'Home\',
components:{
NavBar
}
}
</script>
效果就出来了。背景颜色只是为了让我们更好的看到布局效果。
然后写一个网络请求的文件:
import axios from \'axios\'export function request(config){
const instance = axios.create({
baseURL:"http://123.207.32.32:8000",
timeout:5000
})
instance.interceptors.request.use(config =>{
return config
},err=>{
})
instance.interceptors.response.use(res=>{
return res.data
},err =>{
console.log(err)
})
return instance(config)
}
同时使用:
npm install axios --save
安装一下axios。然后也在home文件夹里写一个Home.js用来作为中间引用文件,实现解耦,首页只需要面向这个模块进行开发,调用相应的函数就可以无序关心具体的url,而url等内容统一放在这里管理。
import {request} from "./request"export function getHomeMultidata(){
return request({
url:\'/home/multidata\'
})
}
这样就可以在home.vue中引入函数getHomeMultidata了:
import {getHomeMultidata} from "network/home"之后我们接着在下面写一个created()函数的内容,只要这个组件创建了我们就希望发送请求来请求数据,所以使用created():
created(){ //1.请求多个数据
getHomeMultidata().then(res=>{
console.log(res);
})
}
这样就拿到了请求的内容。但是这些内容都是函数内部的局部内容,我们需要把这些内容保存在data中供以后使用。
data(){
return{
banners:[],
recommends:[]
}
},
created(){
//1.请求多个数据
getHomeMultidata().then(res=>{
console.log(res);
this.banners = res.data.banner.list;
this.recommends = res.data.recommend.list;
})
}
插入一个轮播图
我们如何使用别人写好的组件呢?加入一个别人写好的轮播图组件到components/common/swiper,这个swiper中的内容就是我们想要的轮播图。我们看到index.js文件可以帮助我们更好的引用这个组件:
import Swiper from \'./Swiper\'import SwiperItem from \'./SwiperItem\'
export {
Swiper, SwiperItem
}
那么我们引用的时候就很方便了:components中注册别忘记了
import {Swiper,SwiperItem} from \'components/common/swiper\'export default {
name:\'Home\',
components:{
NavBar,
Swiper,
SwiperItem
},
然后就可以使用轮播图展示我们请求到的内容:
<swiper><swiper-item v-for="item in banners">
<a :href="item.link">
<img :src="item.image" alt="">
</a>
</swiper-item>
</swiper>
banners我们已经通过网络请求获取到内容了,绑定href和item的link然后img的src属性当顶上item的image,绑定dom属性别忘记是有冒号的v-bind。
然后写推荐栏
<template><div class="recommend">
<div v-for="item in recommends" class="recommend-item">
<a :href="item.link">
<img :src="item.image" alt="">
<div>{{item.title}}</div>
</a>
</div>
</div>
</template>
<script>
export default {
name:\'RecommendView\',
props:{
recommends:{
type:Array,
default(){
return []
}
}
}
}
</script>
这里props用来接收home传过来的数据,home中v-bind来吧数据传到props中:
<recommend-view :recommends="recommends"></recommend-view>
组件的引包和注册这里不多说也是需要的,还有一些css样式来调整图片大小不至于太大:
<style scoped>.recommend{
display:flex;
width: 100%;
text-align:center;
font-size:12;
padding:15px 0 20px;
border-bottom: 8px solid #eee;
}
.recommend-item{
flex:1;
}
.recommend-item img{
width:70px;
height:70px;
margin-bottom:10px;
}
</style>
写特色视图栏:
在home下childcamps文件夹中添加一个featureview,短短几行代码就可以了:
<div class = "feature"><a href = "https://act.mogujie.com/zzlx67">
<img src="~assets/img/home/mogujie.jpg" alt="">
</a>
</div>
然后还是老样子需要回到home中引包,注册组件然后使用一下组件就ok了。图片可以截图来代替先,然后调整下css样式使得图片正常。
接着写这个:内容导航
做一个封装,因为可能在多个地方使用,放在components中。这个东西和导航栏不一样,这个组件上都是一样的,只有文字就有变化,我们就不需要使用插槽。
这里代码似乎有点乱,但是实现的无非就是上面那个东西,首先,点击的内容需要高亮,所以我们添加了class 和:class来确定这个是不是激活状态,需要不需要激活css样式(粉色和下划线)。然后@click函数则用来传递index来告诉函数是哪个激活了。函数只需要this.currentIndex = index一下就可以保持点击的那个选项是高亮的了。注意的是对象语法active赋值为True还是False取决于index和currentIndex。
<template><div class = "tab-control">
<div v-for ="(item,index) in titles"
class="tab-control-item"
:class="{active:index === currentIndex}"
@click="itemClick(index)">
<span>{{item}}</span>
</div>
</div>
</template>
之后是最重要的列表内容:
我们需要使用一种方式来保存这些数据,
这是还没更改的状态
以上是 Vue学习之商城项目 的全部内容, 来源链接: utcz.com/z/379374.html