Vue学习笔记十三:Vue+Bootstrap+vue-resource从接口获取数据库数据

目录
- 前言
SpringBoot提供后端接口
- Entity类
- JPA操作接口
- 配置文件
- 数据库表自动映射,添加数据
- 写提供数据的接口
- 跨域问题
前端修改
- 效果图
- 待续
前言
Vue学习笔记九的列表案例和Vue学习笔记十二vue-resource这两章结合一下,不在使用假数据了,这次从后台接口获取json数据。
Vue前端框架提供交互逻辑处理
Bootstrap前端css提供美化渲染
SpringBoot后端提供接口
MySQL数据库提供数据
SpringBoot提供后端接口
由于前端第九章我都写完了,等会复制着用,所以先把后端写好
先使用Spring JPA创建Entity类和自动映射数据库表,JPA参考我的文章Spring JPA学习笔记
Entity类
package com.vae.weatherforecast.bean;import lombok.AllArgsConstructor;
import lombok.Data;
import lombok.NoArgsConstructor;
import lombok.experimental.Accessors;
import javax.persistence.*;
@Entity
@Table(name = "person")
@AllArgsConstructor //全参数的构造函数
@NoArgsConstructor //无参数的构造函数
@Data //get和set方法
@Accessors(chain = true) //链式访问,使用链式创建的set方法有返回值
@SuppressWarnings("serial") //忽略黄色警告
public class test {
@Id
@GeneratedValue
@Column(name="id")
private Integer id;
private String name;
private String createtime;
}
JPA操作接口
package com.vae.weatherforecast.repository;import com.vae.weatherforecast.bean.test;
import org.springframework.data.jpa.repository.JpaRepository;
public interface testRepository extends JpaRepository<test,Integer> {
}
配置文件
JPA的配置文件写在了properties里,其他的写在了yml里
server: port: 80
spring:
datasource:
driver-class-name: com.mysql.cj.jdbc.Driver
url: jdbc:mysql://127.0.0.1:3306/vae?serverTimezone=UTC
username: root
password: 123
spring.jpa.properties.hibernate.hbm2ddl.auto=updatespring.jpa.properties.hibernate.dialect=org.hibernate.dialect.MySQL5InnoDBDialect
spring.jpa.show-sql= true
数据库表自动映射,添加数据
运行SpringBoot,会自动创建表,现在来添加一些数据,如图
写提供数据的接口
新建controller,写几个操作数据的接口,我先写一个提供数据的接口,至于增删改查的增删改,下面再写。
@Autowired testRepository testRepositorynew;
@CrossOrigin
@GetMapping("/getAllList")
public List<test> getAllList() {
List<test> lists = testRepositorynew.findAll();
for (test testnew : lists) {
System.out.println(testnew);
}
return lists;
}
跨域问题
使用Vue访问自己提供的接口的时候,会出现跨域问题的,解决办法很简单啊,SpringBoot为我们考虑了很多,直接在方法上加一个@CrossOrigin就可以了,这里注意写@GetMapping,Vue那里也使用get方式。至于jsonp方式我还不知道怎么使用。
前端修改
复制第九章的代码,修改后如下:
<!DOCTYPE html><html lang="en">
<head>
<meta charset="UTF-8">
<meta name="viewport" content="width=device-width, initial-scale=1.0">
<title>蜀云泉</title>
<script type="text/javascript" src="../lib/vue-2.6.10.js"></script>
<script type="text/javascript" src="../lib/vue-resource.min.js"></script>
<link rel="stylesheet" href="../lib/bootstrap.min.css">
</head>
<body>
<!-- 这个div就是MVVM中的V,View -->
<div >
<!-- 自定义按键码 -->
<!-- Vue.config.keyCodes.F2=113 -->
<div class="panel panel-primary">
<div class="panel-heading">
<h3 class="panel-title">蜀云泉的小列表</h3>
</div>
<!-- form-inline是文字和输入框在同一行显示,form-control是设置默认宽度width为100% -->
<div class="panel-body form-inline">
<label>
id:<input type="text" class="form-control" v-model="id">
</label>
<label>
name:<input type="text" class="form-control" v-model="name" @keyup.enter="add">
</label>
<input type="button" value="添加" class="btn btn-primary" @click="add">
<label>
查询:<input type="text" class="form-control" v-model="keywords" v-focus v-color="'blue'">
</label>
</div>
</div>
<table class="table table-bordered table-hover table-striped">
<thead>
<tr>
<th>id</th>
<th>name</th>
<th>createtime</th>
<th>operation</th>
</tr>
</thead>
<tbody>
<tr v-for="item in search(keywords)" :key="item.id">
<td v-text="item.id"></td>
<td v-text="item.name"></td>
<td v-text="item.createtime"></td>
<td><a href="" @click.prevent="del(item.id)" class="btn btn-danger">删除</a></td>
</tr>
</tbody>
</table>
</div>
<script>
// 自定义全局的指令
Vue.directive('focus',{
// 第一个参数一定是el,el就是被绑定的js对象
// 当指令绑定到元素上的时候,执行bind函数,执行一次
bind:function(el){
},
// 当指令插入到DOM中的时候,执行inserted函数,执行一次
inserted:function(el){
el.focus()
},
// 当组件更新的时候,执行updated函数,可能会执行多次
updated:function(el){
}
})
// 这个vm就是MVVM中的VM,ViewModel
var vm=new Vue({
el: '#app',
// 这个data就是MVVM中的M,Model
data: {
id:'',
name:'',
keywords:'',
list:[]
},
created() {
//在Vue加载的时候执行
this.getAllList()
},
methods: {
getAllList(){
this.$http.get('http://localhost/getAllList').then(result=>{
console.log(result)
//成功了的回调函数
if(result.status===200){
this.list=result.body
}
else{
alert('获取数据失败!')
}
})
},
add(){
this.list.push({id:this.id,name:this.name,creattime:new Date().toLocaleString()})
},
del(id){
var index=this.list.findIndex(item=>{
if(item.id==id)
return true
})
this.list.splice(index,1)
},
search(keywords){
return this.list.filter(item=>{
if(item.name.includes(keywords))
return item
})
}
},
directives:{
"color":{
bind:function(el,binding){
el.style.color=binding.value
}
}
}
})
</script>
</body>
</html>
可以看到我没有使用假数据,使用了新学的vue-resource,get方式。这里遭遇的跨域请求已经在上面解释过了。
效果图
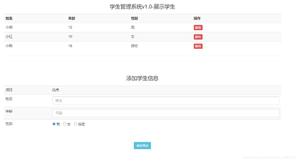
看看效果图
已经成功的从后台获取了数据,其实很简单,获取数据的接口已经完成了,那么接下来的删除,增加也很简单。
待续
待续...
我突然发现vue-resource已经不被官方推荐了....官方推荐的是axios.....
这篇文章我还是按照vue-resource来一个完整的增删改查,然后axios也来一版吧
防盗链接:本博客由蜀云泉发表
以上是 Vue学习笔记十三:Vue+Bootstrap+vue-resource从接口获取数据库数据 的全部内容, 来源链接: utcz.com/z/379265.html

