vue入门(二)基于前面的基础的一个小Demo - 易芝

vue入门(二)基于前面的基础的一个小Demo
<!DOCTYPE html><html>
<head>
<meta charset="UTF-8">
<title></title>
<link rel="stylesheet" href="styles/demo.css" />
</head>
<style>
* {
margin: 0;
padding: 0;
box-sizing: border-box
}
html {
font-size: 12px;
font-family: Ubuntu, simHei, sans-serif;
font-weight: 400
}
body {
font-size: 1rem
}
table,
td,
th {
border-collapse: collapse;
border-spacing: 0
}
table {
width: 100%
}
td,
th {
border: 1px solid #bcbcbc;
padding: 5px 10px
}
th {
background: #42b983;
font-size: 1.2rem;
font-weight: 400;
color: #fff;
cursor: pointer
}
tr:nth-of-type(odd) {
background: #fff
}
tr:nth-of-type(even) {
background: #eee
}
fieldset {
border: 1px solid #BCBCBC;
padding: 15px;
}
input {
outline: none
}
input[type=text] {
border: 1px solid #ccc;
padding: .5rem .3rem;
}
input[type=text]:focus {
border-color: #42b983;
}
button {
outline: none;
padding: 5px 8px;
color: #fff;
border: 1px solid #BCBCBC;
border-radius: 3px;
background-color: #009A61;
cursor: pointer;
}
button:hover{
opacity: 0.8;
}
#app {
margin: 0 auto;
max-width: 640px
}
.form-group {
margin: 10px;
}
.form-group > label {
display: inline-block;
width: 10rem;
text-align: right;
}
.form-group > input,
.form-group > select {
display: inline-block;
height: 2.5rem;
line-height: 2.5rem;
}
.text-center{
text-align: center;
}
.pagination {
display: inline-block;
padding-left: 0;
margin: 21px 0;
border-radius: 3px;
}
.pagination > li {
display: inline;
}
.pagination > li > a {
position: relative;
float: left;
padding: 6px 12px;
line-height: 1.5;
text-decoration: none;
color: #009a61;
background-color: #fff;
border: 1px solid #ddd;
margin-left: -1px;
list-style: none;
}
.pagination > li > a:hover {
background-color: #eee;
}
.pagination .active {
color: #fff;
background-color: #009a61;
border-left: none;
border-right: none;
}
.pagination .active:hover {
background: #009a61;
cursor: default;
}
.pagination > li:first-child > a .p {
border-bottom-left-radius: 3px;
border-top-left-radius: 3px;
}
.pagination > li:last-child > a {
border-bottom-right-radius: 3px;
border-top-right-radius: 3px;
}</style>
<body>
<div id="app">
<fieldset>
<legend>
Create New Person
</legend>
<div class="form-group">
<label>Name:</label>
<input type="text" v-model="newPerson.name"/>
</div>
<div class="form-group">
<label>Age:</label>
<input type="text" v-model="newPerson.age"/>
</div>
<div class="form-group">
<label>Sex:</label>
<select v-model="newPerson.sex">
<option value="Male">Male</option>
<option value="Female">Female</option>
</select>
</div>
<div class="form-group">
<label></label>
<button @click="createPerson">Create</button>
</div>
</fieldset>
<table>
<thead>
<tr>
<th>Name</th>
<th>Age</th>
<th>Sex</th>
<th>Delete</th>
</tr>
</thead>
<tbody>
<tr v-for="(person,index) in people">
<td>{{ person.name }}</td>
<td>{{ person.age }}</td>
<td>{{ person.sex }}</td>
<td :class="\'text-center\'"><button @click="deletePerson(index)">Delete</button></td>
</tr>
</tbody>
</table>
</div>
</body>
<script type="text/javascript" src="https://cdnjs.cloudflare.com/ajax/libs/vue/2.1.8/vue.min.js">
</script>
<script>
var vm = new Vue({
el: \'#app\',
data: {
newPerson: {
name: \'\',
age: 0,
sex: \'Male\'
},
people: [{
name: \'Jack\',
age: 30,
sex: \'Male\'
}, {
name: \'Bill\',
age: 26,
sex: \'Male\'
}, {
name: \'Tracy\',
age: 22,
sex: \'Female\'
}, {
name: \'Chris\',
age: 36,
sex: \'Male\'
}]
},
methods:{
createPerson: function(){
this.people.push(this.newPerson);
// 添加完newPerson对象后,重置newPerson对象
this.newPerson = {name: \'\', age: 0, sex: \'Male\'}
},
/*这种写法也成
deletePerson: function(person){
this.people.splice(this.people.indexOf(person),1);
} */
deletePerson: function(index){
this.people.splice(index,1);
}
}
})
</script>
</html>
注意下遍历的写法哦,删除函数两种写法都行。创建函数一定要重置下对象,不然添加的都是同一行。
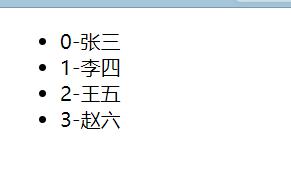
遍历:
用如下的方法获得遍历的下标
 <tr v-for="(person,index) in people">
如果纯数字遍历就更简单了,‘基础一’举例了,
<div id="div1"><div v-for="i in 10">
{{ i }}
</div>
</div>
posted on
2018-07-17 14:45
易芝
阅读(261)
评论(0)
编辑
收藏
举报
以上是 vue入门(二)基于前面的基础的一个小Demo - 易芝 的全部内容, 来源链接: utcz.com/z/379227.html

