Vue 安装 axios 及使用

1.安装:npm install axios --save-dev
2.main.js中导入
import axios from 'axios';Vue.prototype.$axios=axios;
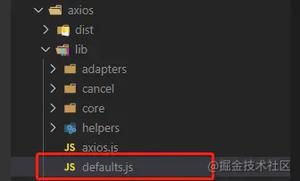
axios.defaults.baseURL ='http://localhost/VueApi'; //请求的默认地址
//axios.defaults.headers.common['Authorization'] = AUTH_TOKEN;
axios.defaults.headers.post['Content-Type'] = 'application/x-www-form-urlencoded';
3.login.vue中:
<template><div class="page-login">
<div class="logo"></div>
<div class="login-wrap">
<div class="login-title">登录</div>
<el-form class="login-form" label-position="right" label-width="80px">
<div class="input-list">
<el-input
@input="setInpu"
class="input-item active"
v-model="login.user"
placeholder="请输入账号: admin"
><i slot="prefix" class="el-input__icon el-icon-user"></i
></el-input>
<el-input
@input="setInpu"
class="input-item"
placeholder="请输入密码: cc123456"
v-model="login.password"
show-password
>
<i slot="prefix" class="el-input__icon el-icon-lock"></i>
</el-input>
<el-input
@input="setInpu"
class="input-item"
v-model="login.number"
placeholder="请输入分机号: 1000"
><i slot="prefix" class="el-input__icon el-icon-phone-outline"></i
></el-input>
</div>
<div class="btn-wrap">
<div class="form-hint">{{ formHint }}</div>
<el-button class="btn" type="primary" @click="loginFun">登录<i class="el-input__icon el-icon-video-play"></i></el-button>
</div>
</el-form>
</div>
</div>
</template>
<script>
export default {
name: "",
components: {},
props: {},
data() {
return {
login: {
user: "",
password: "",
number: ""
},
formHint: ''
};
},
computed: {},
watch: {},
beforeCreate() {},
created() {},
beforeMount() {},
mounted() {},
methods: {
loginFun() {
let { user, password, number } = this.login;
//服务器端 签证
this.$axios.post('/Api_User_Login.php', this.login)
.then(function (response) {
console.log(response);
console.log(response.data);
let { login_result, result } = response.data;//解析JSON
console.log(login_result);
if (login_result == "true") {
this.$store.state.current_user_name=this.login.user;
this.$store.state.current_user_pwd=this.login.password;
this.$store.state.current_user_tel=this.login.number;
console.log(this.$store.state.current_user_name +" "+this.$store.state.password+" "+this.$store.state.number );
this.$router.push("/Home"); //直接跳转
}else{
this.formHint = "用户名和密码错误!"
}
}.bind(this))
.catch(function (error) {
console.log(error);
});
},
setInpu () {
this.formHint = ''
}
},
};
</script>
<style lang="scss">
@import "./Login.scss";
</style>
4.服务器端 Api_User_Login.php
<?phperror_reporting(E_ALL^E_NOTICE);//Notice不显示
//解决 axios 两个请求的问题
header("Access-Control-Allow-Origin: *");
header('Access-Control-Allow-Methods:POST,GET');// 响应类型
header('Access-Control-Allow-Credentials: true'); // 带 cookie 的跨域访问
header('Access-Control-Allow-Headers:x-requested-with,Content-Type,X-CSRF-Token');// 响应头设置
if(strtoupper($_SERVER['REQUEST_METHOD'])== 'OPTIONS'){//预检请求
exit; //后端遇到请求方式是“Request Method: OPTIONS” 时,直接返回或退出即可,不再往下执行程序。
}
//获得post的json数据,
$postJson = json_decode($GLOBALS['HTTP_RAW_POST_DATA']);
//获得event参数
$current_user_name=$postJson->user;
$current_user_pwd=$postJson->password;
$current_user_tel=$postJson->number;
//WriteLog( "postJson " . $current_user_name );
//WriteLog( "postJson " . $current_user_pwd );
//WriteLog( "postJson " . $current_user_tel );
//返回值
$arr_result = array();
$arr_result['login_result']="true";
$arr_result['result'] = "OK";
echo json_encode($arr_result );
exit(0);
?>
以上是 Vue 安装 axios 及使用 的全部内容, 来源链接: utcz.com/z/379105.html


