使用Vue组件为页面添加评论

简介
首先这是一个Laravel练手项目,使用blade和Vue组件混合开发Web页面。
本文章将使用Vue.js组件为博客详情页添加评论功能,主要实现以下功能:
- 文章页面可查看评论
- 用户可进行评论,并且不需要刷新视图
准备工作
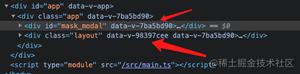
首先新建好Vue组件:Comment.vue 并将它在入口(默认为app.js)进行注册:
Vue.component('comments',require('./components/blog/Comments.vue').default)上一篇文章讲到了评论多态关联,所以这里的评论组件化,可用于博客页面和新闻页面。所以在vue页面中添加prop参数:type,并在blog的show页面引入,<comments type="blog"></comments>
props:[ "type"
],
mounted(){
console.log(this.type);
}
在console中调试成功,输出’blog’
同时还需要一个id参数,方法如上……
开搞
样式……
样式这个东西,得讲究缘分,有时候你要它好看,它就丑,有时候……好吧它一直很丑,就是下面这样
API请求
这里使用的是axios,在Vue中调用十分方便,先在入口申明:
import axios from 'axios'Vue.prototype.$ajax = axios;
获取评论
采用评论接口xxx/api/blog/{id}/comment
getComments: function() { this.$axios.get("/api/blog/" + this.id + "/comment").then(res => {
console.log(res.data);
});
}
测试通过~
接下来就是绑定数据了
<ul> <li v-for="item in comments">
<div class="content">
<div class="head">
<img src="/image/head.jpg">
</div>
<div class="body">{{item.body}}</div>
</div>
<div class="action">
<a href v-show="false">
<span>
<i class="iconfont icon-trash"></i> 删除
</span>
</a>
</div>
</li>
</ul>
正常~~~
同时评论计数也需要绑定一下,这个在blog对象中存在,直接传递就可以了
创建评论
接口为xxx/api/blog/{{id}}/comment?api_token=xxxxxxxxx
sendComment:function(){ var api_url = "/api/blog/" + this.id + "/comment";
var api = window.tokenize ? window.tokenize(api_url) : api_url;
this.$axios.post(api,{
"body" : this.comment
}).then(res => {
this.comment = "";
this.comments.unshift(res.data.data);
});
}
成功
以上就是实现内容,才疏学浅,望见谅……
以上是 使用Vue组件为页面添加评论 的全部内容, 来源链接: utcz.com/z/378229.html