IdentityServer4-前后端分离之Vue

相关资源:https://www.cnblogs.com/FireworksEasyCool/category/1364487.html
前言
之前文章讲到如何使用Node.js+Express构建JavaScript客户端,实现前后端分离。本节将介绍如何使用Vue实现前后端分离,文中介绍Vue的知识比较基础,适合新手学习。
一、搭建Vue项目
前提条件:安装nodejs、webpack和vue-cli。这个网上很多教程,这里不多说。
(1)新建Vue项目
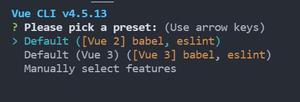
Cmd进入创建项目的路径,输入:vue init webpack VueJS_Client
新建vuejs_client的Vue项目,安装npm。
(2)安装oidc-client库
使用VSCode打开vuejs_client项目所在的文件夹
Ctrl + ~ 打开控制控制台,输入:npm install oidc-client
(3)实现自动跳转登录页面
在src文件夹中打开HelloWorld.vue文件,导入oidc-client模块,若在未登录情况,在组件创建前跳转登录页面。代码很简单,直接调用登录函数。
<template></template><script>
import Oidc from "oidc-client";
var config = {
authority: "http://localhost:5000",
client_id: "js",
redirect_uri: "http://localhost:5003/CallBack",
response_type: "id_token token",
scope: "openid profile api1",
post_logout_redirect_uri: "http://localhost:5003/"
};
var mgr = new Oidc.UserManager(config);
export default {
beforeCreate() {
mgr.signinRedirect();
}
};
</script>
(4)指定重定向页面
可以看到上面的配置,一旦用户登录到IdentityServer,CallBack就是指定的redirect_uri页面。
在components文件夹中新建CallBack.vue文件,调用UserManager函数,实现页面跳转。
<template></template>
<script>
import Oidc from "oidc-client";
new Oidc.UserManager()
.signinRedirectCallback()
.then(function() {
window.location = "/#/Home";
})
.catch(function(e) {
});
export default{}
</script>
(5)编写Home组件
在CallBack中,重定向了Home组件,此时可以获取到登录用户的属性和调用接口所需的access_token等。
<template><div>
<button @click="api">调用API</button>
<button @click="logout">退出登录</button>
<pre>{{res}}</pre>
</div>
</template>
<script>
import Oidc from "oidc-client";
var config = {
authority: "http://localhost:5000",
client_id: "js",
redirect_uri: "http://localhost:5003/CallBack",
response_type: "id_token token",
scope: "openid profile api1",
post_logout_redirect_uri: "http://localhost:5003/"
};
var mgr = new Oidc.UserManager(config);
export default {
name: "Home",
data() {
return {
res: "My Home"
};
},
methods: {
api() {
var that=this;
mgr.getUser().then(function(user) {
var url = "http://localhost:5001/identity";
var xhr = new XMLHttpRequest();
xhr.open("GET", url);
xhr.onload = function() {
that.res = (xhr.status, JSON.parse(xhr.responseText))
};
xhr.setRequestHeader("Authorization", "Bearer " + user.access_token);
xhr.send();
});
},
logout() {
mgr.signoutRedirect();
}
},
mounted() {
var that=this;
mgr.getUser().then(function(user) {
if (user) {
// this.res = ("User logged in", user.profile);注意闭包
that.res = ("User logged in", user.profile);
} else {
that.res = ("User not logged in");
}
});
}
};
</script>
<style scoped>
</style>
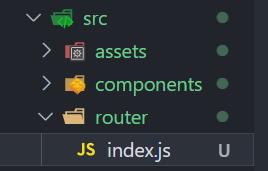
(6)最后,在Router中添加新建的路由并修改程序启动端口为5003
二、修改授权服务配置,资源服务器允许跨域调用API
(1)修改授权服务配置
在AuthServer项目,打开Config.cs文件,在GetClients中添加JavaScript客户端配置
// JavaScript Clientnew Client
{
ClientId = "js",
ClientName = "JavaScript Client",
AllowedGrantTypes = GrantTypes.Implicit,
AllowAccessTokensViaBrowser = true,
RedirectUris = { "http://localhost:5003/CallBack" },
PostLogoutRedirectUris = { "http://localhost:5003 " },
AllowedCorsOrigins = { "http://localhost:5003" },
AllowedScopes =
{
IdentityServerConstants.StandardScopes.OpenId,
IdentityServerConstants.StandardScopes.Profile,
"api1"
},
}
(2)在资源服务配置允许跨域调用api
在ResourceAPI项目,打开Startup.cs文件中的ConfigureServices方法,配置CORS,允许Ajax调用从http://localhost:5003调用http://localhost:5001的Web API。
//JS-allow Ajax calls to be made from http://localhost:5003 to http://localhost:5001.services.AddCors(options =>
{
//this defines a CORS policy called "default"
options.AddPolicy("default", policy =>
{
policy.WithOrigins("http://localhost:5003")
.AllowAnyHeader()
.AllowAnyMethod();
});
});
在Configure方法中将CORS中间件添加到管道中
//JS-Add the CORS middleware to the pipeline in Configure:app.UseCors("default");
(3)添加测试用的api接口
添加IdentityController控制器
[Route("[controller]")] public class IdentityController : ControllerBase
{
[Authorize(Roles ="admin")]
[HttpGet]
public IActionResult Get()
{
return new JsonResult(from c in User.Claims select new { c.Type, c.Value });
}
}
(4)测试
运行AuthServer项目,运行ResourceAPI项目。
在VSCode终端输入:npm run dev
打开浏览器:http://localhost:5003/ 自动跳转到登录页面
账号:zhubingjian 密码:123 登录。跳转到Home页面并获取到用户的属性信息。
调用API,满足授权条件,成功获取数据。
总结:
本节代码尽量简单化了,并有加太多东西进去。关于IdentityServer4的相关知识和教程,可以看我前面几篇博客,都有详细的教程。
授权服务和资源服务源码地址: https://github.com/Bingjian-Zhu/Mvc-HybridFlow.git
Vue Demo源码地址:https://github.com/Bingjian-Zhu/Identity_Vue_Client
以上是 IdentityServer4-前后端分离之Vue 的全部内容, 来源链接: utcz.com/z/377551.html

