vue结合element-ui使用示例
这一篇主要是创建一个vue项目并结合饿了么框架element-ui。
1.先创建vue项目,我准备把项目放在e盘下:E:\Work\RegisterProject;
命令行进入这个目录:
创建一个基于 webpack 模板的新项目
(1)vue init webpack register(项目名)
需要yes按Enter健就可以了,不需要输入n,然后按Enter健。
创建完成:在目录中可看到
运行:命令行进入到刚创建好的目录:cd register
运行:npm run dev
成功:
在浏览器输入:http://localhost:8080/ 我的是http://localhost:8081/(那是因为我已经打开另一个vue项目,80端口已经被占用,第一次的一般不会被占用,输入http://localhost:8080/ 就可以了)。
出现这个界面说明vue项目创建成功:
现在vue引入Element
1.打开cmd,进入到当前刚创建的vue项目目录
在当前目录中运行:npm i element-ui -S
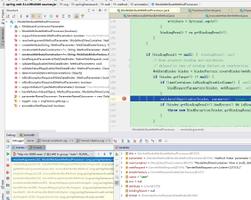
我使用webstrom打开刚创建的项目;file-open
如图所示:
改变项目目录中的main.js文件;
初始main.js文件:
改成:
import Vue from 'vue'
import App from './App'
import router from './router'
import ElementUI from 'element-ui'
import 'element-ui/lib/theme-chalk/index.css'
Vue.config.productionTip = false
Vue.use(ElementUI)
如图所示:
3.然后在.vue文件里就直接可以用了
例如:在src/components/Hello.vue做一下修改
<template>
<div class="hello">
<h1>{{ msg }}</h1>
<h2>Essential Links</h2>
<el-button>默认按钮</el-button>
<el-button type="primary">主要按钮</el-button>
<el-button type="text">文字按钮</el-button>
</div>
</template>
<script>
export default {
name: 'hello',
data () {
return {
msg: 'Welcome to Your Vue.js App'
}
}
}
</script>
<!-- Add "scoped" attribute to limit CSS to this component only -->
<style scoped>
h1, h2 {
font-weight: normal;
}
ul {
list-style-type: none;
padding: 0;
}
li {
display: inline-block;
margin: 0 10px;
}
a {
color: #42b983;
}
</style>
运行:npm run dev(webstrom可以按Alt+F12键,输入npm run dev)
你将看到如下页面:
成功的引入了Element!!
注意以下几个坑:
1.是否引入js与css文件
css文件是静态文件地址,安装教程安装地址不会出错
2.检查node的版本,是否node版本过低
3.检查以下你的npm版本 npm版本是否过低
以上是 vue结合element-ui使用示例 的全部内容, 来源链接: utcz.com/z/350874.html