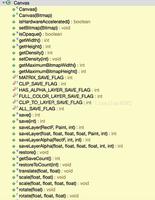
JavaScript canvas实现跟随鼠标事件
本文实例为大家分享了用canvas实现跟随鼠标事件的具体代码,供大家参考,具体内容如下
//鼠标移动 展现光片
<!DOCTYPE html>
<html>
<head>
<meta charset="UTF-8">
<title></title>
<style>
body {
margin: 0;
overflow: hidden;
}
#canvas {
background: #000;
}
</style>
</head>
<body>
<canvas id="canvas"></canvas>
<script>
var canvas = document.getElementById('canvas');
var context = canvas.getContext('2d');
var circleList = [];
canvas.width = window.innerWidth;
canvas.height = window.innerHeight;
canvas.addEventListener('mousemove', function (e) {
// 将对象push到数组中,画出来的彩色小点可以看作每一个对象中记录着信息 然后存在数组中
circleList.push(new Circle(e.clientX, e.clientY));
})
//取x到y之间随机数:Math.round(Math.random()*(y-x)+x) 包括y
function random(min, max) {
return Math.round(Math.random() * (max - min) + min);
}
function Circle(x, y) {
this.x = x;
this.y = y;
this.vx = (Math.random() - 0.5) * 3; //随机出来一个正数,或者负数。乘3是为了让速度变得大一点
this.vy = (Math.random() - 0.5) * 3;
this.color = 'rgb(' + random(0, 255) + ',' + random(0, 255) + ',' + random(0, 255) + ')';
this.a = 1; // 初始透明度
this.draw();
}
Circle.prototype = {
draw() {
context.beginPath();
context.fillStyle = this.color;
context.globalCompositeOperation = 'lighter';
context.globalAlpha = this.a; //全局透明度
context.arc(this.x, this.y, 30, 0, Math.PI * 2, false);
context.fill();
this.update();
},
update() {
// 根据速度更新每一个小圆的位置
this.x += this.vx;
this.y += this.vy;
this.a *= 0.98;
}
}
function render() {
//把原来的内容区域清除掉
context.clearRect(0, 0, canvas.width, canvas.height);
circleList.forEach(function (ele, i) {
ele.draw();
if (ele.a < 0.05) {
circleList.splice(i, 1);
}
});
requestAnimationFrame(render); //动画,会根据浏览器的刷新频率更新动画
}
render();
</script>
</body>
</html>
以上是 JavaScript canvas实现跟随鼠标事件 的全部内容, 来源链接: utcz.com/z/312157.html