使用nginx方式实现http转换为https的示例代码
最近在写一个小程序,因为小程序官网上必须要使用https,之前网站都是使用的http,而且使用的阿里云服务,于是就在阿里云上购买的ssl服务,以下是配置过程。
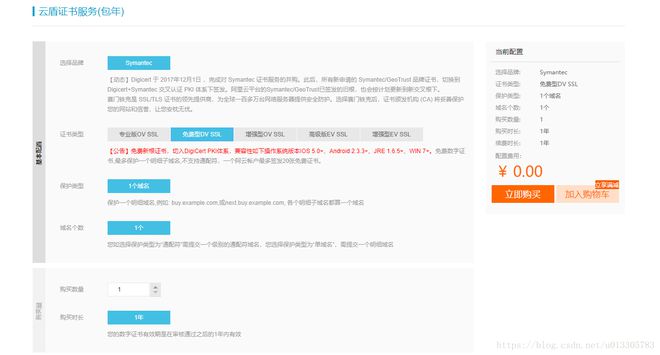
1.首先是去阿里云上购买ssl,当然有免费版,但是只能支持一个域名,而且同一个域名只能购买20个证书,各个明细子域名都算一个域名

2.购买ssl证书之后去证书控制台,这个时候需要补全资料,补全之后等待审核,一般只需几分钟就能审核通过。

3.审核之后就需要去下载证书

4.然后需要去所在服务器上配置key和pem,当然我们这里选择的是自动生成key,如果有必要可以自己去制作key,按照阿里云上的步骤操作就是了。如下所示:
server {
listen 443;
server_name localhost;
ssl on;
root html;
index index.html index.htm;
ssl_certificate cert/21.pem;
ssl_certificate_key cert/21.key;
ssl_session_timeout 5m;
ssl_ciphers ECDHE-RSA-AES128-GCM-SHA256:ECDHE:ECDH:AES:HIGH:!NULL:!aNULL:!MD5:!ADH:!RC4;
ssl_protocols TLSv1 TLSv1.1 TLSv1.2;
ssl_prefer_server_ciphers on;
location / {
root html;
index index.html index.htm;
}
}
这时候不要忙着去重启nginx,首要要去查看nginx是否增加ssl模块,如果没有,需要重新编译,先执行sudo apt-get install openssl libssl-dev安装ssl,然后进入nginx目录执行如下语句:
./configure \
--prefix=/usr/local/nginx \
--pid-path=/var/run/nginx/nginx.pid \
--lock-path=/var/lock/nginx.lock \
--error-log-path=/var/log/nginx/error.log \
--http-log-path=/var/log/nginx/access.log \
--with-http_gzip_static_module \
--http-client-body-temp-path=/var/temp/nginx/client \
--http-proxy-temp-path=/var/temp/nginx/proxy \
--http-fastcgi-temp-path=/var/temp/nginx/fastcgi \
--http-uwsgi-temp-path=/var/temp/nginx/uwsgi \
--http-scgi-temp-path=/var/temp/nginx/scgi \
--add-module=/home/scp/fastdfs-nginx-module/src \
--with-http_stub_status_module \
--with-http_ssl_module
执行完语句后执行make 然后 make install,这个时候如果重启nginx后,外网可能还是无法访问,因为阿里云端口需要我们自己配置,需要先去安全组添加对443端口的过滤,我这里是ubuntu系统,同时要在终端执行ufw allow 443,这时去访问调用即可。然后需要将80端口访问跳转到443
server {
listen 80;
server_name www.域名.com;
rewrite ^(.*) https://$server_name$1 permanent;
}
到此这篇关于使用nginx方式实现http转换为https的示例代码的文章就介绍到这了,更多相关nginx http转换为https内容请搜索以前的文章或继续浏览下面的相关文章希望大家以后多多支持!
以上是 使用nginx方式实现http转换为https的示例代码 的全部内容, 来源链接: utcz.com/p/253215.html


