VScode+ESP32简单环境搭建
第一步:准备
1.软件部分
VS Code 下载 : https://code.visualstudio.com/
Python 3 : https://www.python.org/downloads/
Git : https://git-scm.com/downloads
2.ESP部分
esp-idf 【自选】 : https://github.com/espressif/esp-idf
想偷懒的同学可以在 VS Code 中下载。想手动的参考下面步骤:
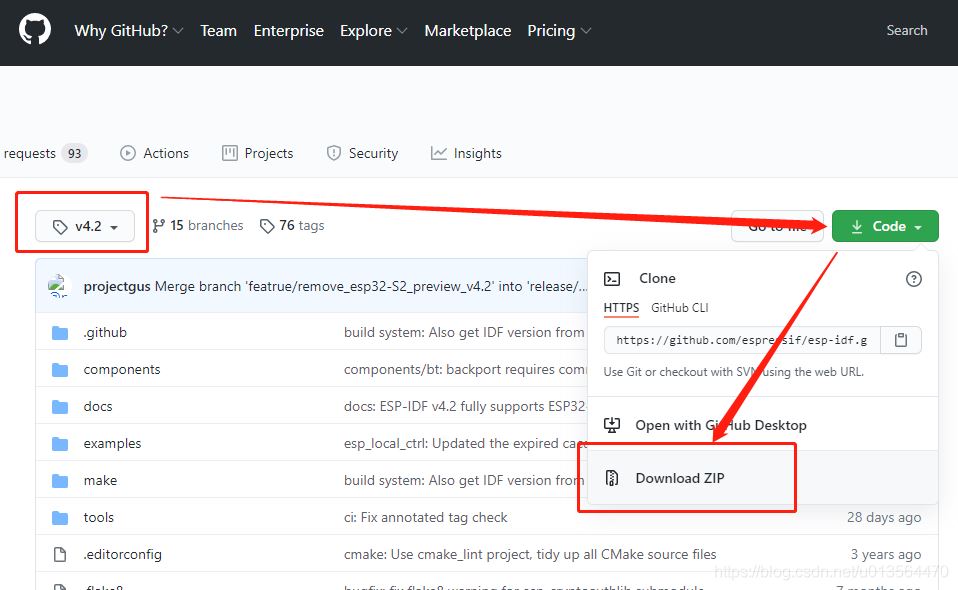
esp-idf不要追新下载尝鲜版,下载最新稳定版即可。
下载方式二选一:
1.在git bash 里面clone。速度非常慢的可以把链接的 github.com 改成 github.com.cnpmjs.org 。clone后选择想要的版本。
git clone https://github.com.cnpmjs.org/espressif/esp-idf.git
2.下载压缩包。下载压缩包后,解压。
第二步:安装
【VS Code 】【Python 3 】【Git】安装。软件安装的安装没什么好说的,选择自己的安装位置,默认下一步即可。
安装Python 3的时候不要选择以下两项,因为需要翻墙会报错0x80072efd。翻墙网络慢也会报错0x80091007。
- Download debugging symbols 安装调试模块(开发者可选择,运用于开发环境)
- Download debug binaries
第三步:VS Code配置
VS Code中搜索Espressif IDF并安装
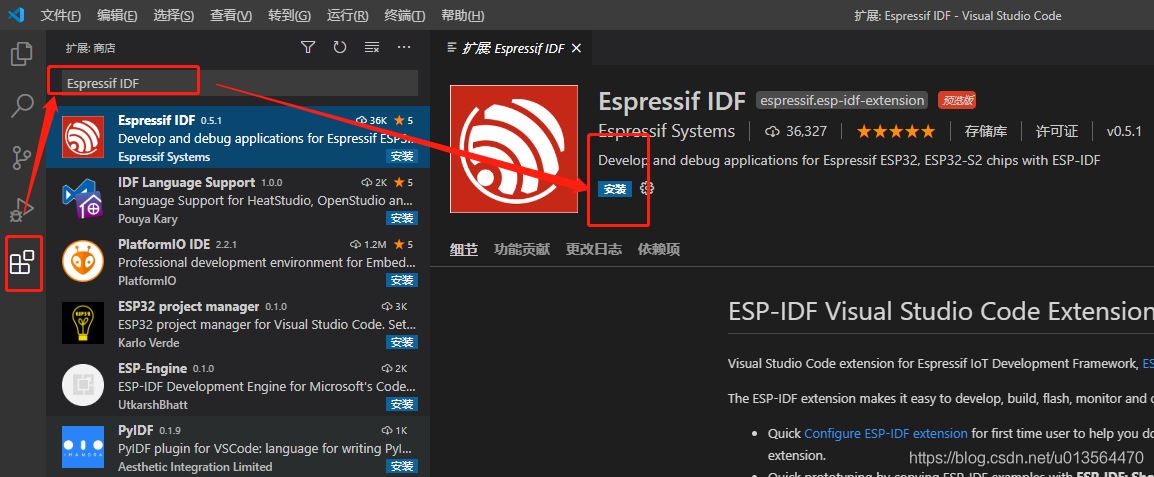
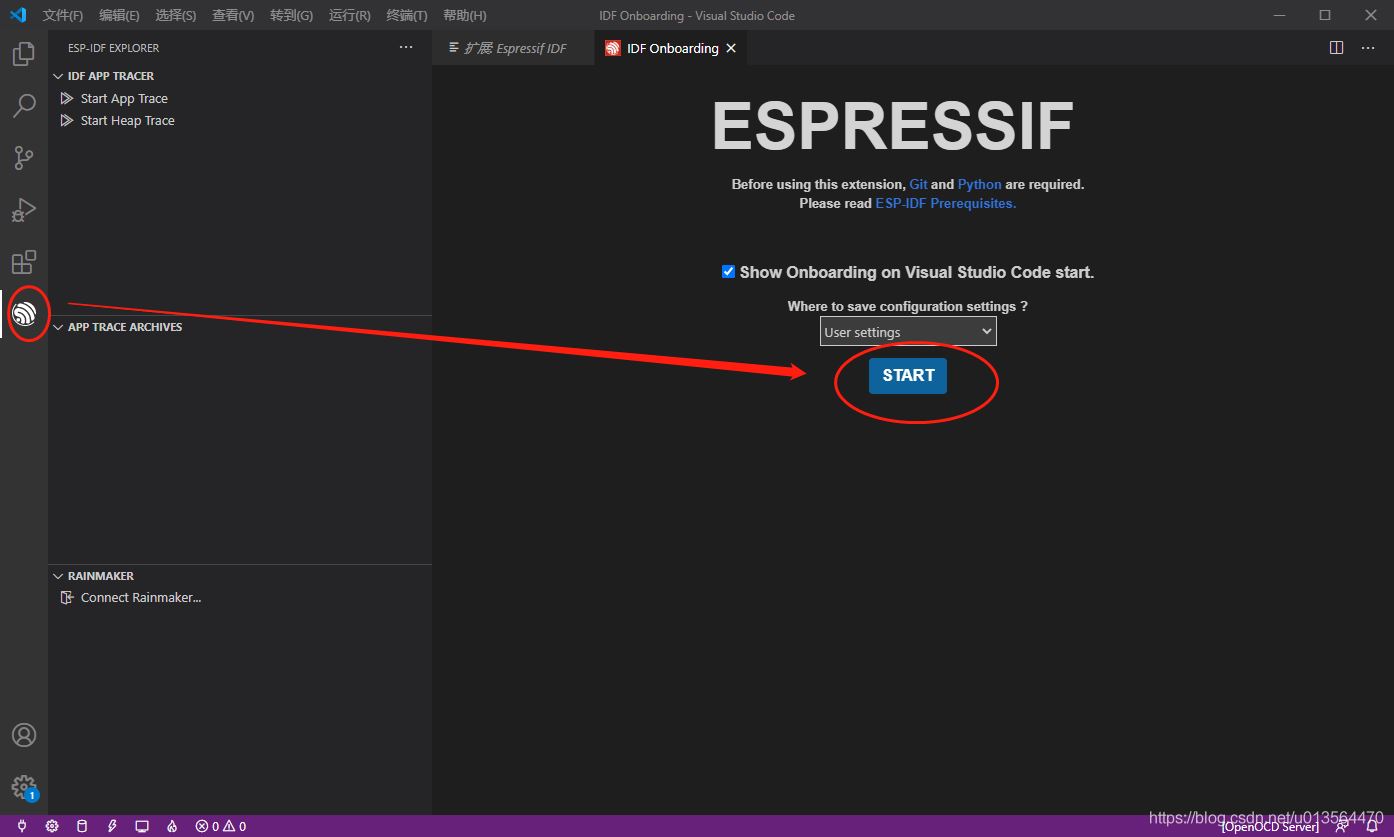
安装完左侧会有Espressif的图标,点击配置
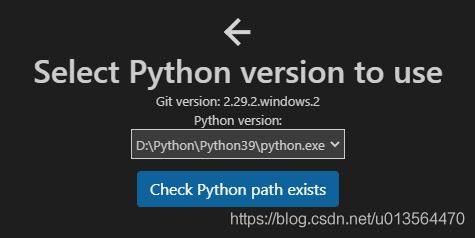
选择Python3 的安装路径
下载并配置 ESP-IDF Tools 。如果想手动安装的参考 ESP-IDF 工具安装器

选择要安装的工作路径.espressif,之后下载工具组件。
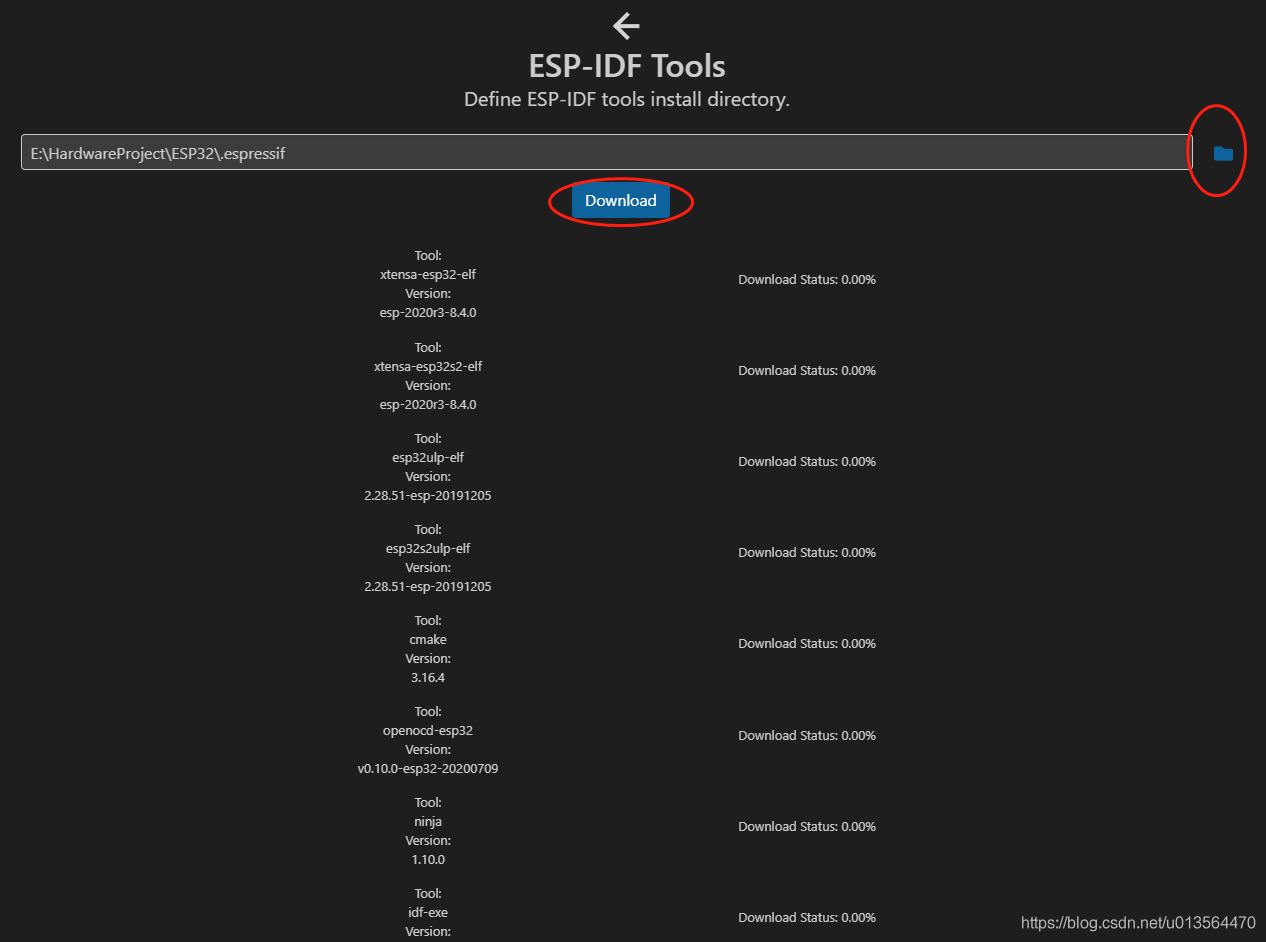
等待下载安装完成,之后下一步。
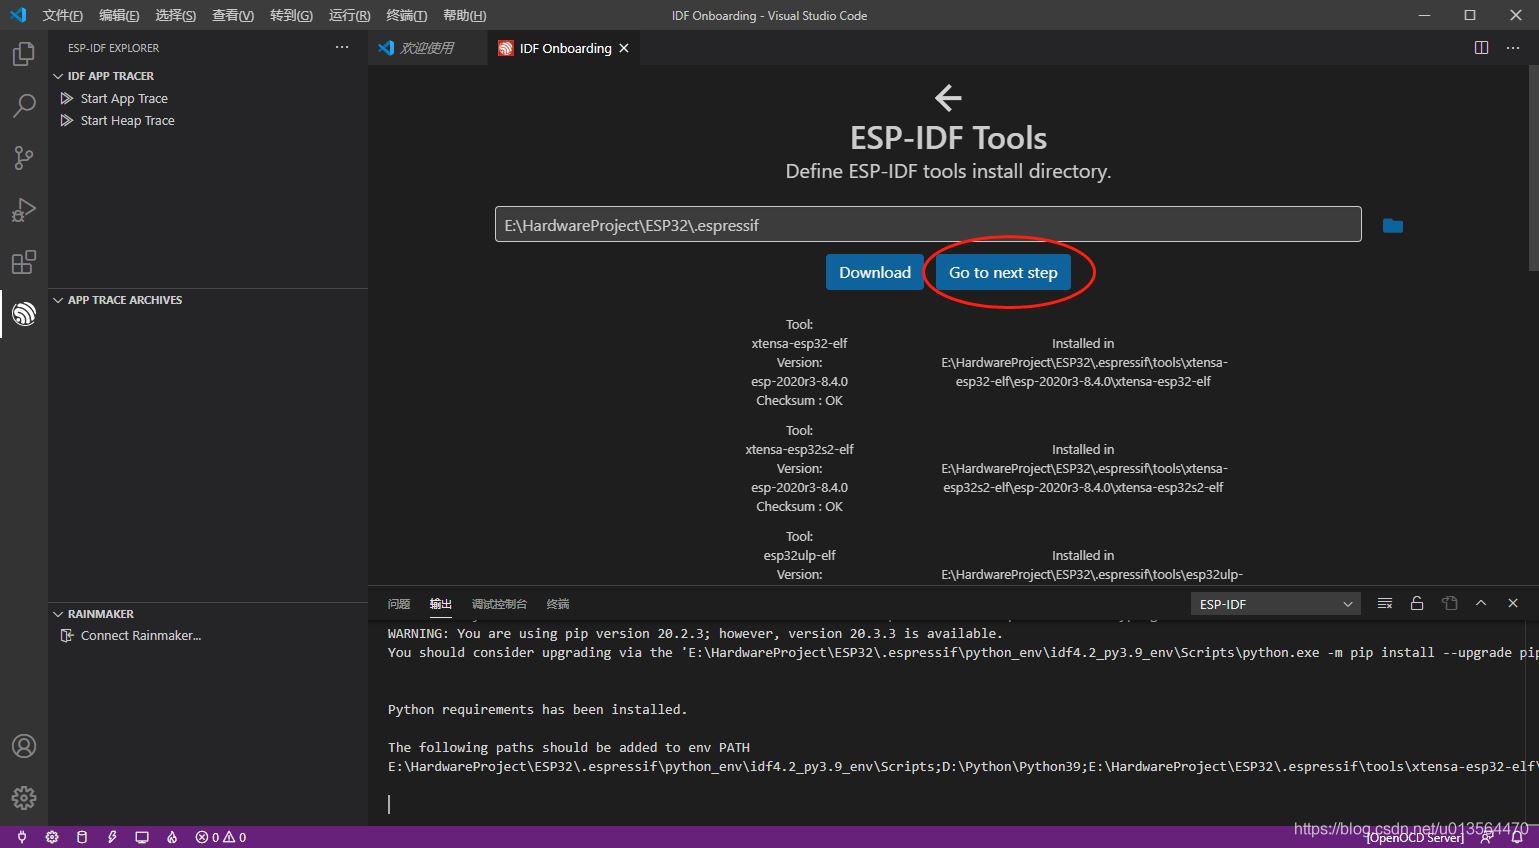
配置 ESP-IDF工具选项
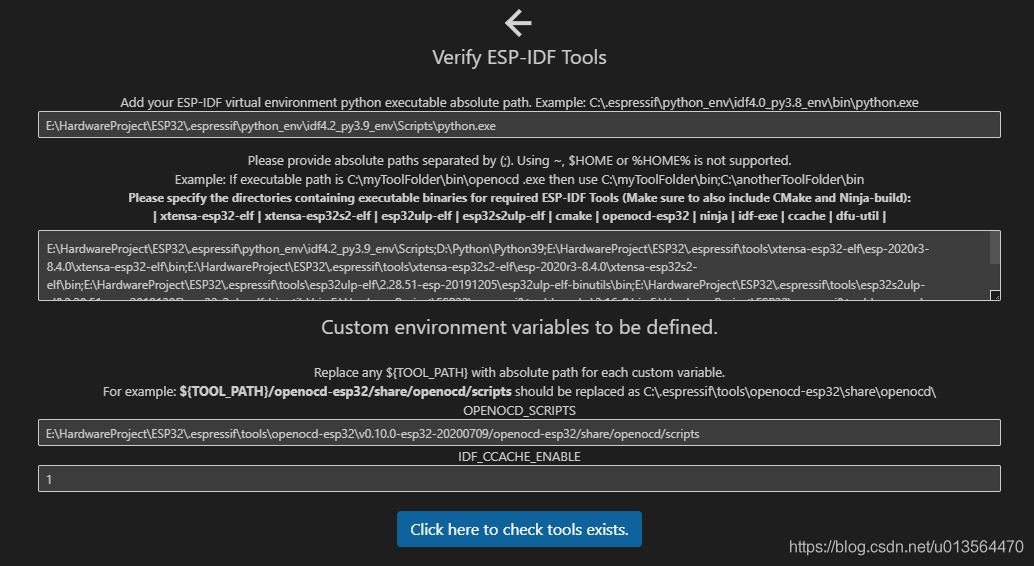
1、添加您的ESP-IDF虚拟环境python可执行绝对路径。
Add your ESP-IDF virtual environment python executable absolute path. Example: C:.espressif\python_env\idf4.0_py3.8_env\bin\python.exe
这里的python路径不是之前安装的python,而是.espressif安装目录下的python路径。
例如我的路径为E:\HardwareProject\ESP32\.espressif\python_env\idf4.2_py3.9_env\Scripts\python.exe
2、填写需要使用到的工具的路径。这里填写绝对路径,不支持 ~ $HOME %HOME%
需要用到的工具有:
xtensa-esp32-elfxtensa-esp32s2-elfesp32ulp-elfesp32s2ulp-elfcmakeopenocd-esp32ninjaidf-execcachedfu-util
E:\HardwareProject\ESP32\.espressif\python_env\idf4.2_py3.9_env\Scripts;
D:\Python\Python39;
E:\HardwareProject\ESP32\.espressif\tools\xtensa-esp32-elf\esp-2020r3-8.4.0\xtensa-esp32-elf\bin;
E:\HardwareProject\ESP32\.espressif\tools\xtensa-esp32s2-elf\esp-2020r3-8.4.0\xtensa-esp32s2-elf\bin;
E:\HardwareProject\ESP32\.espressif\tools\esp32ulp-elf\2.28.51-esp-20191205\esp32ulp-elf-binutils\bin;
E:\HardwareProject\ESP32\.espressif\tools\esp32s2ulp-elf\2.28.51-esp-20191205\esp32s2ulp-elf-binutils\bin;
E:\HardwareProject\ESP32\.espressif\tools\cmake\3.16.4\bin;
E:\HardwareProject\ESP32\.espressif\tools\openocd-esp32\v0.10.0-esp32-20200709\openocd-esp32\bin;
E:\HardwareProject\ESP32\.espressif\tools\ninja\1.10.0;
E:\HardwareProject\ESP32\.espressif\tools\idf-exe\1.0.1;
E:\HardwareProject\ESP32\.espressif\tools\ccache\3.7;
E:\HardwareProject\ESP32\.espressif\tools\dfu-util\0.9\dfu-util-0.9-win64
3、填写使用的脚本的绝对路径,不支持相对路径。
E:\HardwareProject\ESP32\.espressif\tools\openocd-esp32\v0.10.0-esp32-20200709/openocd-esp32/share/openocd/scripts
验证环境,打对勾说明验证通过。
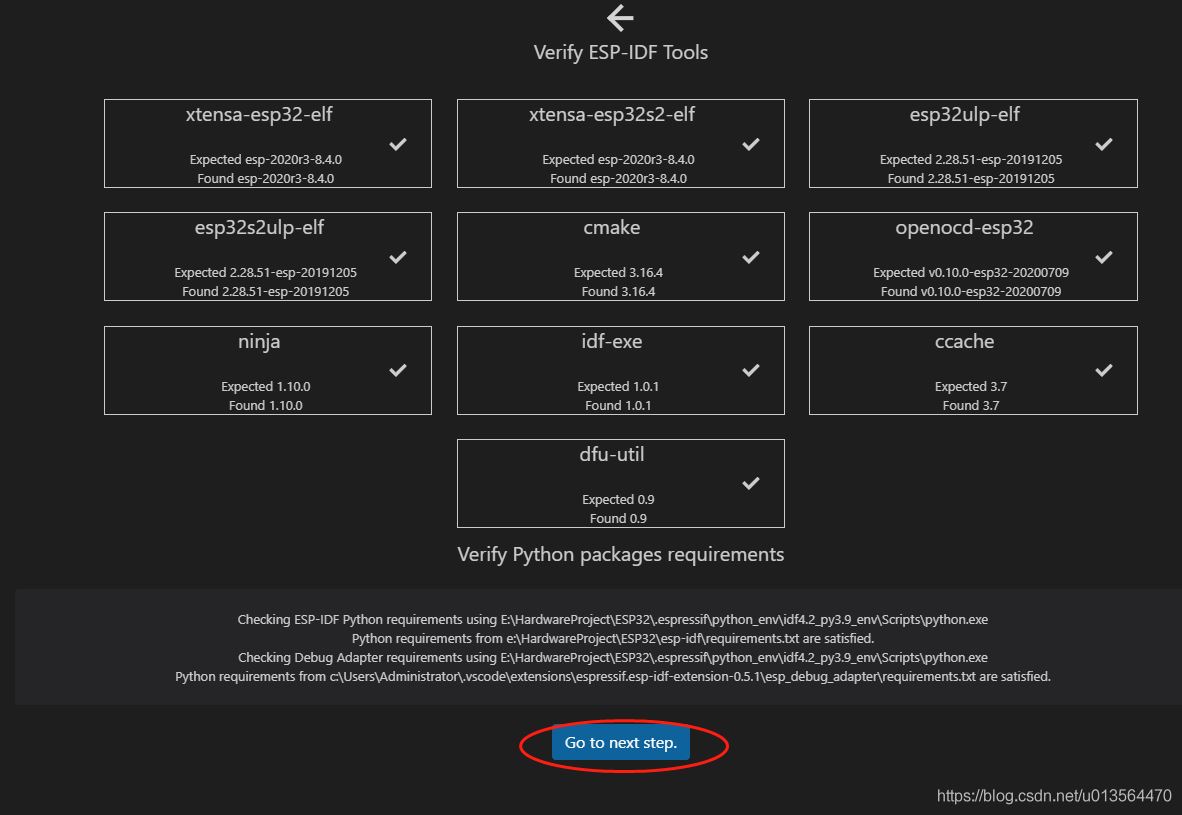
很高兴告诉你配置完了!ESP-IDF Tools have been configured for this extension of Visual Studio Code.

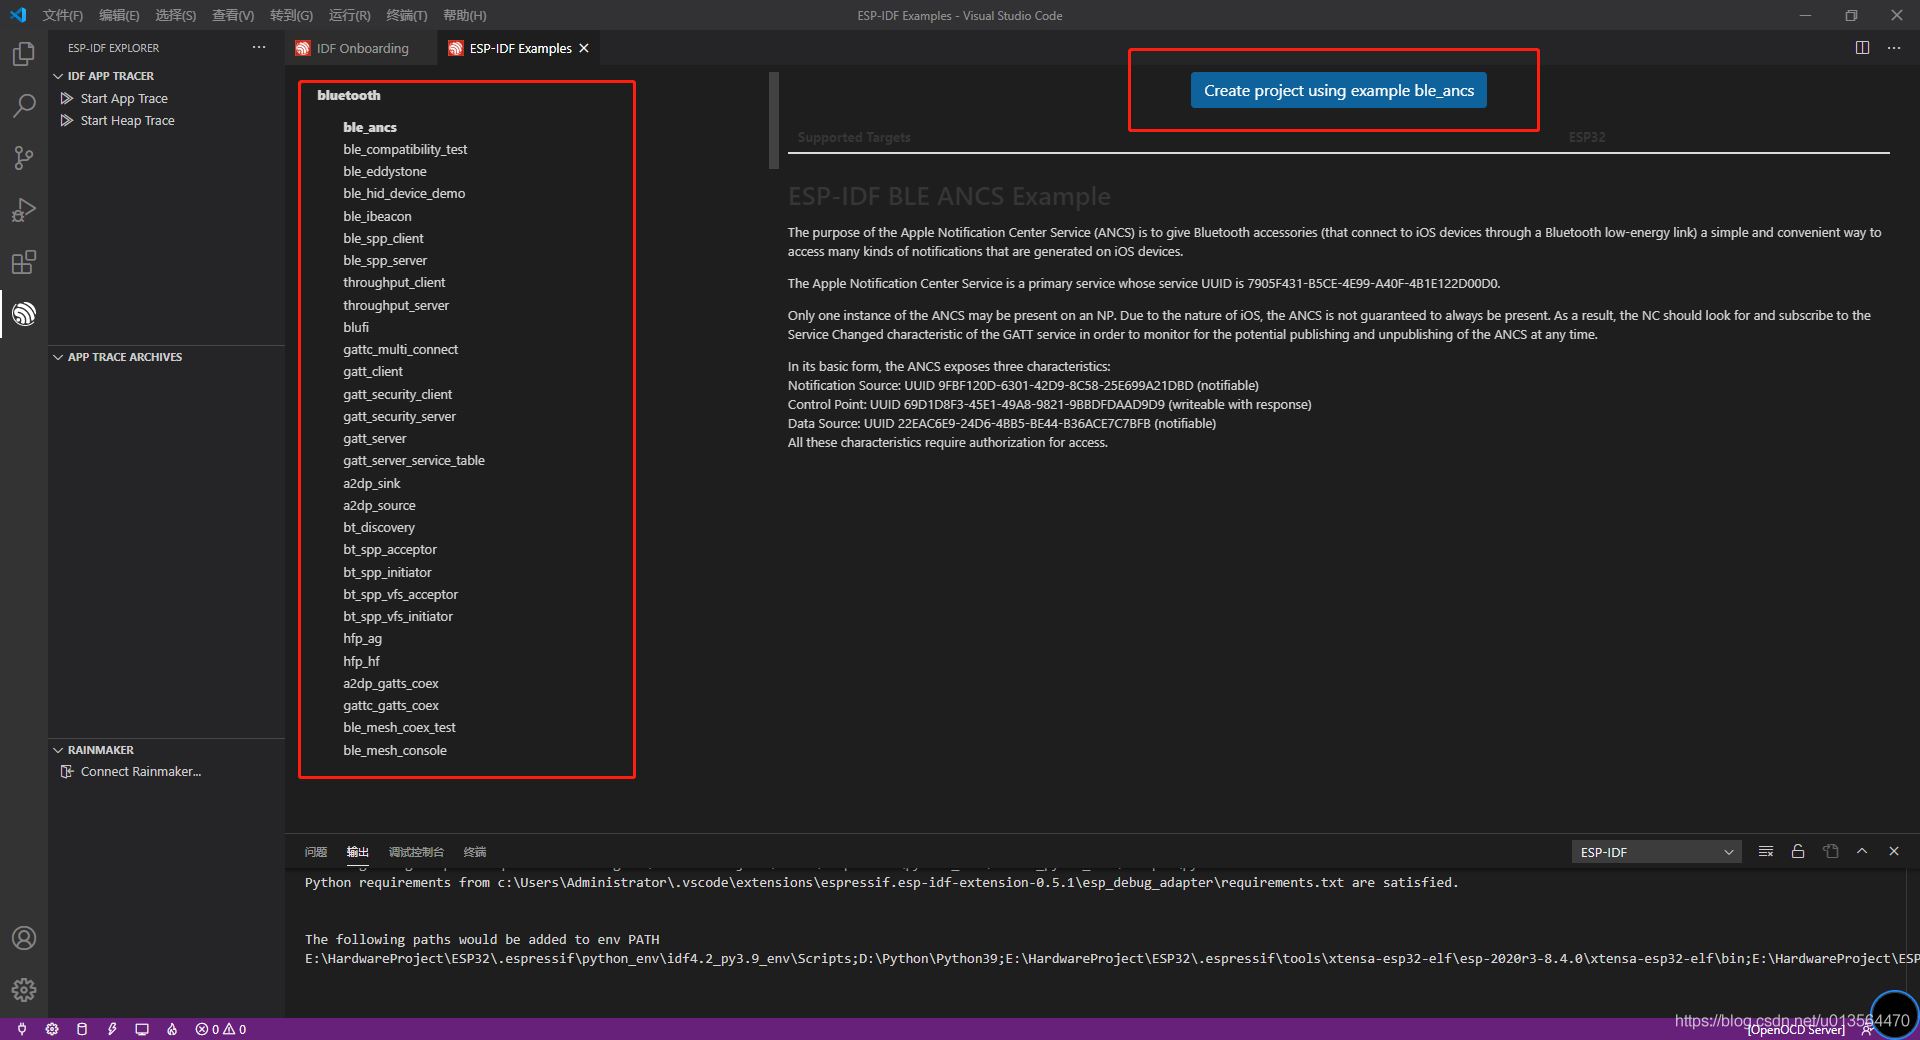
左侧是例程,右侧创建一个新的对应的空白例程。
第四步:运行 Hello Word
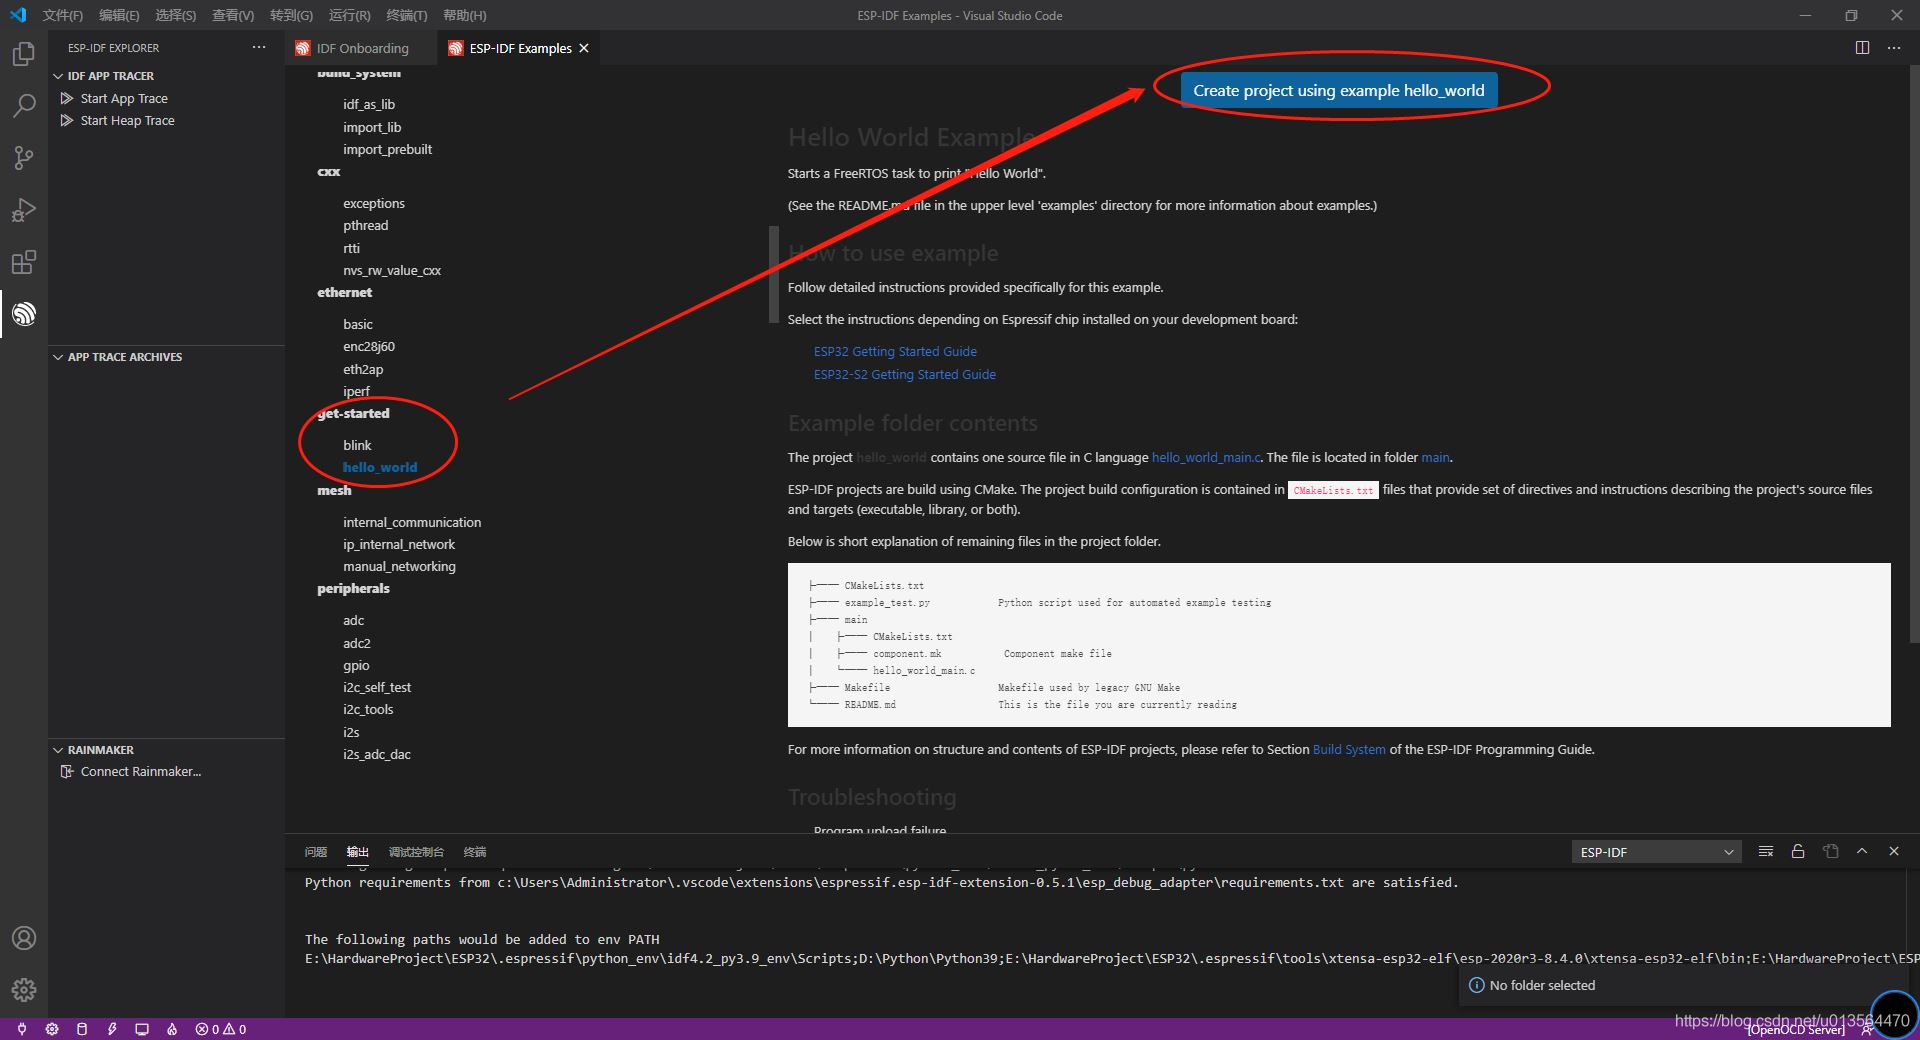
选择hello_word例程,创建新的空白例程到指定位置。
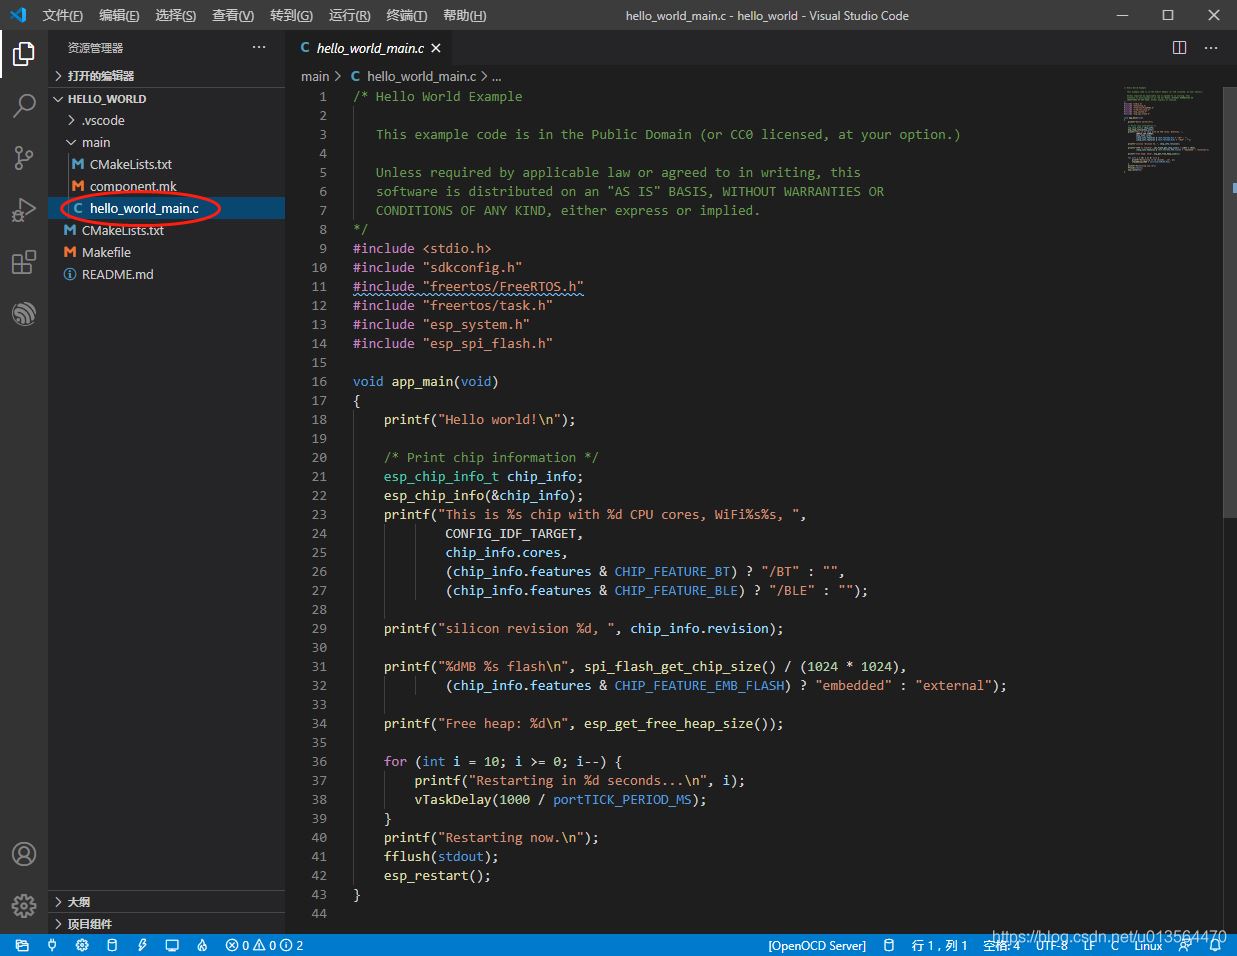
打开hello_world_main.c
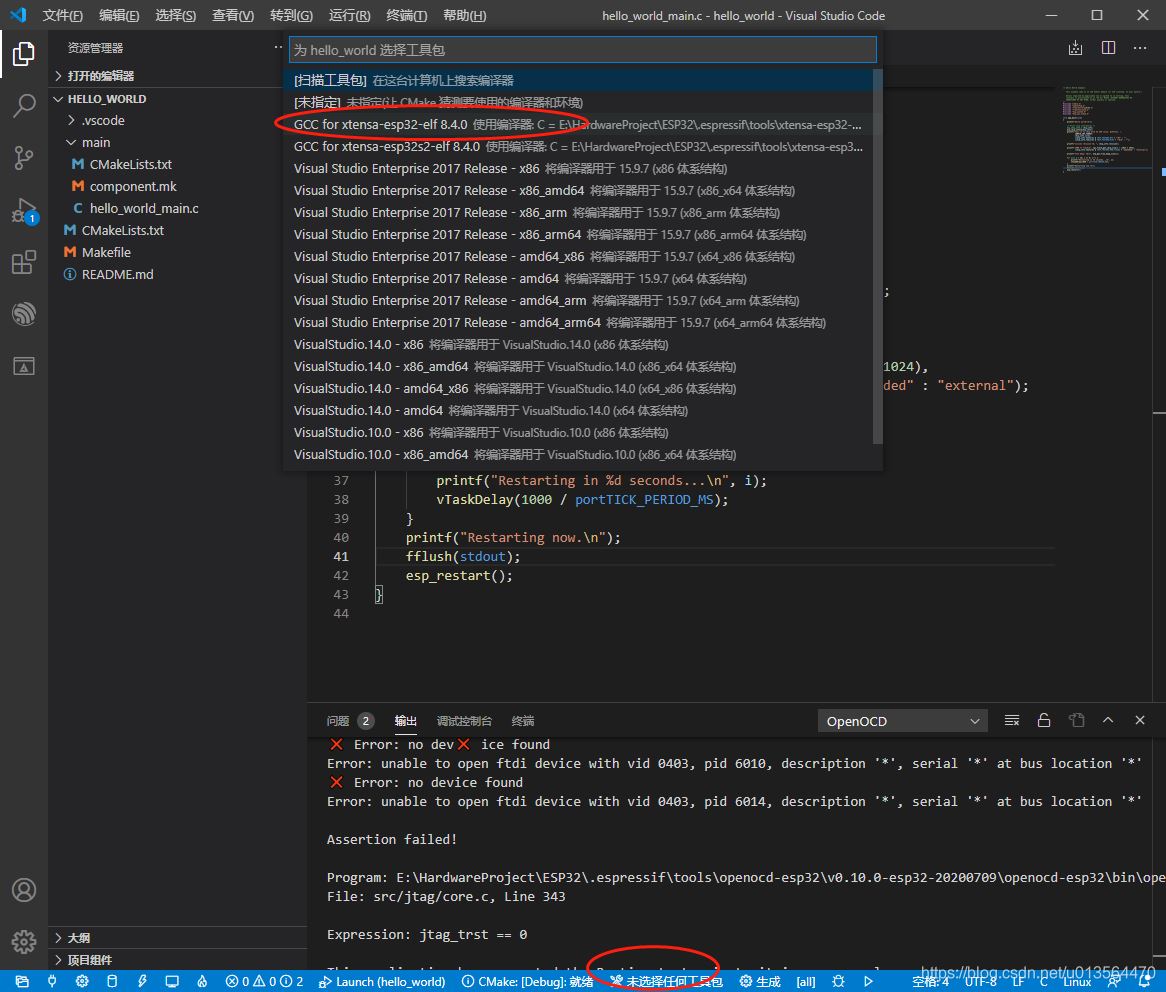
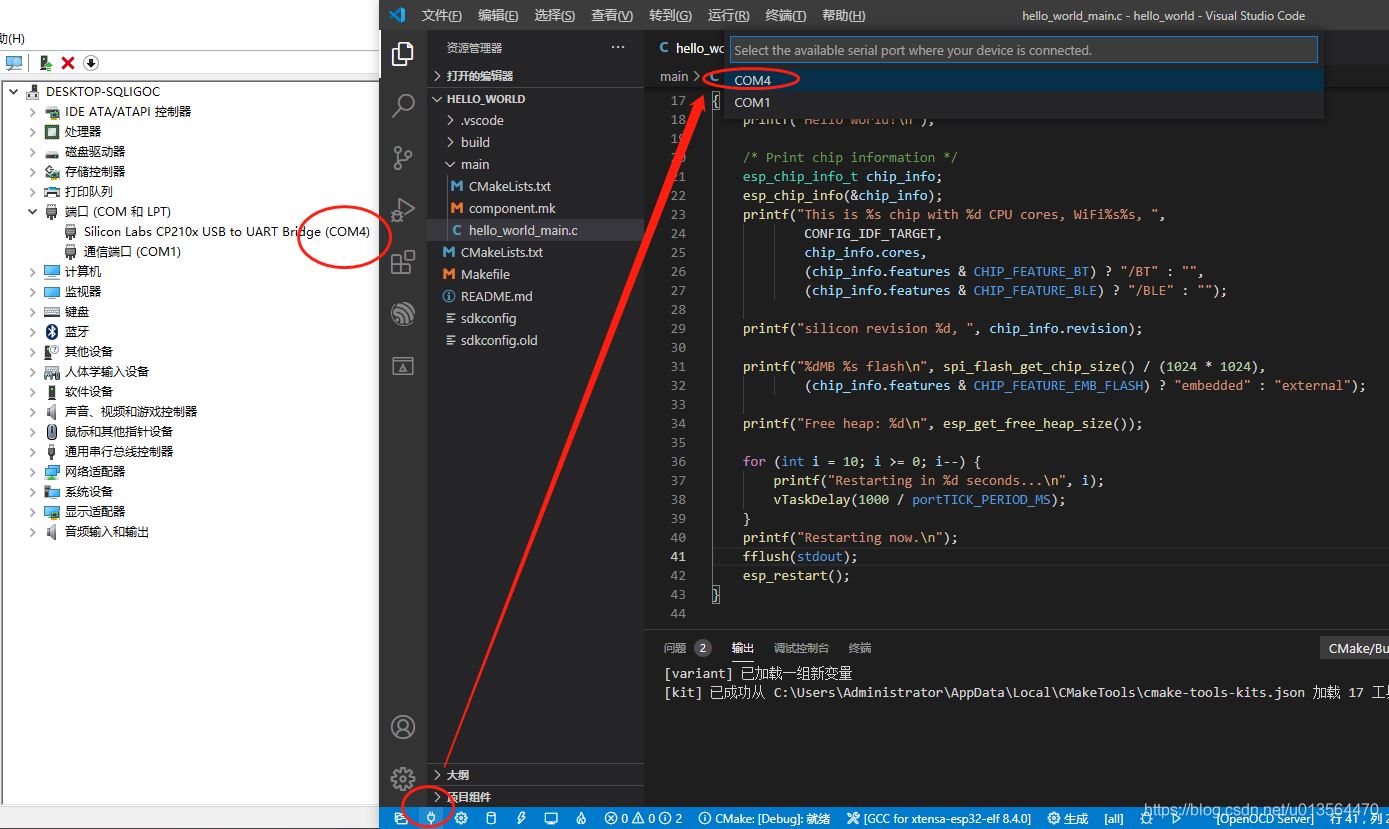
选择我们连接的板子的端口,不知道的在设备管理器中查看。这里我的是COM4
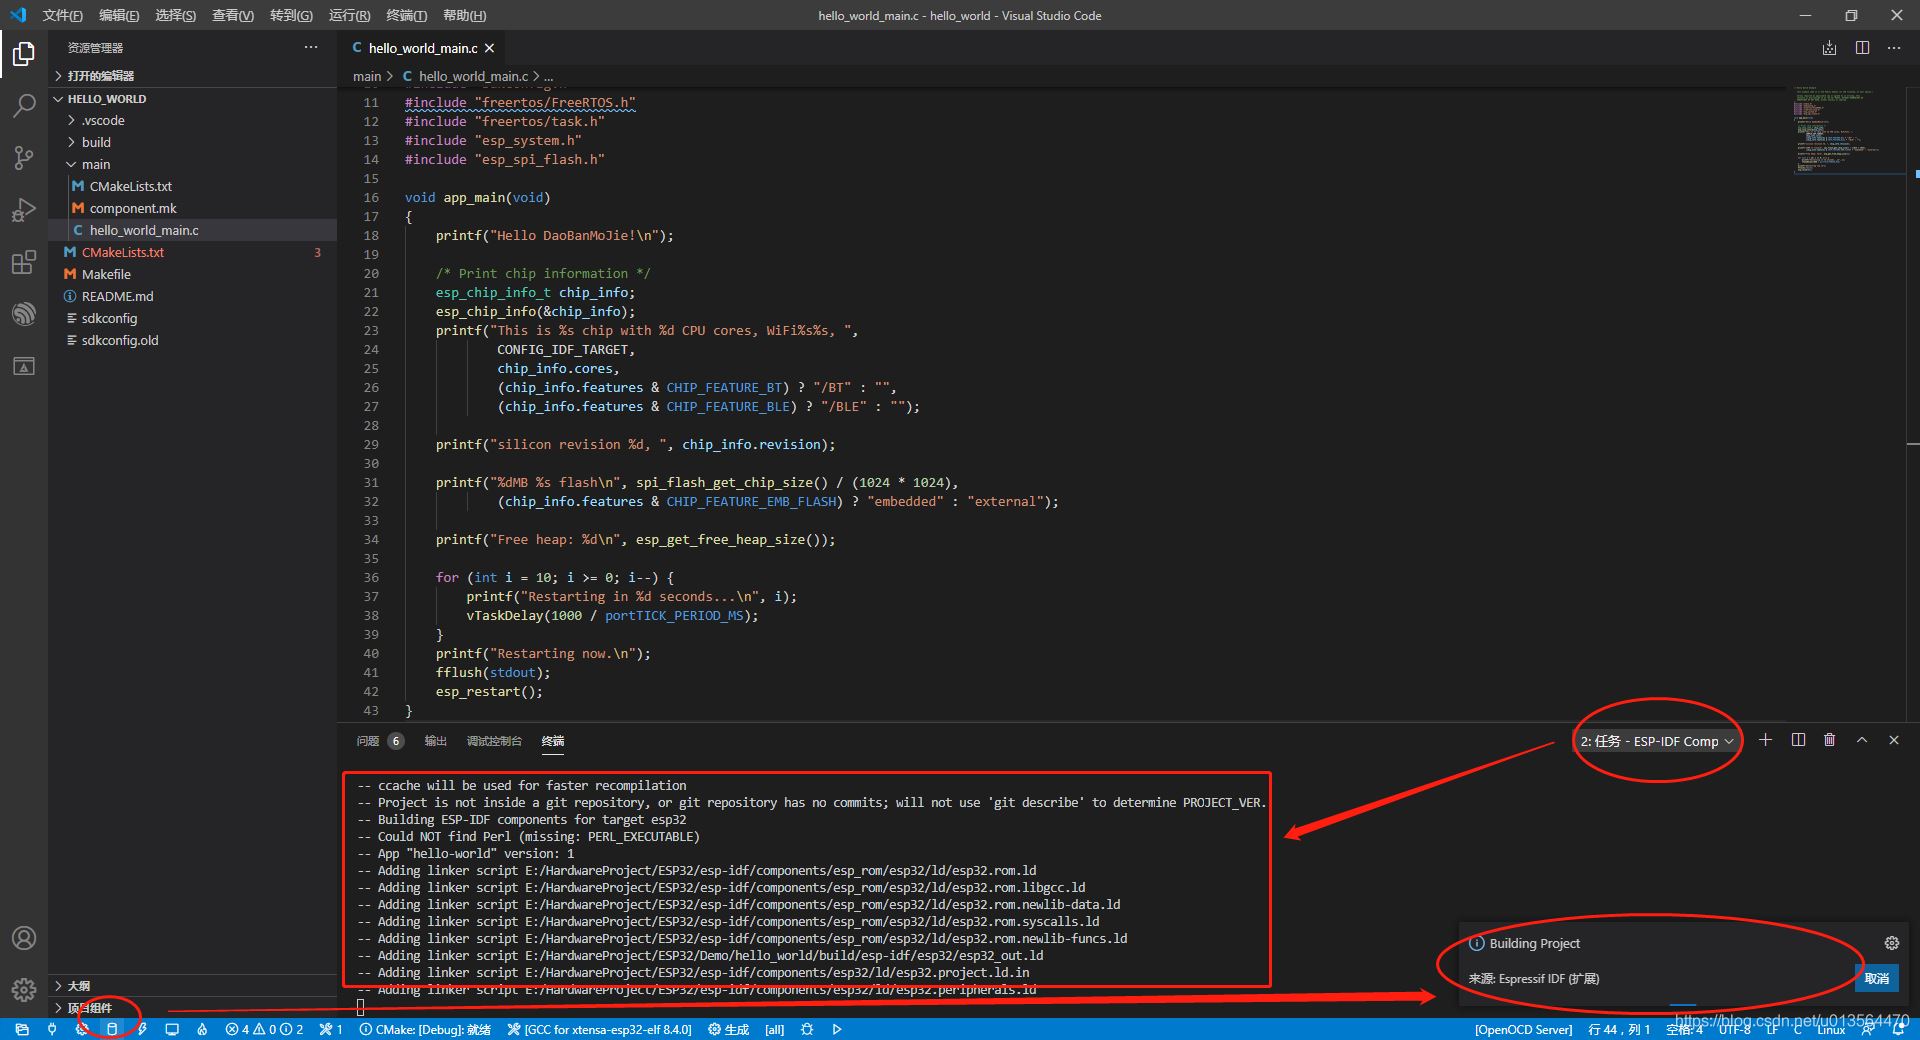
我们把代码的Hello Word更改为Hello DaoBanMoJie。因为很多芯片默认代码会打印输出Hello Word,我们为了区分开是我们自己下载的代码。之后点击下方图标ESP-IDF Build project,编译我们的工程……首次编译较慢,请耐心等待。
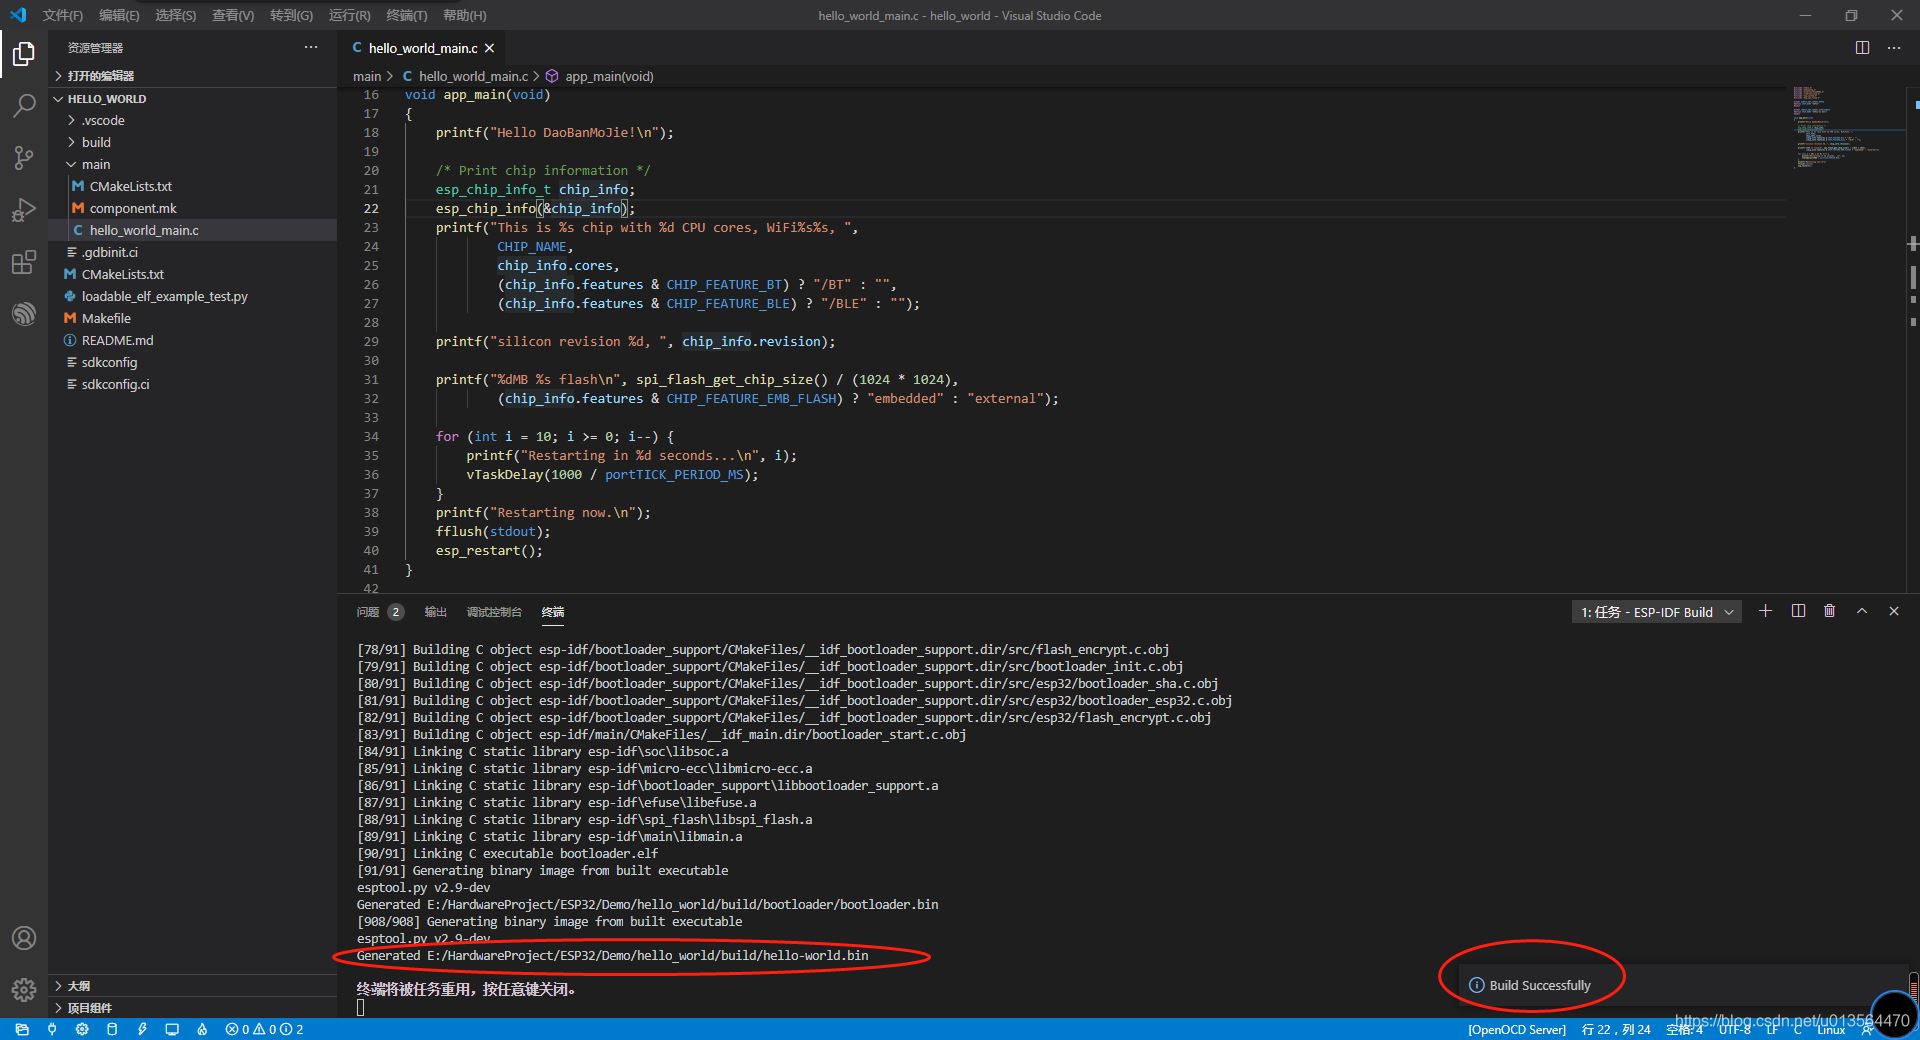
编译成功提示
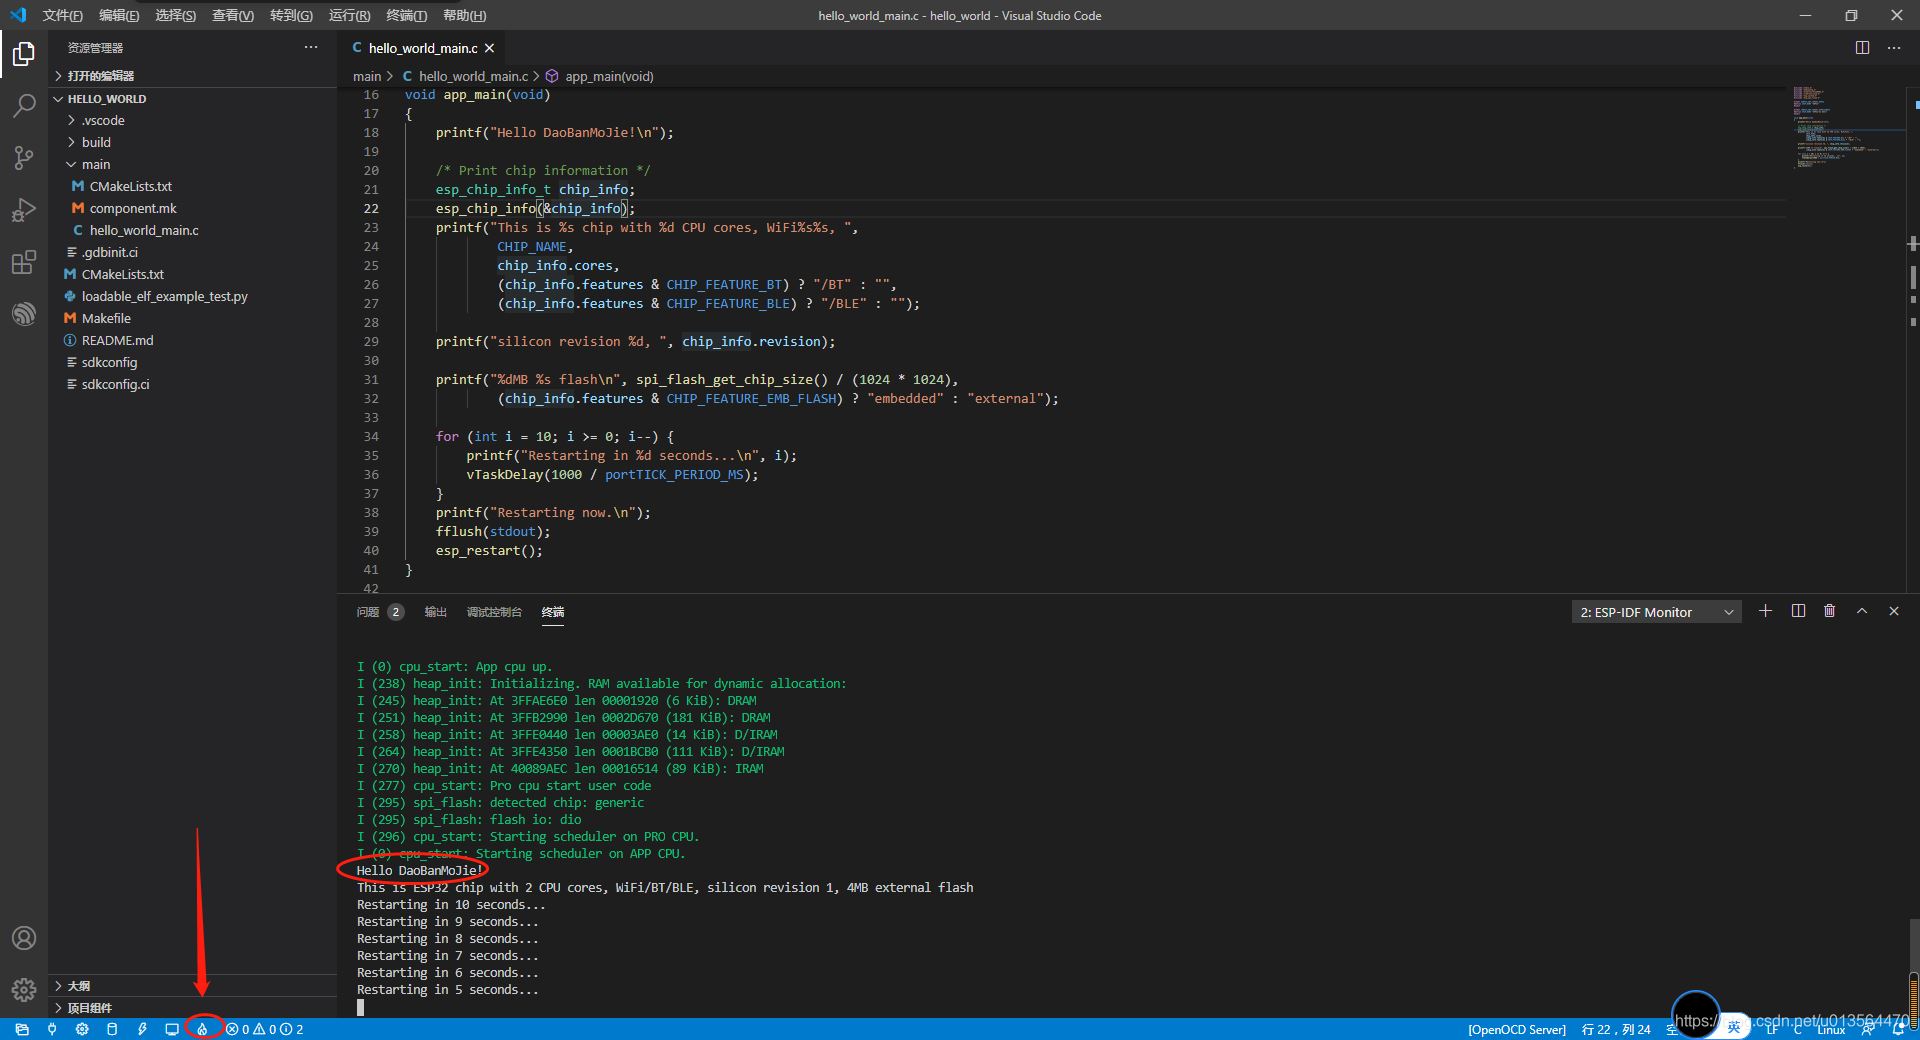
之后点击下方ESP-IDF Flash device下载程序到芯片。之后点击ESP-IDF Monitor device运行查看。当然也可以偷懒,直接点击ESP-IDF Build,Flash and Mointor 编译下载并且显示。
So,到这里就结束了。应该是最简单的办法了吧!更多相关VScode ESP32环境搭建内容请搜索以前的文章或继续浏览下面的相关文章希望大家以后多多支持!
以上是 VScode+ESP32简单环境搭建 的全部内容, 来源链接: utcz.com/p/246309.html

