Android中ImageCropper矩形、圆形 裁剪框的实现方法
前言
支持圆形裁剪框,裁剪后生成圆形图案。
代码基于开源项目修改,github上项目链接:https://github.com/shengge/android-crop (本地下载)
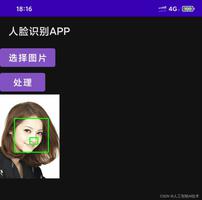
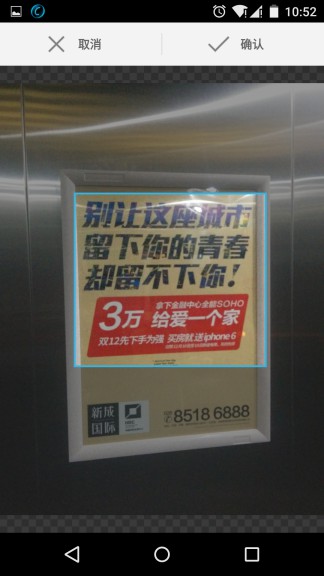
还是贴下效果图:
说一下圆形裁剪实现部分:
1.UI方面,自定义CircleHighlightView继承至HighlightView(原有的矩形裁剪框实现),直接看draw方法实现
@Override
protected void draw(Canvas canvas) {
canvas.save();
Path path = new Path();
outlinePaint.setStrokeWidth( outlineWidth);
if(!hasFocus()) {//没焦点是,直接画一个黑色的矩形框
outlinePaint.setColor( Color.BLACK);
canvas.drawRect( drawRect, outlinePaint);
}
else {
Rect viewDrawingRect = new Rect();
viewContext.getDrawingRect( viewDrawingRect);
//已裁剪框drawRect,算出圆的半径
float radius = (drawRect.right - drawRect.left) / 2;
//添加一个圆形
path.addCircle( drawRect.left + radius, drawRect.top + radius, radius, Direction.CW);
outlinePaint.setColor( highlightColor);
//裁剪画布,path之外的区域,以outsidePaint填充
canvas.clipPath( path, Region.Op.DIFFERENCE);
canvas.drawRect( viewDrawingRect, outsidePaint);
canvas.restore();
//绘制圆上高亮线,这里outlinePaint定义的Paint.Style.STROKE:表示只绘制几何图形的轮廓。
canvas.drawPath( path, outlinePaint);
//当modifyMode为grow时,绘制handles,也就是那四个小圆
if(handleMode == HandleMode.Always || (handleMode == HandleMode.Changing && modifyMode == ModifyMode.Grow)) {
drawHandles( canvas);
}
}
}
这里就实现了画圆形裁剪框的操作。
2. 响应和处理用户触摸事件
1). 判断触摸点坐标与圆的位置
/**
* 根据x,y坐标,计算其与圆的关系(圆上、圆内、圆外)
* @param x
* @param y
* @return
*/
private int getHitOnCircle(float x, float y) {
Rect r = computeLayout();
int retval = GROW_NONE;
final float hysteresis = 20F;
int radius = (r.right - r.left) / 2;
int centerX = r.left + radius;
int centerY = r.top + radius;
//判断触摸位置是否在圆上
float ret = (x - centerX) * (x - centerX) + (y - centerY) * (y - centerY);
double rRadius = Math.sqrt( ret);
double gap = Math.abs( rRadius - radius);
if(gap <= hysteresis) {// 圆上。这里由于是继承至HighlightView(绘制矩形框的)来处理,所以模拟返回了左右上下,而非纯圆上,亲测可用。你也可以自定义。
if(x < centerX) {// left
retval |= GROW_LEFT_EDGE;
}
else {
retval |= GROW_RIGHT_EDGE;
}
if(y < centerY) {// up
retval |= GROW_TOP_EDGE;
}
else {
retval |= GROW_BOTTOM_EDGE;
}
}
else if(rRadius > radius) {// outside
retval = GROW_NONE;
}
else if(rRadius < radius) {// inside,圆内就执行move
retval = MOVE;
}
return retval;
}
由于是继承至HighLightView(矩形框)来实现的,如果点(x,y)位置圆上,还需判断其它那个象限,对应矩形的上下左右位置。
2). 移动裁剪框
若上一步判断,触摸点在圆内,就会返回MOVE,并处理移动过程。
// Grows the cropping rectangle by (dx, dy) in image space
void moveBy(float dx, float dy) {
Rect invalRect = new Rect(drawRect);
//移动
cropRect.offset(dx, dy);
// Put the cropping rectangle inside image rectangle
cropRect.offset(
Math.max(0, imageRect.left - cropRect.left),
Math.max(0, imageRect.top - cropRect.top));
cropRect.offset(
Math.min(0, imageRect.right - cropRect.right),
Math.min(0, imageRect.bottom - cropRect.bottom));
drawRect = computeLayout();
invalRect.union(drawRect);
invalRect.inset(-(int) handleRadius, -(int) handleRadius);
viewContext.invalidate(invalRect);
}
移动裁剪框并保证其它image图片显示范围内。
3). 缩放裁剪框
此过程和上一步类似,将cropRect矩阵进行等比缩放即可,这里就细说了,详见代码:HighLightView.growBy(float dx, float dy)
3.将裁剪图片保存为圆形
/**
* @param bitmap src图片
* @return
*/
public static Bitmap getCircleBitmap(Bitmap bitmap) {
Bitmap output = Bitmap.createBitmap( bitmap.getWidth(), bitmap.getHeight(), Bitmap.Config.ARGB_8888);
Canvas canvas = new Canvas( output);
final int color = 0xff424242;
final Paint paint = new Paint();
final Rect rect = new Rect( 0, 0, bitmap.getWidth(), bitmap.getHeight());
paint.setAntiAlias( true);
paint.setFilterBitmap( true);
paint.setDither( true);
canvas.drawARGB( 0, 0, 0, 0);
paint.setColor( color);
//在画布上绘制一个圆
canvas.drawCircle( bitmap.getWidth() / 2, bitmap.getHeight() / 2, bitmap.getWidth() / 2, paint);
paint.setXfermode( new PorterDuffXfermode( Mode.SRC_IN));
canvas.drawBitmap( bitmap, rect, rect, paint);
return output;
}
注意:将bitmap保存为file时,格式请选择png,不然会出现黑色背景。
鉴于水平有限,从小语文就没学好,描述比较凌乱,需要深入理解的请阅读源代码。
附:另外一个很好开源项目 https://github.com/edmodo/cropper (本地下载)
总结
以上就是这篇文章的全部内容了,希望本文的内容对大家的学习或者工作具有一定的参考学习价值,如果有疑问大家可以留言交流,谢谢大家对的支持。
以上是 Android中ImageCropper矩形、圆形 裁剪框的实现方法 的全部内容, 来源链接: utcz.com/p/240947.html