vue项目中扫码支付的实现示例(附demo)
需求背景
市场报告列表展示的报告有两种类型,一种是免费报告,另一种是付费报告。免费报告用户可以直接查看,付费报告需要用户购买之后才能查看。

思路分析
- 点击查看为付费报告,弹出支付二维码。
- 创建订单,二维码进行倒计时,其展示5秒后开始监听支付回调结果,频次为五秒一次。
- 倒计时第一次倒数到0秒,提醒二维码过期让用户点击刷新二维码。
- 继续倒计时并开始监听支付回调结果。
- 刷新之后倒数到0秒还没有监听到结果则关闭支付弹窗,让用户重新发起支付。
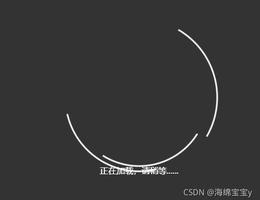
UI展示
支付弹窗未过期长这样子喔

支付弹窗过期时长这样子喔

开始使用
支付功能作为项目的公共功能,所以我们单独封装一个组件,这样其他模块使用的时候就以子组件的方式引入。
一 编写支付组件模板
下面是模板具体的源码,由于样式不是我们考虑的重点,所以就不展示样式的代码了,根据需要自行添加哈。
<template>
<div>
<el-dialog
class="dialog-pay"
title=""
:visible.sync="dialogVisible"
:show-close="false"
@close="handleClosePay"
>
<div class="content">
<p class="tip">{{ pay.title }}</p>
<p class="tip">
支付金额:<span class="small">¥</span
><span class="large">{{ pay.money }}</span>
</p>
<img
class="pic"
:style="{ opacity: btnDisabled ? 1 : 0.3 }"
:src="pay.url"
/>
<el-button
class="btn"
:class="btnDisabled ? 'disabled' : ''"
type="primary"
:disabled="btnDisabled"
@click="handleRefreshCode"
>{{ btnText }}</el-button
>
</div>
</el-dialog>
</div>
</template>
二 支付组件的JS相关代码和说明
1. 监听支付弹窗是否显示
子组件通过props属性,在子组件中接收父组件传过来的值。用watch监听pay.show,只有为true的时候显示支付弹窗,并且在显示5秒后开始执行监听支付结果的方法。
watch: {
'pay.show': {
handler(val) {
if (val) {
this.dialogVisible = this.pay.show
setTimeout(this.handleReportPayNotify(), 5000)
}
},
immediate: true
}
},
2. 二维码开始倒计时
二维码开始进行60秒的倒计时,到0秒提示点击刷新重新获取二维码,继续开始倒计时,此时如果到0秒则关闭支付弹窗,提示用户等待时间过长,请重新发起支付。
handleCountDown() {
if (this.second == 1) {
if (this.refresh) {
this.second = 60
this.btnDisabled = false
this.btnText = '点击刷新重新获取二维码'
if (this.timer) {
clearInterval(this.timer)
}
} else {
this.$emit('closePay', { type: 'fail' })
clearInterval(this.timer)
this.$message.warning('等待时间过长,请重新发起支付')
}
} else {
this.second--
this.btnDisabled = true
this.btnText = `距离二维码过期剩余${this.second}秒`
this.downTimer = setTimeout(() => {
this.handleCountDown()
}, 1000)
}
},
3. 监听支付弹窗关闭
handleClosePay() {
if (this.timer) {
clearInterval(this.timer)
}
if (this.downTimer) {
clearTimeout(this.downTimer)
}
this.$emit('closePay', { type: 'fail' })
this.$message.warning('您已取消支付')
},
4. 监听支付回调结果
回调结果有两种,如果是正常范围内监听成功,则执行父组件传过来的fn,并清除定时器;如果监听到次数为12的时候还没有得到相应的结果,则关闭支付弹窗,提示用户等待时间过长,请重新发起支付,并清除定时器。
handleReportPayNotify() {
let num = 0
this.timer = setInterval(() => {
num++
this.pay.fn().then(res => {
if (res.status == 111111) {
this.$emit('closePay', { type: 'success' })
clearInterval(this.timer)
}
})
if (num == 12) {
this.$emit('closePay', { type: 'fail' })
clearInterval(this.timer)
this.$message.warning('等待时间过长,请重新发起支付')
}
}, 5000)
}
5. 支付组件销毁时清除定时器
这一步是容易忽略但是也是需要做的,当组件销毁时将定时器及时的清除掉。
beforeDestroy() {
if (this.timer) {
clearInterval(this.timer)
}
if (this.downTimer) {
clearTimeout(this.downTimer)
}
}
}
附:组件JS完整的源码
<script>
export default {
name: 'WechatPay',
props: {
pay: Object
},
data() {
return {
dialogVisible: false,
btnDisabled: true,
btnText: '',
second: 60,
timer: null,
refresh: true
}
},
watch: {
'pay.show': {
handler(val) {
if (val) {
this.dialogVisible = this.pay.show
setTimeout(this.handleReportPayNotify(), 5000)
}
},
immediate: true
}
},
mounted() {
this.handleCountDown()
},
methods: {
/**
* @descripttion: 刷新二维码
*/
handleRefreshCode() {
this.$bus.$emit('refreshCode')
this.handleCountDown()
this.handleReportPayNotify()
this.refresh = false
},
/**
* @descripttion: 二维码倒计时
*/
handleCountDown() {
if (this.second == 1) {
if (this.refresh) {
this.second = 60
this.btnDisabled = false
this.btnText = '点击刷新重新获取二维码'
if (this.timer) {
clearInterval(this.timer)
}
} else {
this.$emit('closePay', { type: 'fail' })
clearInterval(this.timer)
this.$message.warning('等待时间过长,请重新发起支付')
}
} else {
this.second--
this.btnDisabled = true
this.btnText = `距离二维码过期剩余${this.second}秒`
this.downTimer = setTimeout(() => {
this.handleCountDown()
}, 1000)
}
},
/**
* @descripttion: 监听支付弹窗关闭
*/
handleClosePay() {
if (this.timer) {
clearInterval(this.timer)
}
if (this.downTimer) {
clearTimeout(this.downTimer)
}
this.$emit('closePay', { type: 'fail' })
this.$message.warning('您已取消支付')
},
/**
* @descripttion: 监测支付回调结果
*/
handleReportPayNotify() {
let num = 0
this.timer = setInterval(() => {
num++
this.pay.fn().then(res => {
if (res.status == 111111) {
this.$emit('closePay', { type: 'success' })
clearInterval(this.timer)
}
})
if (num == 12) {
this.$emit('closePay', { type: 'fail' })
clearInterval(this.timer)
this.$message.warning('等待时间过长,请重新发起支付')
}
}, 5000)
}
},
beforeDestroy() {
if (this.timer) {
clearInterval(this.timer)
}
if (this.downTimer) {
clearTimeout(this.downTimer)
}
}
}
</script>
到此这篇关于vue项目" title="vue项目">vue项目中扫码支付的实现示例(附demo)的文章就介绍到这了,更多相关vue 扫码支付内容请搜索以前的文章或继续浏览下面的相关文章希望大家以后多多支持!
以上是 vue项目中扫码支付的实现示例(附demo) 的全部内容, 来源链接: utcz.com/p/239633.html