Spring Boot项目利用Redis实现session管理实例
在现代网络服务中,session(会话)不得不说是非常重要也是一定要实现的概念,因此在web后台开发中,对session的管理和维护是必须要实现的组件。这篇文章主要是介绍如何在Spring Boot项目中加入redis来实现对session的存储与管理。
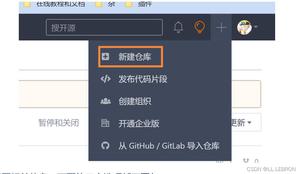
1. 利用Spring Initializr来新建一个spring boot项目

2. 在pom.xml中添加redis和session的相关依赖。项目生成的时候虽然也会自动生成父依赖,但是1.5.3版本的spring boot的redis相关依赖有可能不能够正常工作,笔者自行在maven repository找到了比较稳定的版本如下方代码所示
<groupId>org.springframework.boot</groupId>
<artifactId>spring-boot-starter-web</artifactId>
</dependency>
<dependency>
<groupId>org.springframework.boot</groupId>
<artifactId>spring-boot-starter-data-redis</artifactId>
<version>1.5.2.RELEASE</version>
</dependency>
<dependency>
<groupId>org.springframework.session</groupId>
<artifactId>spring-session-data-redis</artifactId>
<version>1.3.0.RELEASE</version>
</dependency>
3. 在application.properties中添加redis数据库的相关配置。这里为了演示使用方法只添加了相对简单的配置,即设置了session存储的数据库类型、使用的数据库号、数据库地址和端口号。实战中还会对使用非默认数据库、数据库大小、数据库最大连接数、生存时长、是否写回磁盘等许多参数进行配置
# Redis配置
spring.session.store-type=redis
spring.redis.database=0
spring.redis.host=localhost
spring.redis.port=6379
4. 编写一个测试的controller来验证是否能够正确地读写session。这里的controller中,我判断了当前获取的session是否是新生成的。如果是,则输出成功创建一个session对象,并返回session的id,然后在session中添加一个字段。如果session不是新生成的,即是已经存在的session,则输出session是已经存在的并返回session的id,然后再输出session中初次创建session保存的key所对应的value
@SpringBootApplication
@EnableRedisHttpSession
@RestController
public class DemoApplication {
private Logger logger = LoggerFactory.getLogger(this.getClass());
public static void main(String[] args) {
SpringApplication app = new SpringApplication(DemoApplication.class);
app.setWebEnvironment(true);
app.run(args);
}
@GetMapping("/hello")
public ResponseEntity<?> hello(HttpSession session) {
if (session.isNew()) {
logger.info("Successfully creates a session ,the id of session :" + session.getId());
session.setAttribute("key", "hello");
} else {
logger.info("session already exists in the server, the id of session :"+ session.getId());
logger.info(session.getAttribute("key").toString());
}
return new ResponseEntity<>("Hello World", HttpStatus.OK);
}
}
5. 测试代码
首先运行Redis客户端
redis-cli
查看当前数据库内容
127.0.0.1:6379> keys *
(empty list or set)
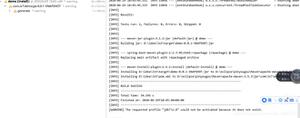
运行spring boot项目
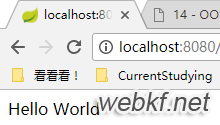
第一次浏览器访问localhost:8080/hello,如下图所示则成功运行
查看log可以看到
2017-06-12 00:26:12.601 INFO 9580 ― [nio-8080-exec-1]
ication$$EnhancerBySpringCGLIB$$de942542 : Successfully creates a session ,the id of session :4368a535-9bfa-406b-975c-e58c2bca1e75
再次访问localhost:8080/hello时,查看log可以看到能够正确地从redis中取出存放在session中的某个key对应的值
2017-06-12 00:30:43.533 INFO 9580 ― [nio-8080-exec-5]
ication$$EnhancerBySpringCGLIB$$de942542 : session already exists in the server, the id of session :4368a535-9bfa-406b-975c-e58c2bca1e75
2017-06-12 00:30:43.533 INFO 9580 ― [nio-8080-exec-5]
ication$$EnhancerBySpringCGLIB$$de942542 : hello
以上是 Spring Boot项目利用Redis实现session管理实例 的全部内容, 来源链接: utcz.com/p/212959.html