【JS】瀑布流布局的实现,前端面试题
有的公司的面试题是上机测试 瀑布流还是有点难度的 如果以前没有搞过的话
当然每一种测试 还是主要考察的是你的实现思路
今天就来说一下 上机测试中的 瀑布流页面布局的实现
首先先看下页面效果

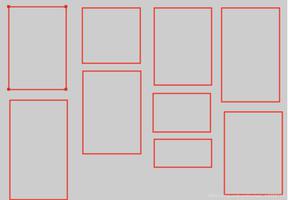
如果按照正常的效果来说 图片的布局不会是这样的 如果ui给的图片 宽度一致高度不一致的话
将会产生大量的留白 知道css布局的就知道 如果不设置 瀑布流的话 第二行 将会是 第一行最高的那张图片底部作为起点
上面产生大量留白 那是css默认的布局方式导致的 我们说了这么多还是直接上效果图比较明显

如果不做瀑布流布局的话 图片布局将是上面的这种效果 这样看起来让用户很难受 如果有选择恐惧症的话 会更难受
所以有的时候就需要我们进行瀑布流布局了
2.瀑布流说俗点 可以叫做 见缝插针 那个高度低 图片插入到哪里 让页面看起来比较紧凑点 没有那么多留白
整理一下思路就是下面的
- 瀑布流布局的特点是等宽不等高。
- 为了让最后一行的差距最小,从第二行开始,需要将图片放在第一行最矮的图片下面(可以根据下表索引找到),以此类推。
- 父元素设置为相对定位,图片所在元素设置为绝对定位。然后通过设置 top 值和 left 值定位每个元素。
我们先说html代码
<div class="boxContent">
<div class="box"><img src="https://www.pianshen.com/article/8140905461/imgs/1.jpg" alt=""></div>
<div class="box"><img src="https://www.pianshen.com/article/8140905461/imgs/2.jpg" alt=""></div>
<div class="box"><img src="https://www.pianshen.com/article/8140905461/imgs/3.jpg" alt=""></div>
<div class="box"><img src="https://www.pianshen.com/article/8140905461/imgs/4.jpg" alt=""></div>
<div class="box"><img src="https://www.pianshen.com/article/8140905461/imgs/5.jpg" alt=""></div>
<div class="box"><img src="https://www.pianshen.com/article/8140905461/imgs/6.jpg" alt=""></div>
<div class="box"><img src="https://www.pianshen.com/article/8140905461/imgs/12.jpg" alt=""></div>
<div class="box"><img src="https://www.pianshen.com/article/8140905461/imgs/8.jpg" alt=""></div>
<div class="box"><img src="https://www.pianshen.com/article/8140905461/imgs/9.jpg" alt=""></div>
<div class="box"><img src="https://www.pianshen.com/article/8140905461/imgs/15.jpg" alt=""></div>
<div class="box"><img src="https://www.pianshen.com/article/8140905461/imgs/11.jpg" alt=""></div>
<div class="box"><img src="https://www.pianshen.com/article/8140905461/imgs/15.jpg" alt=""></div>
</div>
然后是样式文件
*{
padding: 0;
margin: 0;
}
.box{
width: 200px;
box-sizing: border-box;
float: left;
}
.box img{
width: 100%;
}
我这里使用jquery 偷懒一下哈
<script src="https://cdn.bootcss.com/jquery/1.10.0/jquery.min.js"></script>
首先 设置瀑布流的时候 我们为了保证图片 不拉伸 一般是定了宽度 不定高度
var box=$('.box'); // 求出所有存储 图片的 div标签集合
var boxWidth=box.width(); // 得到每个div的宽度 其实也是图片的宽度
var screenWidth=$(window).width(); // 得到屏幕的宽度
var cols=parseInt(screenWidth/boxWidth) ; // 求出第一行显示图片的个数
var heightArr=[]; // 用来存储 第一行每个图片高度的数组
// 图片遍历循环 除了第一排不需要定位 取高度值 其他排定位处理
$.each(box,function(index,item){
var boxHeight=$(item).outerHeight(); // 求出每张图片的高度
if(index<cols){ // 算出第一行所有图片的高度
heightArr[index]=boxHeight; // 放入到数组中
}else{ // 第二行的 图片 放入的位置取决于那张图片高度最小
var minHeightBox=Math.min(...heightArr);// 高度最小的图片
var minBoxIndex=$.inArray(minHeightBox,heightArr);//高度最小的图片的索引
$(item).css({
position:'absolute',
left:minBoxIndex*boxWidth+'px',
top:minHeightBox+'px'
})
// 高度追加
heightArr[minBoxIndex]+=boxHeight;
}
})
上面的这种方式 很适合 是动态插入解决的思路 js+jquery 当然在做项目的时候 很多都是要 动态解决的
2.还有一种就是使用弹性布局来解决
flex 实现瀑布流需要将最外层元素设置为 display: flex,即横向排列。
然后通过设置 flex-flow:column wrap 使其换行。设置 height: 100vh 填充屏幕的高度,来容纳子元素
// 复习一下flex-flow 的样式 使用
flex-flow 属性是 flex-direction 和 flex-wrap 属性的复合属性。
flex-flow 属性用于设置或检索弹性盒模型对象的子元素排列方式。
flex-direction 属性规定灵活项目的方向。
flex-wrap 属性规定灵活项目是否拆行或拆列。
.boxContent {
display: flex;
flex-flow:column wrap;
height: 100vh;
}
.box {
width: 200px;
}
.box img{
width: 100%;
}
我也就学会了这俩种 前端小白 还在努力中!!!
生活那么苦,为啥不给自己一颗糖吃呢!坚持下去!你会看到不一样的风景!
以上是 【JS】瀑布流布局的实现,前端面试题 的全部内容, 来源链接: utcz.com/a/68056.html


