iredwuhaol电子邮箱登录已过期私有云搭建记录本-手把手教你到无
--时间:2020年10月20日
--作者:飞翔的小胖猪
概述
前言
iRedMail 是一个基于 Linux/BSD 系统的零成本、功能完备、成熟的邮件服务器解决方案。iRedMail 是一个开源、免费的项目。以 GPL(v2)协议发布。
文档初衷
在我实际生产环境中需要搭建一套邮件服务器,百度了一下听说iredmail不错,一步一步来呗。大致流程如下:
1.先在自己环境下做测试,如果能成功再搞到生产环境中。
2.打开其官方网站根据自己实际的设备环境(操作系统)找到合适的安装步骤。(尽量要英文手册)
3.根据你所看到的步骤提示一步一步的走,然后就安装好了。这有一个前提你的安装环境必须与互联网相通。
4.通过观察iredmail的安装实时提示信息发现他会去互联网中下载很多东西,可我的内网环境不能连通互联网呀。看了一下官网上又没有提供离线安装包下载,好吧看来要消耗一波脑细胞了。
5.通过一整天的各种尝试终于然我找到一套可行的离线安装方式。
环境准备
系统及软件:

数据准备:

安装包下载:
该安装包是由本人从iredmail官网上下载的文件然后制作的离线安装软件包。现放在百度网盘中,该篇文档也是使用该包来完成安装的。
链接:https://pan.baidu.com/s/1yaOS8CciAjFjeN5IHIW3-w
提取码:wowb
ps:可能只适用与centos 7.6+iredmail-1.3.1的环境,其他操作系统及软件版本也没测过。
包文件说明:

软件包主要分为4块。
.官网软件包:iRedMail-1.3.1.tar.gz + misc
.安装所需的epel源中的rpm文件:yum_down_soft.tar.gz
.cvd病毒库:cvd
.python2及3的各种必要模块:python
步骤
安装配置操作系统
安装操作系统
操作系统安装这一步就不介绍了,请自行百度谢谢!!!切记我用的是Centos 7.6的系统,安装软件选择最简洁的最小化安装即可。

配置系统
进入到操作系统过后需要关闭selinux及firewalld,同时要设置机器主机名、挂载本地repo镜像。
(网络配置这些基础配置自行百度)
.设置主机名
1.#使用名设置主机名为我们事先规划好的名字
[root@test1 ~]# hostnamectl set-hostname test1.mail.com[root@test1 ~]# hostname
test1.mail.com

2.修改/etc/hosts文件把主机名添加到文本中,需要添加到最前面
[root@test1 ~]# vim /etc/hosts
127.0.0.1   test1.mail.com localhost localhost.localdomain localhost4 localhost4.localdomain4
::1         localhost localhost.localdomain localhost6 localhost6.localdomain6
.关闭selinux
1.命令临时设置selinux为只记录
[root@test1 ~]# setenforce  0[root@test1 ~]# getenforceDisabled

2.修改/etc/selinux/config文件中的SELINUX=enforcing为SELINUX=disabled
[root@test1 ~]# vim /etc/selinux/config
# This file controls the state of SELinux on the system.
# SELINUX= can take one of these three values:
#     enforcing - SELinux security policy is enforced.
#     permissive - SELinux prints warnings instead of enforcing.
#     disabled - No SELinux policy is loaded.
SELINUX=disabled
# SELINUXTYPE= can take one of three values:
#     targeted - Targeted processes are protected,
#     minimum - Modification of targeted policy. Only selected processes are protected.
#     mls - Multi Level Security protection.
SELINUXTYPE=targeted
.关闭firewalld
#停止firewalld服务同时设置其开机不自动启动,设置不能被其他应用调用。
[root@test1 ~]# systemctl stop firewalld[root@test1
~]# systemctl disable firewalldRemoved symlink
/etc/systemd/system/multi-user.target.wants/firewalld.service.Removed symlink /etc/systemd/system/dbus-
org.fedoraproject.FirewallD1.service.[root@test1
~]# systemctl mask firewalld
.挂载本地光盘镜像
#挂载本地光盘到/mnt目录中
[root@test1 ~]# mount /dev/sr0 /mnt
mount: /dev/sr0 is write-protected, mounting read-only
#删除/etc/yum.repos.d/下系统自带的repo文件
[root@test1 ~]# cd /etc/yum.repos.d/
[root@test1 yum.repos.d]# rm -rf CentOS-*
#新建编辑一个名为local_yum.repo的yum源文件
[root@test1 ~]# vim /etc/yum.repos.d/local_yum.repo
[yum_local]
name=yum_local
enabled=1
gpgcheck=0
baseurl=file:///mnt/
[root@test1 yum.repos.d]# yum clean all
[root@test1 yum.repos.d]# yum makecache
[root@test1 yum.repos.d]# yum repolist
准备安装环境
解压文件
通过本人分享的百度链接下载得到安装软件包,然后解压到根目录下。
1.解压总的安装包
[root@test1 ~]# ll /iredmail.tar.gz-rw-r--r-- 1 root root 487738299 Oct 20 11:47 /iredmail.tar.gz[root@test1 ~]#[root@test1 ~]#[root@test1 ~]# tar -zxvf /iredmail.tar.gz -C /   #解压压缩包到根目录下
[root@test1 ~]# cd /soft
[root@test1 soft]# ll
total 194128
drwxr-xr-x 2 root root        59 Oct 20 11:42 cvd
-rw-r--r-- 1 root root    232203 Oct 16 08:47 iRedMail-1.3.1.tar.gz
drwxr-xr-x 2 root root       226 Oct 20 11:44 misc
drwxr-xr-x 4 root root        56 Oct 20 11:43 python
-rw-r--r-- 1 root root 198550344 Oct 19 16:50 yum_down_soft.tar.gz

2.解压rpm软件包。
[root@test1 soft]# tar -zxvf yum_down_soft.tar.gz

3.解压iredmail文件
[root@test1 soft]# tar -zxvf iRedMail-1.3.1.tar.gz
[root@test1 soft]# ll
total 194152
drwxr-xr-x  2 root root        59 Oct 20 11:42 cvd
drwxr-xr-x 10 root root       193 Sep 22 05:34 iRedMail-1.3.1
-rw-r--r--  1 root root    232203 Oct 16 08:47 iRedMail-1.3.1.tar.gz
drwxr-xr-x  2 root root       226 Oct 20 11:44 misc
drwxr-xr-x  4 root root        56 Oct 20 11:43 python
drwxr-xr-x  3 root root     20480 Oct 18 23:32 yum_down_soft
-rw-r--r--  1 root root 198550344 Oct 19 16:50 yum_down_soft.tar.gz
修改部分脚本
在iredmail安装脚本中会自动生成一个sogo的repo文件每次。在外网环境下他会通过自动生成的repo文件去找到需要的包并进行下载。在内网中则会因为无法连接外网而安装报错。
我们需要修改其自动生成repo的语句改为我们本地的路径。
在/soft/iRedMail-1.3.1/functions/packages.sh文件中注释掉baseurl=${SOGO_PKG_MIRROR}/SOGo/nightly/${SOGO_VERSION}/rhel/${DISTRO_VERSION}/\$basearch行(大概在文件的408行左右),然后添加一行新数据指定生成的repo路径为本地路径。
[root@test1 soft]# vim /soft/iRedMail-1.3.1/functions/packages.sh
cat > ${YUM_REPOS_DIR}/sogo.repo <<EOF
[SOGo]
name=Inverse SOGo Repository
enabled=1
gpgcheck=0

# SOGo v3 stable release.
# WARNING: A proper support contract from Inverse is required:
# https://sogo.nu/support/index.html#support-plans
#baseurl=${SOGO_PKG_MIRROR}/SOGo/release/${SOGO_VERSION}/rhel/${DISTRO_VERSION}/\$basearch

# SOGo v3 nightly builds
#baseurl=${SOGO_PKG_MIRROR}/SOGo/nightly/${SOGO_VERSION}/rhel/${DISTRO_VERSION}/\$basearch   #被注释掉的行
baseurl=file:///soft/yum_down_soft                            #新添加的行,根据前文所知我的rpm包放在/soft/yum_down_soft目录下
EOF
拷贝软件到指定位置
拷贝安装过程中的软件到指定的位置,如果没有相关文件夹请自行创建。
拷贝/soft/misc目录到/soft/iRedMail-1.3.1/pkgs/
[root@test1 soft]# cp  -rp  /soft/misc /soft/iRedMail-1.3.1/pkgs/
[root@test1 soft]# ll /soft/iRedMail-1.3.1/pkgs/misc/     #确认复制成功
total 42972
-rw-r--r-- 1 root root   395656 Oct 20 11:44 iRedAdmin-1.0.tar.bz2
-rw-r--r-- 1 root root   102870 Oct 20 11:44 iRedAPD-4.3.tar.gz
-rw-r--r-- 1 root root  1849829 Oct 20 11:44 libsodium-1.0.18-stable.tar.gz
-rw-r--r-- 1 root root    40622 Oct 20 11:44 mlmmjadmin-3.0.tar.gz
-rwxr-xr-x 1 root root 34464172 Oct 20 11:44 netdata-v1.23.1.gz.run
-rw-r--r-- 1 root root  7031947 Oct 20 11:44 roundcubemail-1.4.7-complete.tar.gz
-rw-r--r-- 1 root root   105522 Oct 20 11:44 webpy-0.51.tar.gz
正式安装iredmail
一切准备就绪那就可以安装了,安装的步骤和官网的一模一样但有几部又有不同。建议打开两个终端,一个用来安装iredmail一个cd到/etc/yum.repos.d目录下准备修改repo文件。
[root@test1 ~]# cd /soft/iRedMail-1.3.1/
[root@test1 iRedMail-1.3.1]# bash iRedMail.sh
然后就是大帕拉的各种提示,此时应该会报错如下:
   5. Configure the failing repository to be skipped, if it is unavailable.
        Note that yum will try to contact the repo. when it runs most commands,
        so will have to try and fail each time (and thus. yum will be be much
        slower). If it is a very temporary problem though, this is often a nice
        compromise:

            yum-config-manager --save --setopt=iRedMail.skip_if_unavailable=true

failure: repodata/repomd.xml from iRedMail: [Errno 256] No more mirrors to try.
https://dl.iredmail.org/yum/rpms/7/repodata/repomd.xml: [Errno 14] curl#6 - "Could not resolve host: dl.iredmail.org; Unknown error"
[ INFO ] Checking configuration file: /soft/iRedMail-1.3.1/config ...[ INFO ] NOT FOUND. Launching installation wizard.
/soft/iRedMail-1.3.1/dialog/config_via_dialog.sh: line 44: dialog: command not found

修改/etc/yum.repos.d/iRedMail.repo为如下内容后再执行安装。
[root@test1 ~]# vim /etc/yum.repos.d/iRedMail.repo
[iRedMail]
name=iRedMail
#baseurl=https://dl.iredmail.org/yum/rpms/$releasever/
baseurl=file:///soft/yum_down_soft
enabled=1
gpgcheck=0
#exclude=postfix*
priority=99
module_hotfixes=1
[root@test1 ~]# cd /soft/iRedMail-1.3.1/
[root@test1 iRedMail-1.3.1]# bash iRedMail.sh
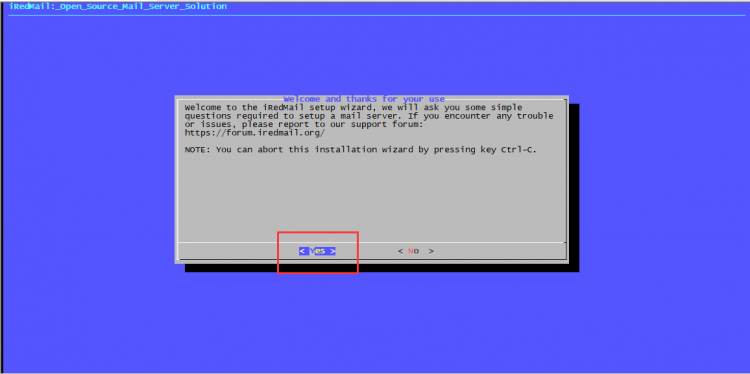
直接鼠标点击<Yes>进入下一步。
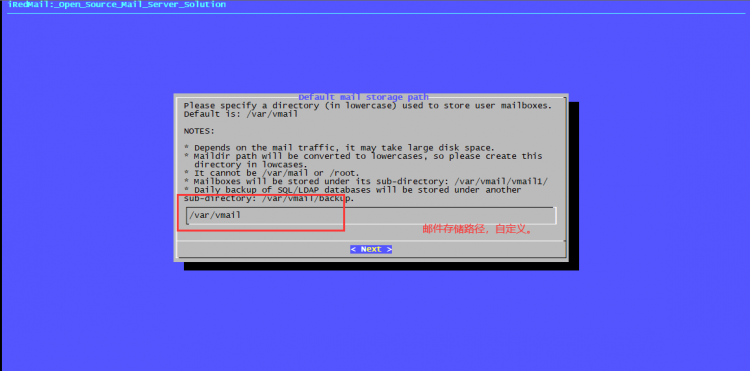
定义你的邮件存储路径,自定义的,如果存储比较有空那么可以挂一张新盘来作为邮件存储。
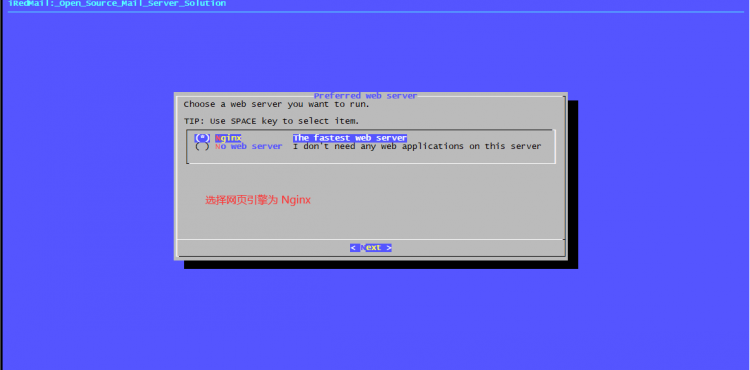
选择安装邮件服务器运行web服务。
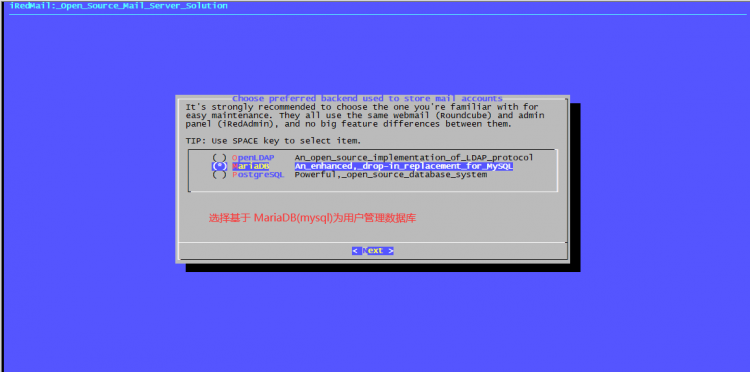
邮件中的用户管理使用mysql数据库。
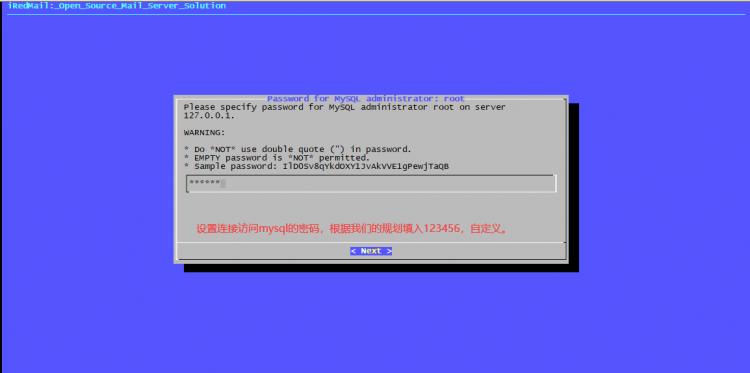
设置mysql的密码,自定义的。
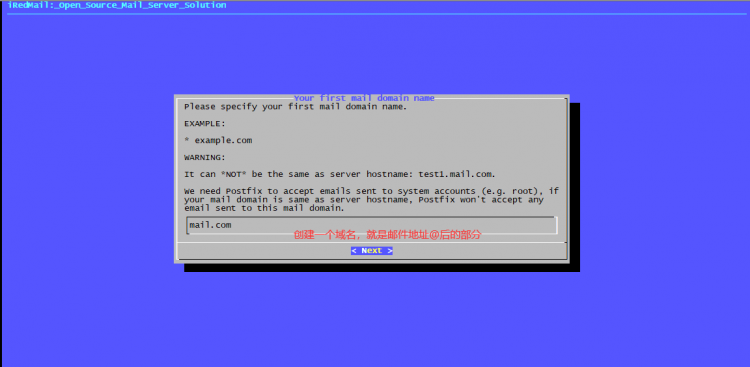
创建一个域名。
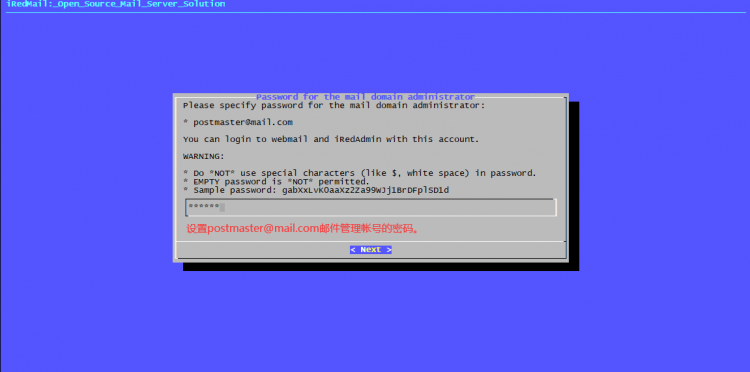
设置邮件管理员的密码。
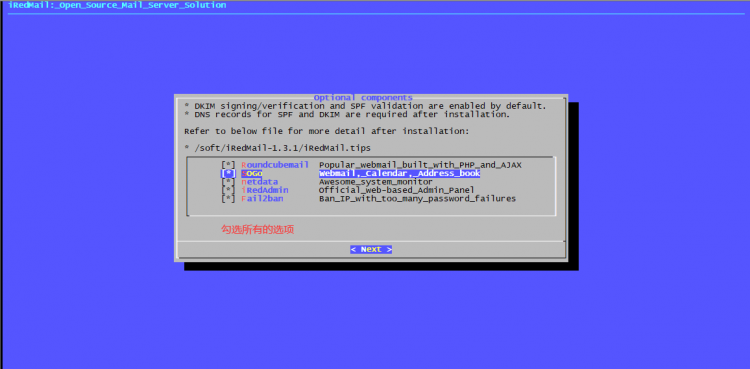
不管全选,具体选项功能看其后的英文注释很清楚。
再次确认你的设置,确认无误后输入Y敲回车继续安装。
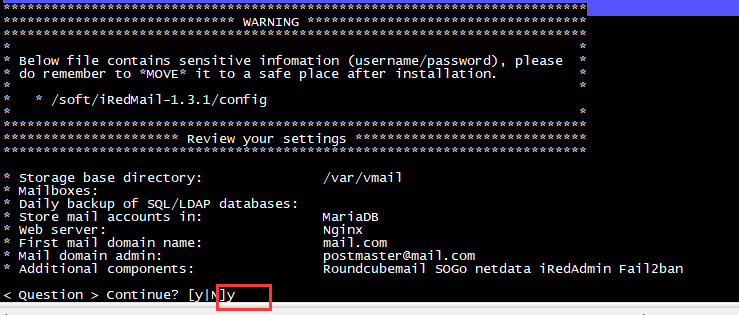
输入了Y后,敲回车,系统会进行软件包的安装。
当安装停在/etc/firewalld/zones/iredmail.xm,with SSHD ports:22. [Y|n] 行时先不要动。新开一个终端进行如下操作。
此处的命令请新开一个终端执行。[root@test1
~]# pip install --no-index --find-links /soft/python/2 -r /soft/python/pip2.txt #安装python2的模块[root@test1
~]# pip3 install --no-index --find-links /soft/python/3 -r /soft/python/pip3.txt #安装python3的模块[root@test1 lib]# cp /soft/cvd/* /var/lib/clamav/
复制包内的cvd病毒库文件置/var/lib/clamav/下并修改所有者。[root@test1 lib]# chown clamupdate:clamupdate /var/lib/clamav/*
[root@test1 lib]# ll /var/lib/clamav/
以上的内存执行好了再回到之前的终端“Y”。
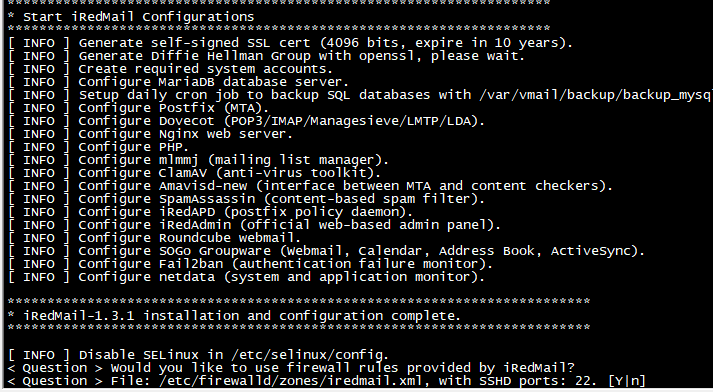
最后你可以类似如下的信息,请从********************************************************************* URLs of installed web applications:处开始复制下来,或拍照,不然以后忘了。
然后根据提示重启服务器完成安装。
.................................
Reading CVD header (daily.cvd): Giving up on https://database.clamav.net...********************************************************************
* URLs of installed web applications:
*
* - Roundcube webmail: https://test1.mail.com/mail/
* - SOGo groupware: https://test1.mail.com/SOGo/
* - netdata (monitor): https://test1.mail.com/netdata/
*
* - Web admin panel (iRedAdmin): https://test1.mail.com/iredadmin/
*
* You can login to above links with below credential:
*
* - Username: postmaster@mail.com
* - Password: 123456
*
*
********************************************************************
* Congratulations, mail server setup completed successfully. Please
* read below fileformore information:
*
* - /soft/iRedMail-1.3.1/iRedMail.tips
*
* And it's sent to your mail account postmaster@mail.com.
*
********************* WARNING **************************************
*
* Please reboot your system to enable all mail services.
*
********************************************************************
测试
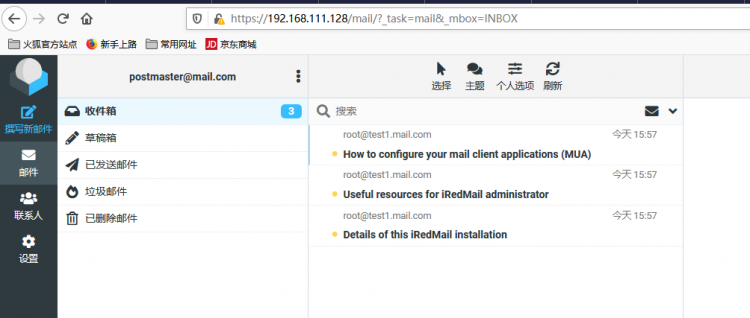
* - Roundcube webmail: https://test1.mail.com/mail/ #邮件收发web界面,所有人可登录
* - SOGo groupware: https://test1.mail.com/SOGo/ #邮件收发web界面,所有人可登录
* - netdata (monitor): https://test1.mail.com/netdata/ #很酷炫的一个资源监控界面,使用域管理员登录。
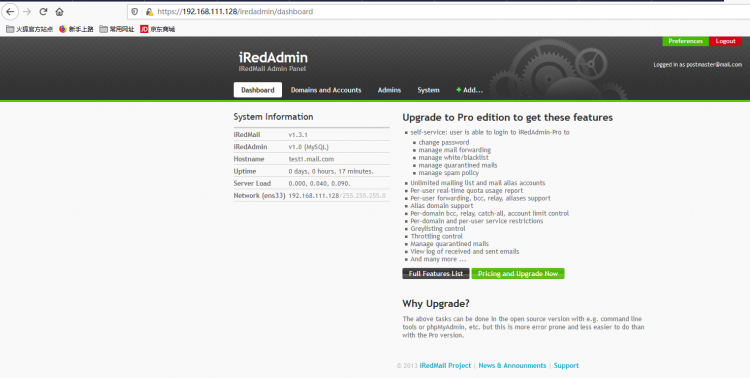
* - Web admin panel (iRedAdmin): https://test1.mail.com/iredadmin/ #邮件管理web界面,使用域管理员登录。用作管理邮件系统,创建域、用户什么的。。。。
请逐一建议检查以上这4个界面是否可用。有问题可以私信我。
总结
在内网环境无法连接互联网时,想要在内网中部署一套需要需要各种外部包和数据的软件及应用不是一件特别轻松的事。
针对这种情况一般有两种方法。
.找到软件的所有依赖包和所需的数据下载打包起来在安装的过程中手动把需要的数据库拷贝到指定的位置。
.搭建套Docker环境,在互联网的环境中使用容器事先软件安装部署,然后打包容器为image,在内网环境中安装docker环境,然后load一下之前打包好的镜像,最后docker run一下就搞定了。
容器真香哈哈。
翻译过来的中文操作文档全是坑。
以上是 iredwuhaol电子邮箱登录已过期私有云搭建记录本-手把手教你到无 的全部内容, 来源链接: utcz.com/a/62235.html

