DRF认证流程及源码分析
![DRF认证流程及源码分析[Python基础]](/wp-content/uploads/new2022/20220602jjjkkk2/2188210830_1.jpg)
认证
前言
用户验证用户是否合法登陆。
部分内容在DRF视图的使用及源码流程分析讲解,建议先看讲解视图的这篇文章。
使用流程
认证使用的方法流程如下:
- 自定义认证类,继承
BaseAuthentication,并且覆写其authenticate方法。不继承BaseAuthentication也可以,但认证类中必须声明authenticate和authenticate_header两个方法。 - 当认证通过后应该返回两个值(一个元组),并且第一个值会传递给
request.user这个属性中,第二个值将会传递给request.auth这个属性中。 - 如果认证失败,则抛出异常
APIException或者AuthenticationFailed,它会自动捕获并返回。 - 当前认证类设置是全局使用还是局部使用。
自定义认证类:
完成1、2、3步,异常统一返回
AuthenticationFailed。
import jwtfrom jwt import exceptions
import rest_framework.exceptions as rest_exception
from rest_framework.authentication import BaseAuthentication
from rest_framework import status
from app1.models import Login
from libs.TokenManager import SALT
class MyAuthentication(BaseAuthentication):
def authenticate(self, request):
token = request.META.get("HTTP_TOKEN") # 在请求头中设置token值,获取的是HTTP_TOKEN
if not token:
raise rest_exception.AuthenticationFailed(code=status.HTTP_401_UNAUTHORIZED, detail="请在请求头中设置token值!")
try: # 解析token
verified_payload = jwt.decode(token, SALT, "HS256")
user_id, username = verified_payload["user_id"], verified_payload["username"]
user = Login.objects.filter(user=user_id, token=token).first()
if user:
return user_id, username
else:
raise rest_exception.AuthenticationFailed(code=status.HTTP_401_UNAUTHORIZED, detail="用户不存在!")
except exceptions.ExpiredSignatureError:
raise rest_exception.AuthenticationFailed(code=status.HTTP_401_UNAUTHORIZED, detail="token已经失效!")
except jwt.DecodeError:
raise rest_exception.AuthenticationFailed(code=status.HTTP_401_UNAUTHORIZED, detail="token认证失败!")
except jwt.InvalidTokenError:
raise rest_exception.AuthenticationFailed(code=status.HTTP_401_UNAUTHORIZED, detail="token非法!")
第4步:
局部认证:
在一个需要认证的CBV里面,添加authentication_classes类属性。如:
class UserAPIView(GenericAPIView, ListModelMixin): authentication_classes = [MyAuthentication]
queryset = User.objects
serializer_class = UserSerializer
全局认证:
在settings.py里面设置:
REST_FRAMEWORK = { "DEFAULT_AUTHENTICATION_CLASSES": ["libs.MyAuth.MyAuthentication"]
}
在源码分析部分,大家将会明白为何这样设置。
源码分析
认证的执行,是发生在dispatch函数的过程中。
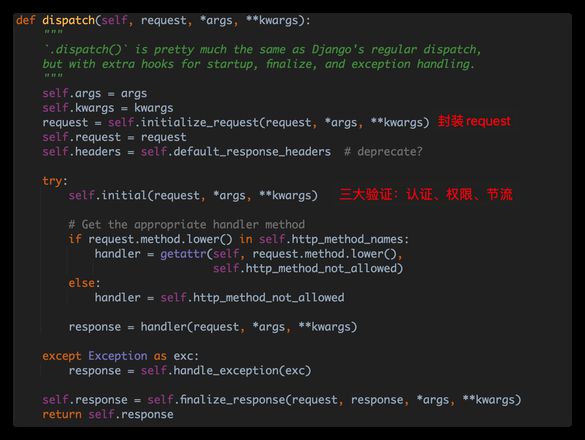
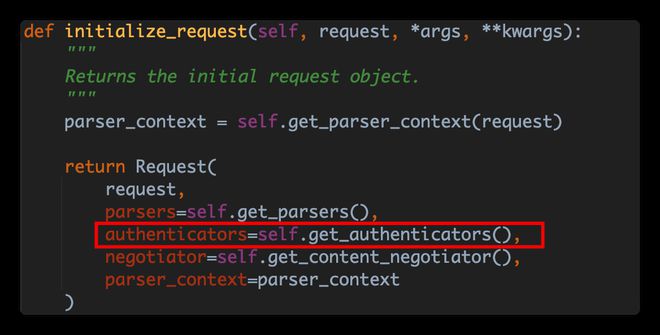
值得注意的是,封装request的时候,我们的指定的认证类也会一起封装在新的request里面。
接下来看看
get_authenticators的执行。
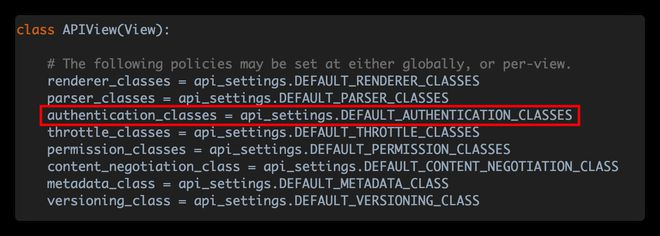
使用列表生成式挨个实例化了每个authentication_classes里面的认证类。而
authentication_classes读取了我们自定义的认证类。注:
如果是局部认证,那么就是我们直接给
authentication_classes赋值如果是全局认证,那么就是读取我们
settings中的DEFAULT_AUTHENTICATION_CLASSES配置项。
之后,在initial函数中,执行了三大验证,其中就有认证。
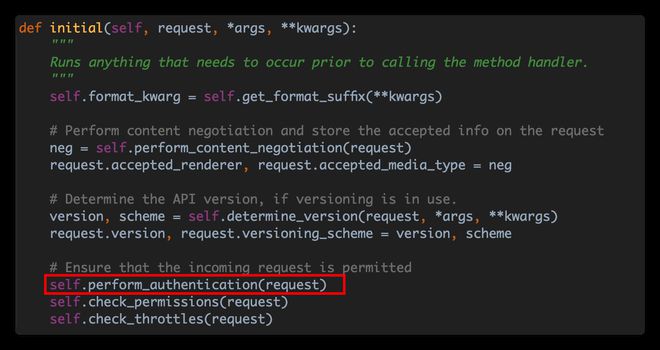
而认证直接执行了request.user,它其实是一个被@property装饰的方法。
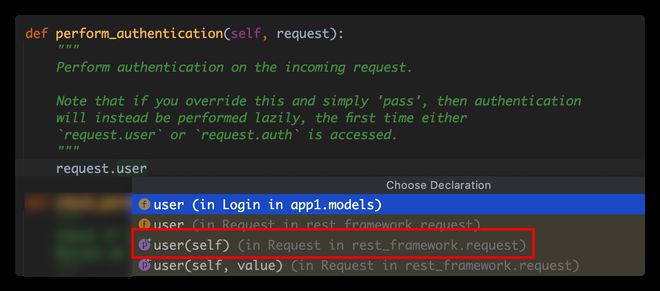
接下来的操作都是在rest_framework.request模块里面。新封装的request就是这下面的Request类的实例。
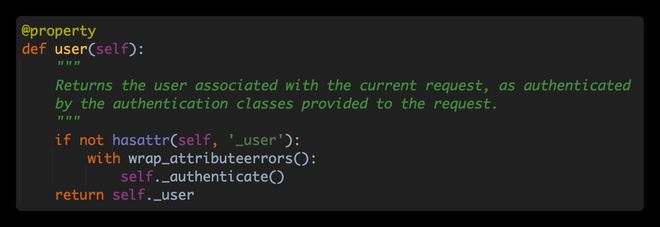
当没有_user属性的时候,说明还未认证,则会执行 _authenticate() 方法
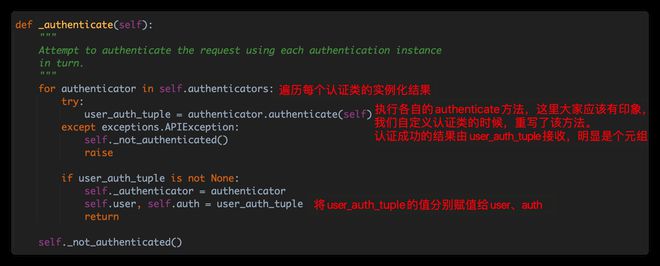
- 认证成功,返回元组。
- 认证失败,执行
_not_authenticated。
补充
最后,一个问题,当配置了全局认证以后,之后每个接口的访问都要执行认证,而有的借口并不需要认证或者认证的类不一样(如登陆接口),该怎么办呢?
其实很好办,全局设置以后并不影响局部设置的生效,因为局部设置的优先级大于全局设置,就比如对于登陆接口来说,我们只需要在登陆接口CBV中设置authentication_classes为空就可以了。如果有特殊需要,也可以指定其他认证类。
class LoginAPIView(APIView): authentication_classes = []
以上是 DRF认证流程及源码分析 的全部内容, 来源链接: utcz.com/z/537809.html

