如何把iconfont导入到react-native expo 中

第一步 下载 Iconfont-阿里巴巴矢量图
登录网址后,把需要的图标添加到库,如下:
然后下载到本地。(注:本人google浏览器出现下载的压缩包为空的现象,使用其他浏览器才下载成功)
有如下内容:
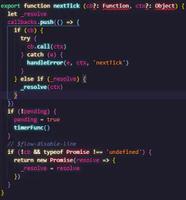
第二步 创建genJson.js 文件,转化css文件为json
创建genJson.js 文件:
const path = require('path');const oldPath = path.resolve(__dirname, 'iconfont.css');
const newPath = path.resolve(__dirname, 'iconfont.json');
var gen = module.exports = function () {
const readline = require('readline');
const fs = require('fs');
const fRead = fs.createReadStream(oldPath);
const fWrite = fs.createWriteStream(newPath, {flags: 'w+', defaultEncoding: 'utf8'});
const objReadLine = readline.createInterface({
input: fRead
});
var ret = {};
objReadLine.on('line', line => {
line = line && line.trim();
if( !line.includes(":before") || !line.includes("content") ) return;
var keyMatch = line.match(/\.(.*?):/);
var valueMatch = line.match(/content:.*?\\(.*?);/);
var key = keyMatch && keyMatch[1];
var value = valueMatch && valueMatch[1];
value = parseInt(value, 16);
key && value && (ret[key] = value);
});
objReadLine.on('close', () => {
console.log('readline close');
fWrite.write(JSON.stringify(ret), 'utf8');
});
};
gen();
将iconfont.css 文件和 genJson.js 放置到同一个文件夹,运行node:
node genJson.js获得iconfont.json文件,内容如下:
第三步 放置 iconfont.ttf 、iconfont.json到项目中
把 inconfont.json 放到项目目录: node_modules/@expo/vector-icons/vendor/react-native-vector-icons/glyphmaps
把iconfont.ttf 放到项目目录:node_modules/@expo/vector-icons/fonts
第四步 创建 iconfont.js 文件,
在项目目录 node_modules/@expo/vector-icons 下创建文件 iconfont.js:
import createIconSet from './createIconSet';import glyphMap from './vendor/react-native-vector-icons/glyphmaps/iconfont.json';
export default createIconSet(glyphMap, "iconfont", require('./fonts/iconfont.ttf'));
找到项目目录下 node_modules/@expo/vector-icons/index.js 文件,加上内容:
最后一步 使用 iconfont
打开demo_fontclass.html ,可以看到下载了这几个图标:
这里使用第一个图标 icon-changjingguanli 为示例:
import React from "react";import { View, Text, StyleSheet } from "react-native";
import { Icon } from 'expo';
//或者这样子导入 import { Iconfont } from '@expo/vector-icons';
// 就可以直接使用 Iconfont 组件
export default class ProfileScreen extends React.Component {
render() {
return (
<View style={{ flex: 1, justifyContent: 'center', alignItems: 'center' }}>
<Text>Details!</Text>
<Icon.Iconfont
name="icon-changjingguanli"
size={26}
style={{ marginBottom: -3 }}
color="red"
/>
</View>
);
}
}
效果如下:
使用expo的字体
仔细观察expo的文件目录,可以发现 expo已经按照了一些字体:
比如要使用 FontAwesome 的字体,使用方法如下:
import React from "react";import { View, Text, StyleSheet } from "react-native";
import FontAwesome from "@expo/vector-icons/FontAwesome";
export default class ProfileScreen extends React.Component {
render() {
return (
<View style={{ flex: 1, justifyContent: 'center', alignItems: 'center' }}>
<Text>Details!</Text>
<FontAwesome
name="android"
size={26}
style={{ marginBottom: -3 }}
color="red"
/>
</View>
);
}
}
以上是 如何把iconfont导入到react-native expo 中 的全部内容, 来源链接: utcz.com/z/383986.html