react native 学习之模仿”探探“实现豆瓣电影app部分功能

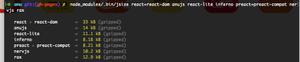
一、 首先配置环境 当然是node 下用npm
npm install -g react-native-clireact-native init react1cd react1
react-native run-android
新开一个cmd 启动项目
react-native start
在电脑上启动的安卓虚拟机 不能摇一摇,所以还需要在 cmd 里输入
adb shell input keyevent 82或者
adb -s emulator-5554 shell input keyevent 82
在笔记本下启动的虚拟机会比较卡可以设置如下,会稍微好点
二、需要实现的界面和功能如下
新建一个AppNavigator.js 文件 用于首页和详情页的跳转
'use strict'import React, { Component } from 'react';
import { StyleSheet, Navigator } from 'react-native';
import ViewContainer from '../views/indexView';
import DetailContainer from '../views/Detail';
class AppNavigator extends Component {
_renderScene(route, navigator) {
let globalNavigatorProps = { navigator };
switch(route.ident){
case 'indexView':
return(
<ViewContainer {...globalNavigatorProps} />
)
case 'detail':
return(
<DetailContainer {...globalNavigatorProps} />
)
default:
return(
<ViewContainer {...globalNavigatorProps} />
)
}
}
render() {
return (
<Navigator initialRoute={this.props.initialRoute}
ref="AppNavigator"
renderScene={this._renderScene}/>
);
}
}
module.exports = AppNavigator;
'use strict'import React, { Component } from 'react';
import { AppRegistry, StatusBar } from 'react-native';
import AppNavigator from './app/common/AppNavigator';
class react1 extends Component {
render() {
this._setStatusBar();
return (
<AppNavigator
initialRoute={{ident: 'indexView'}}/>
);
}
//状态栏的颜色
_setStatusBar() {
StatusBar.setBackgroundColor('#af3329', true);
}
}
AppRegistry.registerComponent('react1', () => react1);
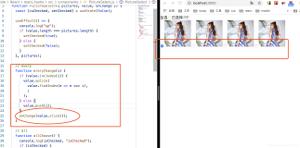
首页中的 卡片布局如下
'use strict'import React, { Component } from 'react';
import { StyleSheet, Text, View, AsyncStorage, Image } from 'react-native';
import util from '../common/util';
class Card extends Component {
constructor(props) {
super(props);
}
render() {
let subject, posterImage, image; // 大图
this.props.subject ? subject = this.props.subject : subject = this.props;
posterImage = subject.images.large;
if(posterImage != '' && posterImage != null) {
image = <Image resizeMode="stretch" style={styles.posterImage}
source={{uri: posterImage}}/>;
}else{
image = <Text>{this.props.subject.title}</Text>;
}
return (
<View style={[styles.cardBox, this.props.CardPosition ? {
position: 'absolute',
top: this.props.CardTop} : null
]}>
<View style={styles.posterWrap}>
{image}
{this.props.new ? <Text style={styles.newTop}>新上榜</Text> : null }
{this.props.rank ? <Text style={styles.topNumber}>Top {this.props.rank}</Text> : null}
</View>
<View style={styles.cinemaMsg}>
<View style={styles.cinemaMsgItem}>
<Text style={styles.title} numberOfLines={1} >{subject.title}
{ this.props.box ? <Text style={styles.cast}> {subject.casts[0].name}...</Text> : null}
</Text>
<Text style={styles.average}>评分:{subject.rating.average}</Text>
</View>
<View style={styles.cinemaMsgItem}>
<Text style={[styles.arrivedMsg, styles.flex2]} numberOfLines={1}>{subject.original_title} ({subject.year})</Text>
<Text style={styles.boxOffice} numberOfLines={1}>{ this.props.box ? '票房:' + this.props.box/1000 : subject.casts[0].name}</Text>
</View>
<View style={styles.cinemaMsgItem}>
<Text style={styles.arrivedMsg}>类型:{subject.genres.join('\/')}</Text>
<Text style={styles.directors}>导演:{subject.directors[0].name}</Text>
</View>
</View>
</View>
);
}
}
const styles = StyleSheet.create({
flex2: {
overflow: 'hidden',
},
cardBox: {
borderRadius: 5,
borderWidth: 2,
marginTop: 2,
width: 310,
marginHorizontal: (util.size.width - 310) / 2 ,
borderColor: '#e1e2da',
backgroundColor: '#ffffff',
},
posterWrap: {
width: 310,
borderColor: '#e1e2da',
},
posterImage: {
height: 340,
width: 310,
},
newTop: {
position: 'absolute',
top: 0,
right: 0,
fontSize: 12,
color: '#ffffff',
backgroundColor: 'rgba(230,69,51,0.65)',
paddingVertical: 1,
paddingHorizontal: 3,
},
topNumber: {
position: 'absolute',
top: 0,
left: 0,
fontSize: 12,
color: '#ffffff',
paddingVertical: 1,
paddingHorizontal: 3,
backgroundColor: 'rgba(255,164,51,0.7)',
},
cinemaMsg: {
width: 300,
padding: 2,
flexDirection: 'column',
},
cinemaMsgItem: {
flex: 1,
justifyContent: 'space-between',
flexDirection: 'row',
},
title: {
flex: 2,
fontSize: 15,
color: '#1d1d1d',
textAlign: 'left',
},
cast: {
fontSize: 12,
},
average: {
flex: 1,
fontSize: 15,
color: '#e64533',
textAlign: 'right',
},
arrivedMsg: {
fontSize: 13,
textAlign: 'left',
},
boxOffice: {
flex:1,
fontSize: 12,
color: '#e64533',
textAlign: 'right',
},
directors: {
fontSize: 12,
textAlign: 'right',
color: '#1d1d1d',
},
});
module.exports = Card;
卡片滑动swipe 效果
npm install -g react-native-swipe-cardsimport SwipeCards from 'react-native-swipe-cards';render() {
let data = (this.props.dataCinema ? JSON.parse(this.props.dataCinema) : null);
return (
<View style={styles.box}>
{ data ?
<SwipeCards cards={data} style={styles.swipeCards}
loop={true}
renderCard={(cardData) => <Card {...cardData} />}
handleYup={this.handleYup} renderNope={this.renderNope} renderYup={this.renderYup}
handleNope={this.handleNope}
cardRemoved={this.cardRemoved}/>
: null
}
</View>
);
}
首页抽屉效果
npm install -g react-native-drawer render() { return (
<Drawer
ref={(ref) => this._drawer = ref}
type="static"
content={
<LeftControlPanel closeDrawer={this.closeDrawer}/>
}
styles={{main: {shadowColor: '#000000', shadowOpacity: 0.3, shadowRadius: 15}}}
captureGestures={true}
acceptTap={true}
acceptPan={true}
negotiatePan={false}
useInteractionManager={false}
tweenDuration={100}
panThreshold={0.08}
panOpenMask={0.03}
panCloseMask={0}
disabled={this.state.drawerDisabled}
openDrawerOffset={(viewport) => {
return 80
}}
panOpenMaskY={50}
side="left"
tweenHandler={Drawer.tweenPresets.parallax}
>
<Drawer
type="static"
ref={(ref) => this._drawer2 = ref}
content={
<RightControlPanel closeDrawer={this.closeDrawer2} />
}
captureGestures={true}
acceptTap={true}
acceptPan={true}
negotiatePan={false}
useInteractionManager={false}
tweenDuration={100}
panThreshold={0.08}
panOpenMask={0.03}
panCloseMask={0}
openDrawerOffset={(viewport) => {
return 80
}}
side="right"
tweenHandler={Drawer.tweenPresets.parallax}
>
<Main topItem={this.state.topItem} navigator={this.props.navigator}/>
</Drawer>
</Drawer>
以上所用插件我都有改动 符合demo的需求····
通过这次的demo学习对react 有进一步的认识与体会,
组件的生命周期
componentWillReceiveProps(nextProps){} 接收新的数据
shouldComponentUpdate(nextProps, nextState){ return boo} 必须有返回值, 返回 false componentWillUpdate()不会被调用 render()也再不执行 ,这样根据需要可以禁止页面的更新。
react native事件捕获
onStartShouldSetPanResponderCapture, onMoveShouldSetPanResponderCapture连个方法都有返回值, 返回true 时,事件就不再传递,被当前组件劫持并调用当前组件的onResponderStart或者onResponderRlase等
数据请求利用 facth 比传统ajax 更简洁 当然属于es6 的
fetch(url).then((response) => response.text()) .then((responseText) => {
successCallback(JSON.parse(responseText));
}).catch(function(err){
failCallback(err);
});
this.state['cards'] = JSON.parse(nextProps.dataCinema); this.forceUpdate();
forceUpdate就是重新render。有变量不在state上,缺又想更新state,刷新render;或者state里的某个变量层次太深,更新的时候没有自动触发render。这些时候都可以手动调用forceUpdate自动触发render。
跳转到github
有需要合作的,可以加个好友
一、 首先配置环境 当然是node 下用npm
npm install -g react-native-clireact-native init react1cd react1
react-native run-android
新开一个cmd 启动项目
react-native start
在电脑上启动的安卓虚拟机 不能摇一摇,所以还需要在 cmd 里输入
adb shell input keyevent 82或者
adb -s emulator-5554 shell input keyevent 82
在笔记本下启动的虚拟机会比较卡可以设置如下,会稍微好点
二、需要实现的界面和功能如下
新建一个AppNavigator.js 文件 用于首页和详情页的跳转
'use strict'import React, { Component } from 'react';
import { StyleSheet, Navigator } from 'react-native';
import ViewContainer from '../views/indexView';
import DetailContainer from '../views/Detail';
class AppNavigator extends Component {
_renderScene(route, navigator) {
let globalNavigatorProps = { navigator };
switch(route.ident){
case 'indexView':
return(
<ViewContainer {...globalNavigatorProps} />
)
case 'detail':
return(
<DetailContainer {...globalNavigatorProps} />
)
default:
return(
<ViewContainer {...globalNavigatorProps} />
)
}
}
render() {
return (
<Navigator initialRoute={this.props.initialRoute}
ref="AppNavigator"
renderScene={this._renderScene}/>
);
}
}
module.exports = AppNavigator;
'use strict'import React, { Component } from 'react';
import { AppRegistry, StatusBar } from 'react-native';
import AppNavigator from './app/common/AppNavigator';
class react1 extends Component {
render() {
this._setStatusBar();
return (
<AppNavigator
initialRoute={{ident: 'indexView'}}/>
);
}
//状态栏的颜色
_setStatusBar() {
StatusBar.setBackgroundColor('#af3329', true);
}
}
AppRegistry.registerComponent('react1', () => react1);
首页中的 卡片布局如下
'use strict'import React, { Component } from 'react';
import { StyleSheet, Text, View, AsyncStorage, Image } from 'react-native';
import util from '../common/util';
class Card extends Component {
constructor(props) {
super(props);
}
render() {
let subject, posterImage, image; // 大图
this.props.subject ? subject = this.props.subject : subject = this.props;
posterImage = subject.images.large;
if(posterImage != '' && posterImage != null) {
image = <Image resizeMode="stretch" style={styles.posterImage}
source={{uri: posterImage}}/>;
}else{
image = <Text>{this.props.subject.title}</Text>;
}
return (
<View style={[styles.cardBox, this.props.CardPosition ? {
position: 'absolute',
top: this.props.CardTop} : null
]}>
<View style={styles.posterWrap}>
{image}
{this.props.new ? <Text style={styles.newTop}>新上榜</Text> : null }
{this.props.rank ? <Text style={styles.topNumber}>Top {this.props.rank}</Text> : null}
</View>
<View style={styles.cinemaMsg}>
<View style={styles.cinemaMsgItem}>
<Text style={styles.title} numberOfLines={1} >{subject.title}
{ this.props.box ? <Text style={styles.cast}> {subject.casts[0].name}...</Text> : null}
</Text>
<Text style={styles.average}>评分:{subject.rating.average}</Text>
</View>
<View style={styles.cinemaMsgItem}>
<Text style={[styles.arrivedMsg, styles.flex2]} numberOfLines={1}>{subject.original_title} ({subject.year})</Text>
<Text style={styles.boxOffice} numberOfLines={1}>{ this.props.box ? '票房:' + this.props.box/1000 : subject.casts[0].name}</Text>
</View>
<View style={styles.cinemaMsgItem}>
<Text style={styles.arrivedMsg}>类型:{subject.genres.join('\/')}</Text>
<Text style={styles.directors}>导演:{subject.directors[0].name}</Text>
</View>
</View>
</View>
);
}
}
const styles = StyleSheet.create({
flex2: {
overflow: 'hidden',
},
cardBox: {
borderRadius: 5,
borderWidth: 2,
marginTop: 2,
width: 310,
marginHorizontal: (util.size.width - 310) / 2 ,
borderColor: '#e1e2da',
backgroundColor: '#ffffff',
},
posterWrap: {
width: 310,
borderColor: '#e1e2da',
},
posterImage: {
height: 340,
width: 310,
},
newTop: {
position: 'absolute',
top: 0,
right: 0,
fontSize: 12,
color: '#ffffff',
backgroundColor: 'rgba(230,69,51,0.65)',
paddingVertical: 1,
paddingHorizontal: 3,
},
topNumber: {
position: 'absolute',
top: 0,
left: 0,
fontSize: 12,
color: '#ffffff',
paddingVertical: 1,
paddingHorizontal: 3,
backgroundColor: 'rgba(255,164,51,0.7)',
},
cinemaMsg: {
width: 300,
padding: 2,
flexDirection: 'column',
},
cinemaMsgItem: {
flex: 1,
justifyContent: 'space-between',
flexDirection: 'row',
},
title: {
flex: 2,
fontSize: 15,
color: '#1d1d1d',
textAlign: 'left',
},
cast: {
fontSize: 12,
},
average: {
flex: 1,
fontSize: 15,
color: '#e64533',
textAlign: 'right',
},
arrivedMsg: {
fontSize: 13,
textAlign: 'left',
},
boxOffice: {
flex:1,
fontSize: 12,
color: '#e64533',
textAlign: 'right',
},
directors: {
fontSize: 12,
textAlign: 'right',
color: '#1d1d1d',
},
});
module.exports = Card;
卡片滑动swipe 效果
npm install -g react-native-swipe-cardsimport SwipeCards from 'react-native-swipe-cards';render() {
let data = (this.props.dataCinema ? JSON.parse(this.props.dataCinema) : null);
return (
<View style={styles.box}>
{ data ?
<SwipeCards cards={data} style={styles.swipeCards}
loop={true}
renderCard={(cardData) => <Card {...cardData} />}
handleYup={this.handleYup} renderNope={this.renderNope} renderYup={this.renderYup}
handleNope={this.handleNope}
cardRemoved={this.cardRemoved}/>
: null
}
</View>
);
}
首页抽屉效果
npm install -g react-native-drawer render() { return (
<Drawer
ref={(ref) => this._drawer = ref}
type="static"
content={
<LeftControlPanel closeDrawer={this.closeDrawer}/>
}
styles={{main: {shadowColor: '#000000', shadowOpacity: 0.3, shadowRadius: 15}}}
captureGestures={true}
acceptTap={true}
acceptPan={true}
negotiatePan={false}
useInteractionManager={false}
tweenDuration={100}
panThreshold={0.08}
panOpenMask={0.03}
panCloseMask={0}
disabled={this.state.drawerDisabled}
openDrawerOffset={(viewport) => {
return 80
}}
panOpenMaskY={50}
side="left"
tweenHandler={Drawer.tweenPresets.parallax}
>
<Drawer
type="static"
ref={(ref) => this._drawer2 = ref}
content={
<RightControlPanel closeDrawer={this.closeDrawer2} />
}
captureGestures={true}
acceptTap={true}
acceptPan={true}
negotiatePan={false}
useInteractionManager={false}
tweenDuration={100}
panThreshold={0.08}
panOpenMask={0.03}
panCloseMask={0}
openDrawerOffset={(viewport) => {
return 80
}}
side="right"
tweenHandler={Drawer.tweenPresets.parallax}
>
<Main topItem={this.state.topItem} navigator={this.props.navigator}/>
</Drawer>
</Drawer>
以上所用插件我都有改动 符合demo的需求····
通过这次的demo学习对react 有进一步的认识与体会,
组件的生命周期
componentWillReceiveProps(nextProps){} 接收新的数据
shouldComponentUpdate(nextProps, nextState){ return boo} 必须有返回值, 返回 false componentWillUpdate()不会被调用 render()也再不执行 ,这样根据需要可以禁止页面的更新。
react native事件捕获
onStartShouldSetPanResponderCapture, onMoveShouldSetPanResponderCapture连个方法都有返回值, 返回true 时,事件就不再传递,被当前组件劫持并调用当前组件的onResponderStart或者onResponderRlase等
数据请求利用 facth 比传统ajax 更简洁 当然属于es6 的
fetch(url).then((response) => response.text()) .then((responseText) => {
successCallback(JSON.parse(responseText));
}).catch(function(err){
failCallback(err);
});
this.state['cards'] = JSON.parse(nextProps.dataCinema); this.forceUpdate();
forceUpdate就是重新render。有变量不在state上,缺又想更新state,刷新render;或者state里的某个变量层次太深,更新的时候没有自动触发render。这些时候都可以手动调用forceUpdate自动触发render。
跳转到github
有需要合作的,可以加个好友
以上是 react native 学习之模仿”探探“实现豆瓣电影app部分功能 的全部内容, 来源链接: utcz.com/z/382218.html