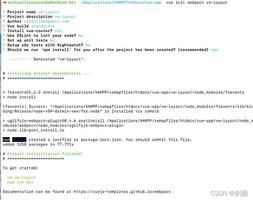
vue-cli3项目中使用Svg组件封装

本文讲述如何在vue-cli3项目中引入svg格式图片并封装成通用vue组件
本文讲述如何在vue-cli3项目中引入svg格式图片并封装成通用vue组件
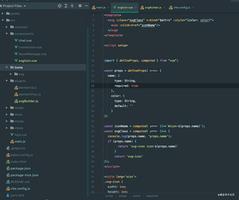
1.首先在src路径下的components文件夹里新建一个IconSvg.vue组件template里面写入
<svg :class="svgClass" aria-hidden="true" v-on="$listeners"> <use :xlink:href="iconName" />
</svg>
props接收两个值iconClass与className;然后通过计算属性根据组件中传入的iconClass以及className去计算iconName以及svgClass
props: { iconClass: {
type: String,
required: true
},
className: {
type: String,
default: ''
}
},
整体组件代码如下
<template> <svg :class="svgClass"
aria-hidden="true"
v-on="$listeners">
<use :xlink:href="iconName" />
</svg>
</template>
<script>
export default {
name: 'IconSvg',
props: {
iconClass: {
type: String,
required: true
},
className: {
type: String,
default: ''
}
},
computed: {
iconName () {
return `#icon-${this.iconClass}`
},
svgClass () {
if (this.className) {
return this.iconClass + ' svg-icon ' + this.className
} else {
return this.iconClass + ' svg-icon'
}
},
}
}
</script>
<style scoped>
.svg-icon {
width: 17px;
height: 17px;
vertical-align: -0.15em;
fill: currentColor;
overflow: hidden;
font-size: 16px;
}
</style>
2.在全局引入该组件并注册该组件(或者可以通过页面单独引用的方式进行组件的注册)
在main.js中
//全局注册组件:import IconSvg from '@components/IconSvg' //引入IconSvg组件到全局
Vue。component('icon-svg',IconSvg) // 注册IconSvg到项目的全局使用
某页面单独引入组件:
import IconSvg from '../components/IconSvg.vue'; //次数需要引入组件的路径(依当时项目而定)
export default {
name: 'xxx',
components: {
IconSvg,
},
...
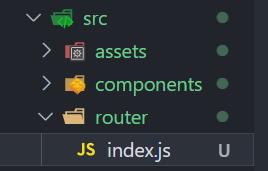
3.在src下assets下新建icon文件夹icon下新建svg文件夹用于存放项目所需要的所有svg格式的文件;在与svg文件夹同级新建index.js文件用于写入将组件注册全局js代码:
index.js:
const req = require.context('./svg', false, /\.svg$/)const requireAll = requireContext => requireContext.keys().map(requireContext)
requireAll(req)
4. loader(svg-sprite-loader组件的使用)
- 在项目中新建vue.config.js文件
2.安装插件svg-sprite-loader并使用
npm i -D svg-sprite-loader3.需要在vue.config.js中配置
chainWebpack (config) { // config.entry('main').add('babel-polyfill')
config.module
.rule('svg')
.exclude.add(resolve('src/assets/icon'))
.end()
config.module
.rule('icons')
.test(/\.svg$/)
.include.add(resolve('src/assets/icon'))
.end()
.use('svg-sprite-loader')
.loader('svg-sprite-loader')
.options({
symbolId: 'icon-[name]'
})
.end()
},
5.组件的使用方法:
将要使用的svg格式的图片编辑好名字放入svg文件夹下,然后在想要引入组件中使用该组件即可:
...<IconSvg :iconClass="icon"
class="hover-fill"
:style="{fontSize:'20px'}"
v-if="link.icon"></IconSvg>{{iconName}}
...
export default {
name: 'xxx',
components: {
IconSvg,
},
...
以上是 vue-cli3项目中使用Svg组件封装 的全部内容, 来源链接: utcz.com/z/380387.html