VUE keep-alive与非keep-alive 手动刷新页面

由于需求需要有时候需要刷新vue的某个页面,即手动再触发vue组件的钩子方法(created,mounted等),但是会有问题
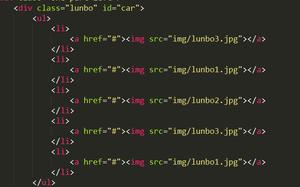
1.vue是根据组件名来加载页面的,如下
组件没改变,人工再调用 this.$router.push(),也不会触发刷新。
2.this.$router.go(0)可行,但是页面会变白,而且不支持动态路由,即原本在某个入口添加进来的路由由于并没有再次执行该添加路由的方法,会导致原本已添加进来的动态路由丢失。
于是在网上百度了,如何手动刷新,这里有一个方法
参考地址
https://blog.csdn.net/yufengaotian/article/details/81238792
分三步
1,在app.vue组件修改
默认是true
思路是,当用户点击刷新按钮先设置isRouterAlive为false,然后在nextTrick再把它修改为true
用到了 provide 和 inject
<template> <div id="appRoot">
<v-app id="inspire" class="app">
<keep-alive :include="cachedViews">
<!-- 手动刷新设置 -->
<router-view v-if="isRouterAlive" />
</keep-alive>
<!-- <router-view></router-view> -->
</v-app>
</div>
</template>
<script>
import {
mapState
} from 'vuex'
export default {
mounted() {
},
computed: {
cachedViews() {
return this.$store.state.tagsView.cachedViews
},
},
provide() {
return {
reload: this.reload
}
},
data: () => ({
isRouterAlive: true
}),
created() {
AppEvents.forEach(item => {
this.$on(item.name, item.callback);
});
window.getApp = this;
},
methods: {
reload() {
var curView=this.$route
this.$store.commit("tagsView/DEL_CACHED_VIEW", curView)
this.isRouterAlive = false
this.$nextTick(function () {
this.isRouterAlive = true
this.$store.commit("tagsView/ADD_CACHED_VIEW", curView)
})
}
}
}
</script>
<style lang="stylus" scoped>
.setting-fab
top:50% !important;
right:0;
border-radius:0
.page-wrapper
min-height:calc(100vh - 64px - 50px - 81px);
</style>
然后在需要调用刷新的组件的按钮就可以通过添加
inject: ['reload'],使用 this.reload() 即可触发
但是只是这样设置 使用了keep-alive的页面还是不能触发刷新
再找,网上找到了个例子
说 keep-alive 标签有个 exclude(排除)属性数组,数组里面元素是组件页面的名字,如果exclude数组默认为null即都不排除都使用keep-alive,当在触发刷新时,先把当前页面组件的名字加进去,即排除该组件,等到nextTrick再排除掉,
参考地址
https://forum.vuejs.org/t/keep-alive/23146/3
主要在
https://jsfiddle.net/vs9tzgbv/
代码如下
html
<div id="app"> <h1>The Parent</h1>
<p>
<button @click="toggleChild">Toggle Child</button>
<button @click="refreshChild">Refresh Child</button>
</p>
<keep-alive :exclude="exclude">
<Child v-if="showChild" @create="log.push('Child create')"/>
</keep-alive>
<hr>
<pre v-text="log.join('\n')"></pre>
</div>
js
new Vue({ el: '#app',
components: {
Child: {
name: 'Child',
template: `
<div>
<h2>The Child</h2>
<p>{{counter}} <button @click="counter++">+1</button></p>
</div>
`,
data() {
return {
counter: 0,
}
},
created() {
this.$emit('create')
},
},
},
data: {
showChild: true,
exclude: null,
log: [],
},
methods: {
toggleChild() {
this.showChild = !this.showChild
},
refreshChild() {
//注意这里 先不显示
this.showChild = !this.showChild
this.exclude = 'Child'
//增加排除
this.$nextTick(_ => {
//删除排除
//显示组件
this.exclude = null
this.showChild = !this.showChild
})
},
},
})
这样keep-alive也能手动刷新页面了
我这里用了include
同样的道理 首先先排除组件,并且把v-if设为false 然后 this.$nextTick 再把组件增加到keep-alive数组中 再把v-if 设置为true显示组件
完工 有什么不足欢迎指正
以上是 VUE keep-alive与非keep-alive 手动刷新页面 的全部内容, 来源链接: utcz.com/z/377258.html


