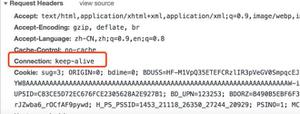
从源码角度来回答keep-alive组件的缓存原理
今天开门见山地聊一下面试中被问到的一个问题:keep-alive组件的缓存原理。
官方API介绍和用法
- <keep-alive> 包裹动态组件时,会缓存不活动的组件实例,而不是销毁它们。
- 和 <transition> 相似,<keep-alive> 是一个抽象组件:它自身不会渲染一个 DOM 元素,也不会出现在组件的父组件链中。
- 当组件在 <keep-alive> 内被切换,它的 activated 和 deactivated 这两个生命周期钩子函数将会被对应执行。
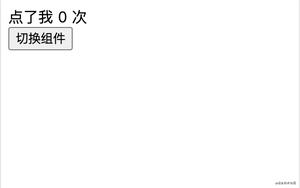
官网的例子是 tab 切换保存了用户的操作,实际中还可能遇到从列表页跳转去了详情页,再跳转回列表页需要保存用户进行过的筛选操作,这就需要用到 <keep-alive>,这样也能避免重新渲染,提高页面性能。
用法及props的讲解
// keep-alive组件搭配动态组件的用法,还要其他的用法参见官网
<keep-alive
include="['componentNameA', 'componentNameB']"
exclude="'componentNameC'"
:max="10">
<component :is="view"></component>
</keep-alive>
- include - 字符串或正则表达式或数组,name匹配上的组件会被缓存
- exclude - 字符串或正则表达式或数组,name匹配上的组件都不会被缓存
- max - 字符串或数字,缓存组件实例的最大数,最久没有被访问的实例会被销毁掉
注意:
- <keep-alive> 只渲染其直系的一个组件,因此若在 <keep-alive> 中用 v-for,则其不会工作,若多条件判断有多个符合条件也同理不工作。
- include 和 exclude 匹配时,首先检查组件的 name 选项,若 name 选项不可用,则匹配它的局部注册名称 (即父组件 components 选项的键值)。匿名组件不能被匹配。
- <keep-alive> 不会在函数式组件中正常工作,因为它们没有缓存实例。
源码解读
先贴一张源码图

总共125行,收起来一看其实东西也比较少。前面是引入一些需要用到的方法,然后定义了一些 keep-alive 组件自己会用到的一些方法,最后就是向外暴露一个 name 为 keep-alive 的组件选项,这些选项除了 abstract 外,其他的我们都比较熟悉了,其中, render 函数就是缓存原理最重要的部分,也能看出 keep-alive 组件是一个函数式组件。
// isRegExp函数判断是不是正则表达式,remove移除数组中的某一个成员
// getFirstComponentChild获取VNode数组的第一个有效组件
import { isRegExp, remove } from 'shared/util'
import { getFirstComponentChild } from 'core/vdom/helpers/index'
type VNodeCache = { [key: string]: ?VNode }; // 缓存组件VNode的缓存类型
// 通过组件的name或组件tag来获取组件名(上面注意的第二点)
function getComponentName (opts: ?VNodeComponentOptions): ?string {
return opts && (opts.Ctor.options.name || opts.tag)
}
// 判断include或exclude跟组件的name是否匹配成功
function matches (pattern: string | RegExp | Array<string>, name: string): boolean {
if (Array.isArray(pattern)) {
return pattern.indexOf(name) > -1 // include或exclude是数组的情况
} else if (typeof pattern === 'string') {
return pattern.split(',').indexOf(name) > -1 // include或exclude是字符串的情况
} else if (isRegExp(pattern)) {
return pattern.test(name) // include或exclude是正则表达式的情况
}
return false // 都没匹配上(上面注意的二三点)
}
// 销毁缓存
function pruneCache (keepAliveInstance: any, filter: Function) {
const { cache, keys, _vnode } = keepAliveInstance // keep-alive组件实例
for (const key in cache) {
const cachedNode: ?VNode = cache[key] // 已经被缓存的组件
if (cachedNode) {
const name: ?string = getComponentName(cachedNode.componentOptions)
// 若name存在且不能跟include或exclude匹配上就销毁这个已经缓存的组件
if (name && !filter(name)) {
pruneCacheEntry(cache, key, keys, _vnode)
}
}
}
}
// 销毁缓存的入口
function pruneCacheEntry (
cache: VNodeCache,
key: string,
keys: Array<string>,
current?: VNode
) {
const cached = cache[key] // 被缓存过的组件
// “已经被缓存的组件是否继续被缓存” 有变动时
// 若组件被缓存命中过且当前组件不存在或缓存命中组件的tag和当前组件的tag不相等
if (cached && (!current || cached.tag !== current.tag)) {
// 说明现在这个组件不需要被继续缓存,销毁这个组件实例
cached.componentInstance.$destroy()
}
cache[key] = null // 把缓存中这个组件置为null
remove(keys, key) // 把这个组件的key移除出keys数组
}
// 示例类型
const patternTypes: Array<Function> = [String, RegExp, Array]
// 向外暴露keep-alive组件的一些选项
export default {
name: 'keep-alive', // 组件名
abstract: true, // keep-alive是抽象组件
// 用keep-alive组件时传入的三个props
props: {
include: patternTypes,
exclude: patternTypes,
max: [String, Number]
},
created () {
this.cache = Object.create(null) // 存储需要缓存的组件
this.keys = [] // 存储每个需要缓存的组件的key,即对应this.cache对象中的键值
},
// 销毁keep-alive组件的时候,对缓存中的每个组件执行销毁
destroyed () {
for (const key in this.cache) {
pruneCacheEntry(this.cache, key, this.keys)
}
},
// keep-alive组件挂载时监听include和exclude的变化,条件满足时就销毁已缓存的组件
mounted () {
this.$watch('include', val => {
pruneCache(this, name => matches(val, name))
})
this.$watch('exclude', val => {
pruneCache(this, name => !matches(val, name))
})
},
// 重点来了
render () {
const slot = this.$slots.default // keep-alive组件的默认插槽
const vnode: VNode = getFirstComponentChild(slot) // 获取默认插槽的第一个有效组件
// 如果vnode存在就取vnode的选项
const componentOptions: ?VNodeComponentOptions = vnode && vnode.componentOptions
if (componentOptions) {
//获取第一个有效组件的name
const name: ?string = getComponentName(componentOptions)
const { include, exclude } = this // props传递来的include和exclude
if (
// 若include存在且name不存在或name未匹配上
(include && (!name || !matches(include, name))) ||
// 若exclude存在且name存在或name匹配上
(exclude && name && matches(exclude, name))
) {
return vnode // 说明不用缓存,直接返回这个组件进行渲染
}
// 匹配上就需要进行缓存操作
const { cache, keys } = this // keep-alive组件的缓存组件和缓存组件对应的key
// 获取第一个有效组件的key
const key: ?string = vnode.key == null
// 同一个构造函数可以注册为不同的本地组件
// 所以仅靠cid是不够的,进行拼接一下
? componentOptions.Ctor.cid + (componentOptions.tag ? `::${componentOptions.tag}` : '')
: vnode.key
// 如果这个组件命中缓存
if (cache[key]) {
// 这个组件的实例用缓存中的组件实例替换
vnode.componentInstance = cache[key].componentInstance
// 更新当前key在keys中的位置
remove(keys, key) // 把当前key从keys中移除
keys.push(key) // 再放到keys的末尾
} else {
// 如果没有命中缓存,就把这个组件加入缓存中
cache[key] = vnode
keys.push(key) // 把这个组件的key放到keys的末尾
// 如果缓存中的组件个数超过传入的max,销毁缓存中的LRU组件
if (this.max && keys.length > parseInt(this.max)) {
pruneCacheEntry(cache, keys[0], keys, this._vnode)
}
}
vnode.data.keepAlive = true // 设置这个组件的keepAlive属性为true
}
// 若第一个有效的组件存在,但其componentOptions不存在,就返回这个组件进行渲染
// 或若也不存在有效的第一个组件,但keep-alive组件的默认插槽存在,就返回默认插槽的第一个组件进行渲染
return vnode || (slot && slot[0])
}
}
补充:
上面关于删除第一个旧缓存组件和更新缓存组件 key 的顺序,其实是用到了LRU缓存淘汰策略:
LRU全称Least Recently Used,最近最少使用的意思,是一种内存管理算法。
这种算法基于一种假设:长期不用的数据,在未来被用到的几率也很小,因此,当数据所占内存达到一定阈值,可以移除掉最近最少使用的。
总结
简单总结为:
keep-alive 组件在渲染的时候,会根据传入的 include 和 exclude 来匹配 keep-alive 包裹的命名组件,未匹配上就直接返回这个命名组件进行渲染,若匹配上就进行缓存操作:若缓存中已有这个组件,就替换其实例,并更新这个组件的 key 在 keys 中的位置;若缓存中没有这个组件,就把这个组件放入 keep-alive 组件的缓存 cache 中,并把这个组件的 key 放入 keys 中,由于在 mounted 的时候有对 include 和 exclude 进行监听,因此,后续这两个属性值发生变化时,会再次判断是否满足条件而进行组件销毁。
到此这篇关于从源码角度来回答keep-alive组件的缓存原理的文章就介绍到这了,更多相关keep-alive组件缓存内容请搜索以前的文章或继续浏览下面的相关文章希望大家以后多多支持!
以上是 从源码角度来回答keep-alive组件的缓存原理 的全部内容, 来源链接: utcz.com/p/238842.html